views
Selecting and Positioning a Corsage

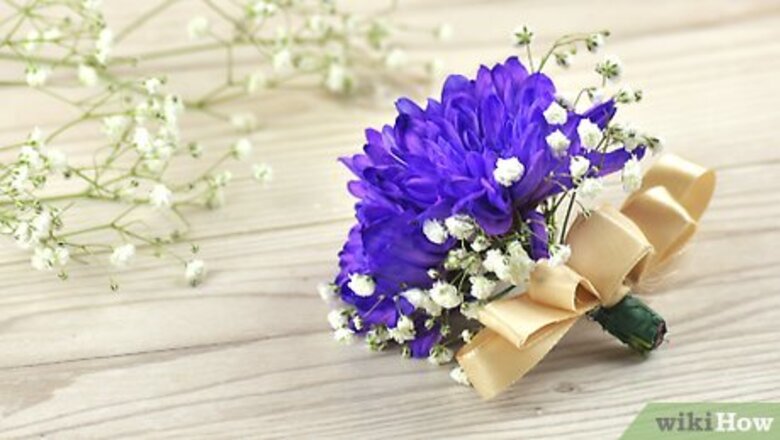
Select the corsage. Choose the corsage color and type based upon the clothing of the wearer. Some people prefer to coordinate while others want more of a contrast. You can also choose the color and style of the ribbon as well. Think about size too. A good corsage option might be a single white carnation surrounded by some greenery and a red or white thin ribbon. Before you choose a pinned option, you may want to ask the recipient if they have any metal allergies. If so, they may be more comfortable with a wrist-worn corsage.
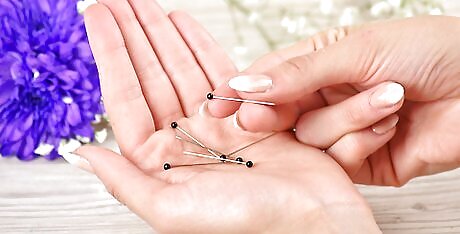
Select custom pins. Some corsages come with standard, plain pins included in the package. However, you can also buy pins with black heads or even pearl ones. Just make sure that you buy a high quality pin so that it will not break under the pressure of holding up the corsage.
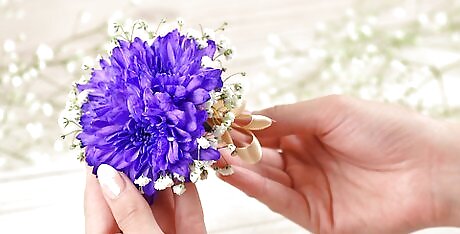
Take the corsage out of the box and inspect it. Carefully open the lid and remove the corsage, gently holding it the entire time. Make sure that all of the greenery looks fresh and that the wrapping around the stem is intact. Wait to do this step until you are ready to proceed with pinning, otherwise you could wilt the flower.

Ask about clothing layers, if needed. If the wearer has multiple layers on you will need to decide how many to go through to keep the corsage in place. Ask the wearer if they plan to remove the outer layers at any point. If not, pin through as many as you need for stability. For example, a woman may be wearing a shawl that she plans to remove prior to the main event. If so, pull the top layer of fabric aside to clear a space for pinning.
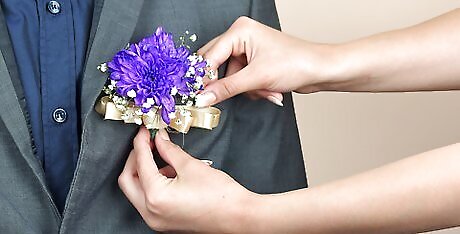
Position the corsage on the left side of the wearer's chest. A corsage is typically placed about 4 inches down from the shoulder on the wearer's left. The bloom of the flower should face outward and the stem should be vertical. If you choose, you can slightly angle the stem to follow the lines of the outfit. Make sure to take into account any neckties or jewelry as you determine final placement.
Attaching the Corsage
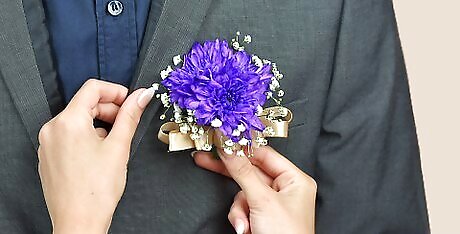
Take a deep breath. Go ahead and calm yourself before pulling the pin out and attaching it. You will want to have steady hands for these final steps. It is important that you make as few holes as possible, so as to not damage the garment.
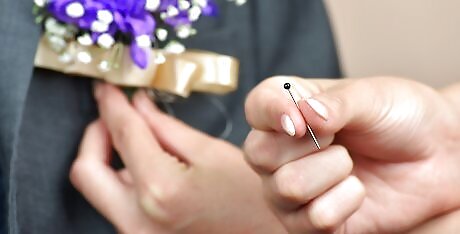
Hold the pin in your hand. Pull the pin out from the package or remove it from the side of the stem. Place it between your fingers or set it down on a smooth surface nearby until you are ready. Be very careful or you could lose the pin.
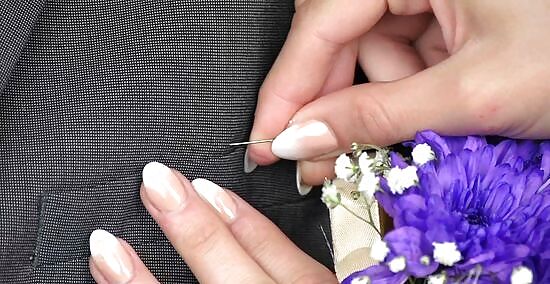
Push the pin into the fabric near the stem. Go to the lower part of one side of the stem and enter the fabric with the pin. You may need to pinch the fabric upwards to make it possible. Don't push the pin all the way in or you will lose control of it and may poke the wearer.
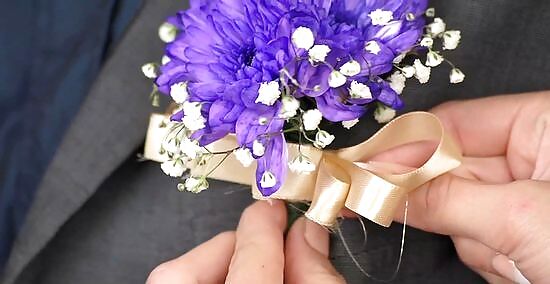
Weave it over the top of the stem. Push the pin out of the fabric and over the stem. The pin should be visible across the stem horizontally. It will hold the stem and flower in place through the tension of the pin. Remember that the pin is not intended to pierces the stems and will hold the corsage more securely. Use two corsage pins to make it even more secure and balanced.
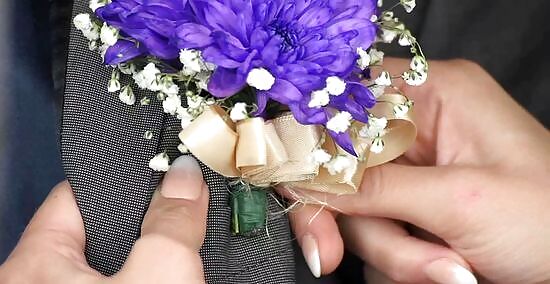
Push back into the fabric on the other side of the stem. Once the pin is over the stem, push it into the fabric it is facing. The two pin entry points on either side of the stem should mirror one another. Then, continue to push until the tip of the pin is almost visible on this new side.
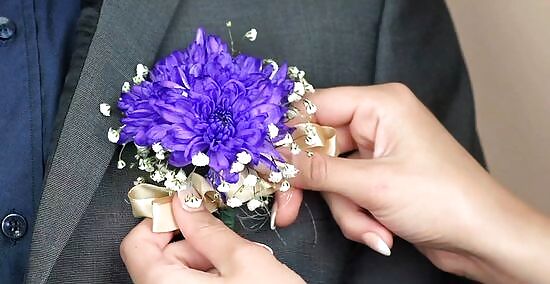
Check the positioning of the pin. Wiggle the corsage a little bit to make sure that it is tight enough to hold over the course of the event. Ask the wearer if they can feel the pin at all. If the pin sticks out too far to one side, simply slowly push it a bit in or out of the fabric to adjust.
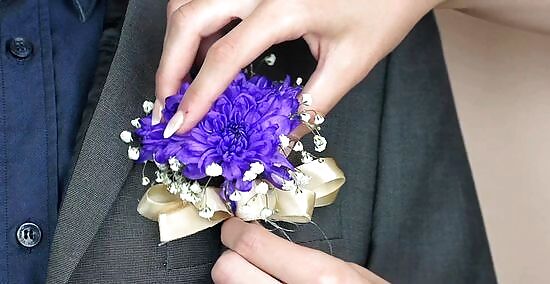
Check the positioning of the corsage. The corsage should be straight or at a desired angle. The hold should be firm with the flowers moving very little even as the person walks. Take a look at the corsage from both a front and side view to make sure you are happy with the final result. If not, you can always take out the pin and try again.
Add another pin, if necessary. Some larger corsages actually require two pins. You can follow the same steps as outlined above. However, you should aim to have the pins make an “X” over the stem of the flower or place the pins horizontally. Essentially, position one pin and then thread another directly over it in the stem portion. EXPERT TIP Lana Starr, AIFD Lana Starr, AIFD Certified Floral Designer & Owner, Dream Flowers Lana Starr is a Certified Floral Designer and the Owner of Dream Flowers, a floral design studio based in the San Francisco Bay Area. Dream Flowers specializes in events, weddings, celebrations, and corporate events. Lana has over 14 years of experience in the floral industry and her work has been featured in floral books and magazines such as International Floral Art, Fusion Flowers, Florist Review, and Nacre. Lana is a member of the American Institute of Floral Designers (AIFD) since 2016 and is a California Certified Floral Designer (CCF) since 2012. Lana Starr, AIFD Lana Starr, AIFD Certified Floral Designer & Owner, Dream Flowers Our Expert Agrees: When you're pinning a corsage onto someone's shoulder, slide one pin into the fabric, then through the stem of the corsage, then again through the fabric. When you're finished, the pointed end of the pin should be on the outside of the fabric, not inside toward the body. Repeat that with a second pin to secure the corsage.
Weighing Alternatives to a Pinned Corsage
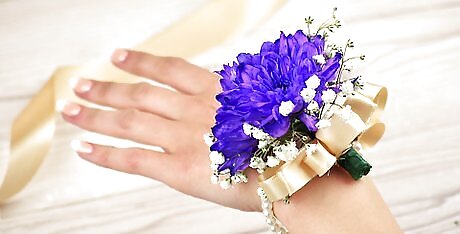
Consider a wrist corsage. This is a corsage that does not need to be pinned and that will instead hold to the wearer via an expandable strap or ribbon on the back. You normally wear a wrist corsage on your left arm. Some people prefer these corsages as they are less damaging to clothing. However, they can also be a bit bulky and restrict the motion of your arm. You can also use the ribbon strap on the back of the corsage to attach it to a purse or bag. EXPERT TIP Megan Papageorge Megan Papageorge Certified Wedding Planner Megan Papageorge is a Certified Wedding Planner and Owner of Sweet Peach Planning, a wedding planning and management company based in Long Beach, California. She has completed over 200 weddings in settings such as gondolas, church halls, the side of cliffs, and vintage warehouses. Megan also co-hosts Peach & Honey, a wedding planning podcast. She is certified to plan and run weddings by the Bridal Society Educational Course. Her work has been featured in A Practical Wedding, Junebug Weddings, Ceremony Magazine, and The Bridal Society. Megan Papageorge Megan Papageorge Certified Wedding Planner Our Expert Agrees: If the person wearing the corsage is wearing a dress with spaghetti straps or a sheer top, they may not have enough support for a pinned corsage. In that case, it's a good idea to choose a wrist corsage.
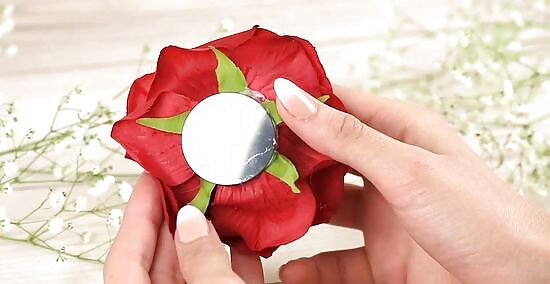
Choose a magnetized corsage. You can ask your florist to make your corsage with magnetic links, as opposed to pins. This means that a two-piece magnet set will hold the corsage up. One piece is attached to the corsage and another goes under the piece of clothing to make the connection. Magnetized corsages don't work as well with heavy fabric as they do best on an even, thin surface. There is also the possibility that the magnet will disengage with heavy movement.

Look into corsage alternatives. You might consider a small bouquet, a flower pendant, or a flower bud in the hair as another option. You can discuss these various creations with your florist or you can experiment and try to make something on your own.


Comments
0 comment