views
Making Beaded Earrings
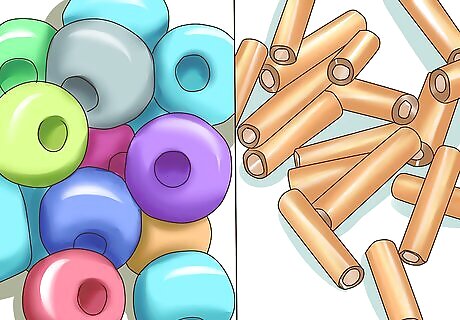
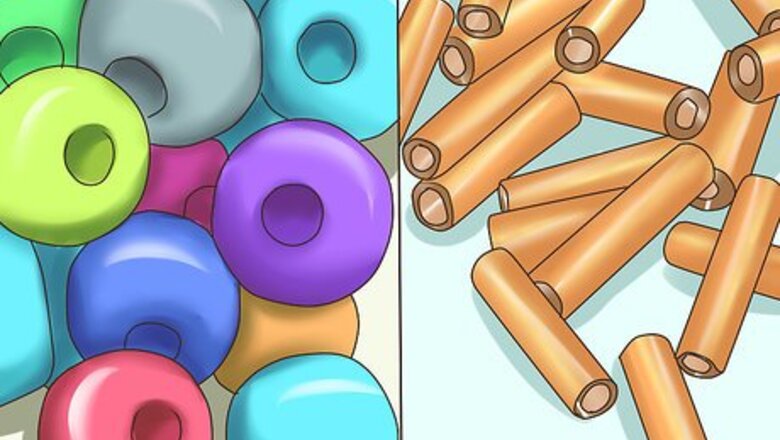
Use seed beads and bugle beads for dangly earrings. Create earrings with small beads in a style often associated with Native American art. Play around with your own patterns using different colors of seed beads and bugle beads strung together with beading thread. Look for seed beads in the common 11/0 size and a long size of bugle bead, which can both be found in the beading section of any craft store. You can use other shapes and sizes of beads, but these are most common for this style. Use a beading needle and nylon beading thread for the easiest construction of dangling beaded earrings. You will also need a 4mm jump ring and an earring hook to complete each earring. These are also found in most craft stores.
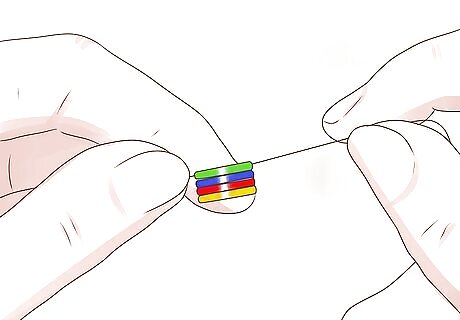
Make a foundation row with bugle beads. String together a row of bugle beads to make the top foundation of your earring where other strands will dangle from. Use a ladder stitch to make the bugle beads sit side-to-side rather than end-to-end. To do a ladder stitch with the bugle beads, first pick up two beads with your needle and pull them down almost to the end of your thread, leaving about a 6 inch tail. Then thread your needle through just the first bead, in the same direction you did to begin, and pull the thread tight until the two beads naturally sit parallel to one another. Continue the ladder stitch for as many beads as you want your foundation row to have. After the stitch with the first two beads, pick up a new bugle bead on your thread and put your needle through the last bead in the same direction that you used to thread it on, and pull it tight. Continue this stitch for each bead in the row. The number of bugle beads you use in your foundation row will determine how wide your earring is and how many dangling strands you will have. If you plan on a symmetrical pattern of chevrons, diamonds, etc., note that you will need to use an odd number of beads in your row.
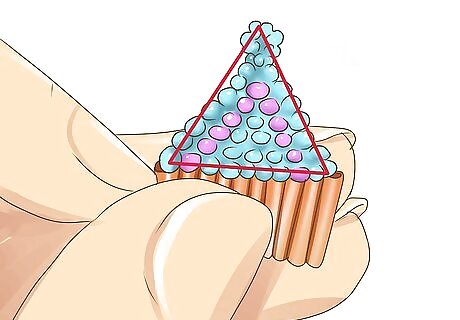
Make a tapered tip above the foundation row. Add seed beads above your foundation row in a triangular shape that with taper up to your earring hook. Use a brick stitch to naturally decrease each beaded row by one until you reach the top. To do a brick stitch, pick up two seed beads on your thread. Note where you can see the thread go in and out of each bugle bead in your foundation rows—each of these spots is called a thread bridge. Skip the first thread bridge and thread your needle with the two seed beads through the second thread bridge and pull tight. Then bring your needle back up through the last seed bead. To even out the first two beads, go back down through the first bead and back up through the second bead. Then continue the rest of the row by picking up one seed bead, threading your needle through the next thread bridge in the row, and bringing the needle back up through the bead. Continue till the end of the row, then start a new one using the thread bridges on the row you just created. Keep creating rows until you’ve completed the last one with just one bead.
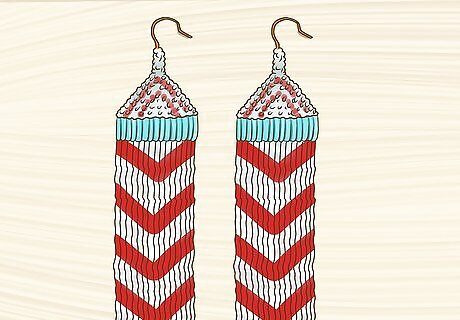
Create a pattern with dangling bead strands. Bring your needle and thread down through all the seed beads on one side of your tapered top section and through the end bugle bead in your foundation row. Use the rest of your thread to create single dangling strands of beads in whatever pattern you like. To create the first strand, string all of the seed beads you want in that strand, in order from top to bottom, onto your thread. Then, skipping the last bead you put on, bring your needle all the way back through each bead till you’re back up at the top. Then thread your needle back through the bugle bead above that strand and back down through the next bugle bead so you can create your second strand. Continue in this way for all of your strands. Make sure that when you pull your thread back up through each strand that you don’t pull too tightly. You want the beads on these strands to be loose enough that they will dangle nicely, but without showing any thread in between.
Creating a Necklace
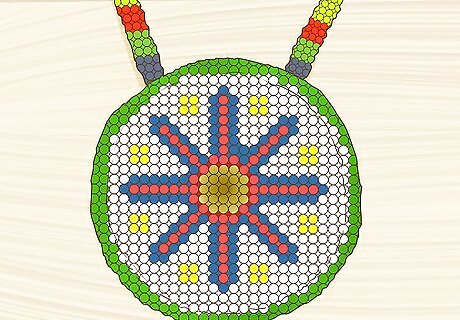
Create a beaded medallion. Make a medallion necklace similar to what might be worn at a Native American powwow by using seed beads and felt. Bead designs into a circular piece of felt, and attach that to a leather or faux leather cord. You can create any design you want on the medallion with different colored seed beads. To sew on beads securely, use nylon beading thread to pick up four beads, stitch through your foundation material, then loop back through the last two beads before picking up four new ones. Use a sharp needle that can go through the felt for your medallion but still thin enough to fit through your beads. You can use larger beads, or a thinner foundation material and attach it to felt later, if you’re having trouble with this.
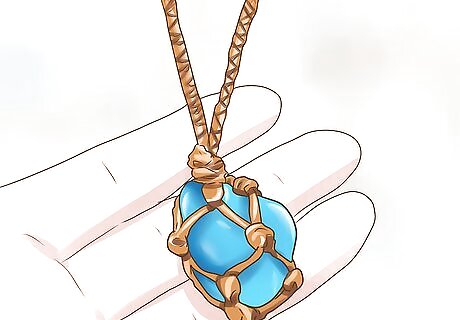
Make a simple stone pendant. Put a stone on display by stringing it on a cord to wear as a necklace. Use turquoise, coral, or other precious or semiprecious stones commonly found in Native American jewelry. Try using a natural material for the cord such as leather or suede, or an imitation version of these. Look for a stone in a jewelry store that has a pre-drilled hole or a jump ring to run a cord through. If you can’t find this, you can try wrapping a stone in thin, flexible wire in order to attach it to a cord for your necklace.
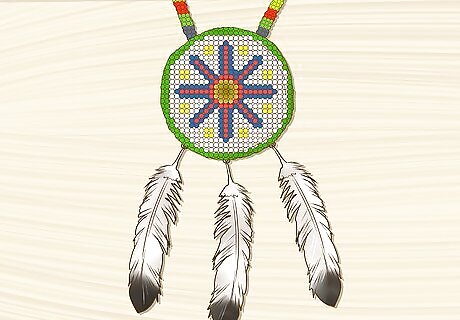
Utilize feathers in a necklace. Attach one or more feathers to the bottom of any pendant or medallion for a natural touch. You can also feature feathers exclusively in your necklace by wrapping the feather quills with cord. Use natural feathers rather than ones that have been artificially dyed. You can also thread beads onto the quill of a feather for decoration and to help attach it to the cord or chain of a necklace. Push a bead onto the quill, then thread a headpin (flexible pin with a flat end) through the bead in the opposite direction. Then bend the headpin around a jump ring or your cord to attach it.
Crafting a Bracelet
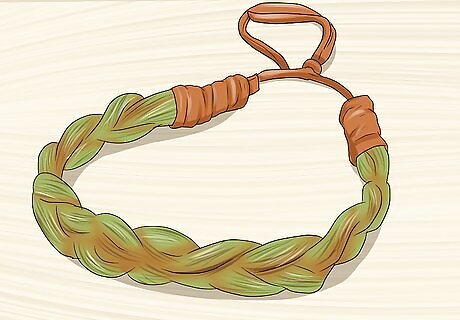
Make a natural leaf or grass bracelet. Create truly natural and native jewelry by using grass or leaves, like the traditional rattlesnake master leaf, to make a bracelet. Twist sturdy material so that it becomes cord-like and can be wrapped or braided into a bracelet. You can find rattlesnake master growing in prairie areas of the Midwestern United States. You can also experiment with other thin leaves or grasses that will hold up when twisted and folded. To use a long grass or leaf like rattlesnake master, fold it in the middle and hold onto the fold with one hand. With your other hand, twist one half of the material clockwise so that it rolls into a cord-like shape, then wrap it counterclockwise around the other half of the material. Do the same with the opposite side, and continue twisting and wrapping with alternating sides until you have a twisted length of bracelet that you can tie off. Push the tied end through the loop you created in the beginning so the bracelet holds together around your wrist.
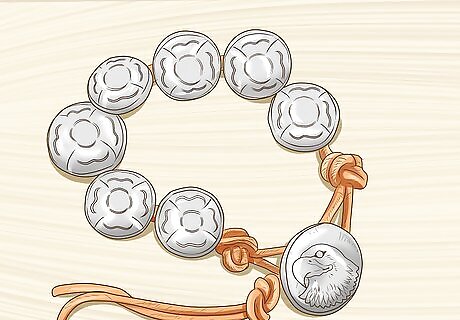
Create a simple silver medallion bracelet with buttons. Use silver buttons to recreate a carved silver cuff or bracelet that you might see in Native American-inspired jewelry. Attach buttons to a cord to wrap around your wrist. Wrap a length of cord around your wrist and add about 6 inches (15 cm) to that length to make sure you have room to tie off and secure your bracelet. Look for silver buttons with patterns of animals, nature, or other Native American patterns and designs. You can also alternate silver buttons with semiprecious stones or other beads to add color and interest.
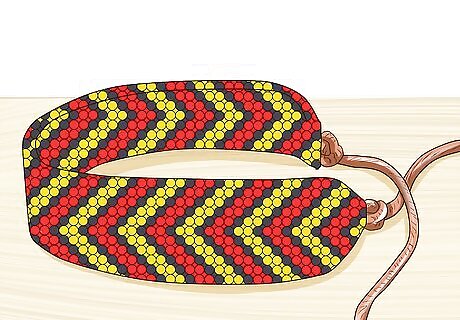
Make a beaded bracelet. Use seed beads and beading thread to create a patterned bracelet with different colors. Try incorporating a leather cord on either side of your beading for a natural touch. If you do use cord, make sure it is the double the circumference of your wrist, plus 12 extra inches. Fold over and tie a knot in a leather or other cord so it makes a loop. Tie a piece of beading thread right under the knot to begin adding seed beads. Use just one bead in the first row, two in the second, and so on until you reach the width you’d like for the length of your bracelet. To secure the rows of beads between the leather cord, wrap your beading thread under one side of the cord, then string on the beads for your row. Wrap the thread over and around the other side of the cord, then thread back through the beads in your row. Finish the bracelet by tapering off the number of beads in each row back to just one bead like you began with. Then tie off the beading thread and the cord with a button that you can push through your loop at the other end to act as a clasp.


Comments
0 comment