views
Using Air Dry Clay
Protect your work surface. Air-dry clay can get messy, it's a good idea to protect the table you will be working on. You can simply spread out some newspaper or a cheap, plastic tablecloth. If your project is very small, you can even work on a tray or baking sheet. This will make cleaning up much easier. This method will work for stone clay, natural clay, and paper clay.
Cut off however much clay you need and wrap the rest of the clay back up. Most air-dry clays come in big blocks. You likely won't need the entire block, so just cut off a small amount and wrap the rest of the clay back up in its packaging. This way, the rest of clay won't dry out. Most air-dry clays will come wrapped in plastic. If yours came in a tub, simply put the lid back on. Is it better to cut off less clay than you think you might need. A little bit goes a long way, and you can always cut more clay off later.
Cut the clay into cubes or roll it into a tube. If you are going to make ball-shaped beads, cut the clay up into small, evenly-sized cubes. It will be easier to shape them later on. If you are going to make tube or disc-shaped beads, roll your clay out into a tube; try to make it between the thickness of a pencil and your finger. Make the clay cubes between the size of a pea and a blueberry. Larger, grape-sized beads may take too long to dry. If your clay is difficult to work with, dip your fingers into a cup of water and smooth them over the clay. The water will help soften it.
Start shaping the clay. If you are making round beads, roll the cubes between your palms. If you are making tube or disc-shaped beads, cut the clay roll to the length you need using a sharp knife. For discs, try to make them about ¼ inch (0.64 centimeters) thick. For tubes, try to make them between ½ and one inch (1.27 and 2.54 centimeters) thick. You can leave the cut edges as they are or taper them using your fingers.
Smooth out any cracks or jagged edges using water. Dip your finger in water and run it over the bead's surface until it is smooth. Keep doing this until you get the texture you want. Remember, once the clay dries, it will be very difficult to change or repair it.
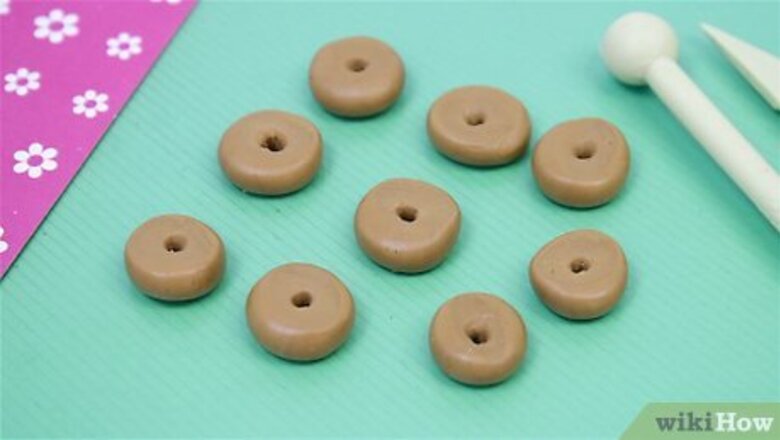
Poke holes into the beads using a tapestry needle or a toothpick. Use a tapestry needle for smaller beads, and a toothpick for larger beads. Be careful not to smooth the beads. If you made tube-shaped beads, poke the hole from top to bottom—the flat parts, not the curved. If you made disk-shaped beads, poke the hole from the side—the narrow edge part. This way, when you string the beads, they will look like circles.
Let the beads dry. How long it takes will depend on how warm or humid it is. It will also depend on how large your beads are; larger/thicker beads will take longer to dry. Most beads will need about a day to dry fully. The clay will lighten in color as it dries. For example, most grayish clays will turn white when they dry, and red/brown clays will turn a lighter shade.
Paint the beads using acrylic paint and let them dry. Stick them back onto the needle/toothpick, and place the needle/toothpick between two level objects. This will allow the beads to hang freely and allow you to paint them from all sides. If you wish to add designs to your beads, paint the beads a solid color first, let the paint dry, then add your designs. Here are some ideas to get you started: Dots Stripes Simple flowers Swirls
Consider sealing the beads with lacquer. This will not only give the beads a nice finish, it will also protect the paint. You can spray the beads with an acrylic sealer, or paint them with a clear acrylic sealer. For a glazed look, choose something with a glossy or high-gloss finish. For a natural look, choose a matte, semi-matte, or satin finish.
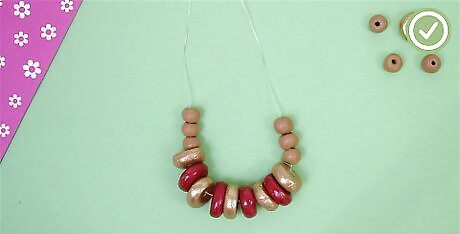
Use the beads. You can string them onto beading cord or elastic, and wear them as jewelry. You can also use them to make key chains, charms, and bookmark dangles.
Using Polymer Clay
Make sure your hands and work surface are clean. Polymer clay is very good at picking up dirt and specks of dust. Wash your hands with soap and water. Wipe down your work surface with some household cleaner and a paper towel.
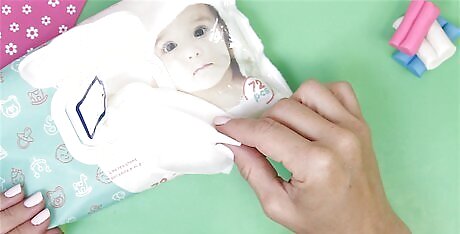
Consider having some baby wipes close by. Some colors, such as red, stain skin very easily. Other colors, such as white, pick up stains. If you are working with several different colors, wipe your hands clean with the baby wipes.
Cut off a small amount of clay and knead it. Most polymer clays will be hard when you first get them, but they will soften up the more you work with them. In general, the solid colors will require more kneading than the glittery or pearly colors. If your clay is too hard to work with, consider working in some clay conditioner or clay softener. You can usually buy it in the same aisle that sells polymer clay.
Shape your clay. Polymer clay is great in that it does not require water to be smoothed. It also does not harden or dry unless you bake it in the oven. Take your time to create your beautiful beads. Here are some shaping ideas to get you started: To create a sphere: roll a small amount of clay between your palms until it is smooth and round. To create discs: roll your clay into a thin cylinder or tube shape, about the thickness of a pencil. Use a sharp blade to cut the cane into discs. To create tapered tubes: roll your clay into a thin cylinder, about the thickness of a pencil. Cut the cane into ½ to one inch (1.27 to 2.54 centimeters) pieces. Use your fingers to pinch the ends of each mini-tube. Consider making a little animal shaped bead. Keep the design simple.
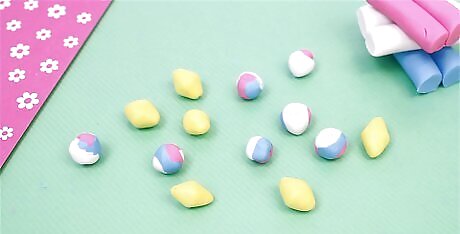
Set your clay aside if it becomes too soft. Polymer clay will soften the more you work with it. Sometimes, it may even become sticky and mushy. When this happens, the best thing to do is to set it aside for 10 to 15 minutes. You can also let the clay cool down in the fridge.
Poke holes using a toothpick or tapestry needle. If the clay is too soft and starts to lose its shape as you poke the needle through it, set it aside or stick it in the fridge. Let the clay sit for about 15 minutes until it firms up again. Once the clay is firm, you can try poking the holes again.
Consider using a soft paintbrush to smooth out any finger prints. Polymer clay picks up fingerprints very easily. These can be sanded out once you bake the clay, or they can be brushed out with a soft paintbrush. Simply brush the surface of the beads until the finger prints disappear. You do not need to use water.
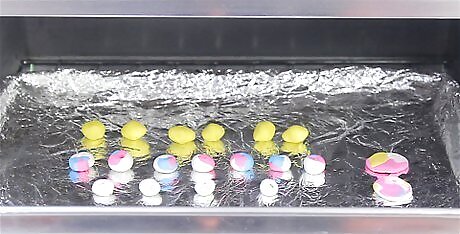
Place the pieces on a foil-lined baking sheet and bake the clay. Different brands will require different baking times. Refer to the packaging or the manufacturer's website for exact baking times. Most polymer clays will bake at 275 °F (135 °C) for 15 minutes per ¼ inch (0.64 centimeters) thickness.
Use sandpaper to smooth out any uneven edges once the clay cools. After you take the clay out of the oven, it will be very hot. Let the clay cool down before you touch it. If you see any sharp or jagged edges, smooth them away with some fine-grit sandpaper. The clay may turn chalky when you do this. This is just dust. Simply rinse the clay under running water, and pat it dry with a paper towel.
Consider coating the clay with glaze. Slide the beads back onto the toothpick or tapestry needle. Set the toothpick or tapestry needle down between two objects, so that the bead hangs freely. You can either spray or paint the beads with a clear glaze. Let the glaze dry and cure fully before you move the beads; if you use them too soon, the glaze may turn sticky. This may take two to four hours.
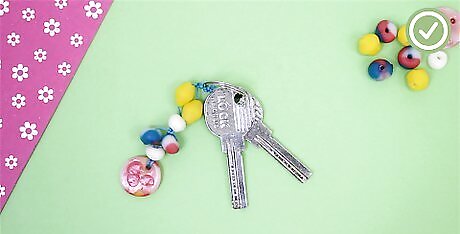
Use the beads. You can string them onto clear beading elastic to make jewelry. You can also use them to make bookmark tassels or key chains.


Comments
0 comment