views
General Tips
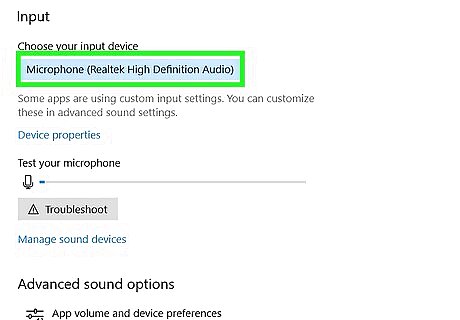
Start with high-quality recordings. As obvious as it may sound, ensuring that your recording is as high-quality as possible means that you won't have to edit the recording in Audacity very much, If you're editing music, make sure it's in MP3 format from a CD; if you're recording music, follow these guidelines: Use high-quality recording equipment - A pop filter and a high-quality microphone will go a long way in ensuring high recording quality. Record in a good acoustic space - Try to record in a tight, insulated area. You can even turn a closet into a recording space by clearing it out and lining the walls with acoustic foam. Eliminate background noise - Record during a time where air conditioners or other appliances aren't running. A high-quality microphone will pick up any sound, so minimize the number of sounds that it can pick up.
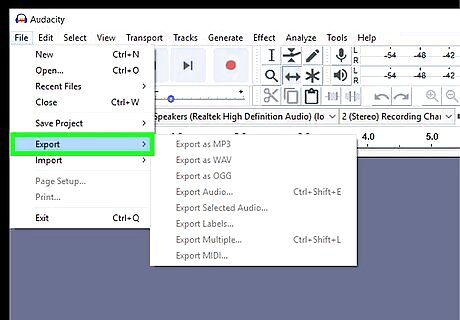
Save your recordings in high-quality. If you record with another program or device before using Audacity, make sure you export or extract the track's audio using the highest-possible quality.
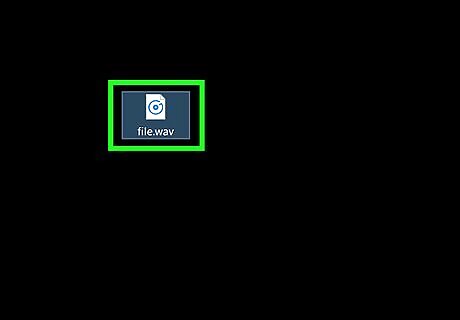
Refrain from converting audio until you save in Audacity. If you convert a WAV file to an MP3 file and then import it into Audacity, you'll lose some quality; instead, wait until the final saving process to convert the file.
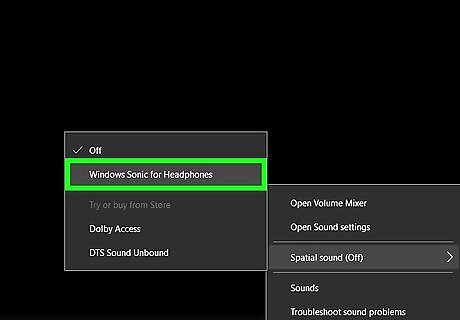
Use headphones when listening to the track. Even decent speakers can mislead you, so listen using headphones to pick up minor flaws or background noise.
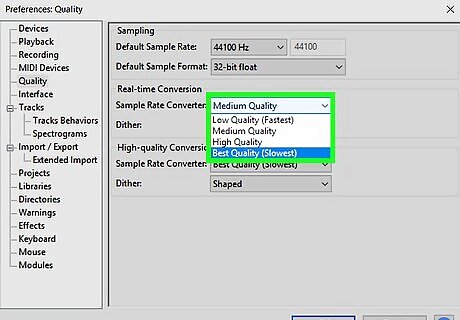
Change Audacity's default quality settings. To do so: Open Audacity Click Edit (Windows) or Audacity (Mac) Click Preferences... in the drop-down menu. Click the Quality tab. Click the "Default Sample Rate" drop-down box, then click 48000 Hz Click the "Sample Rate Converter" drop-down box, then click Best Quality (Slowest) Click OK (Windows only).
Removing Background Noise
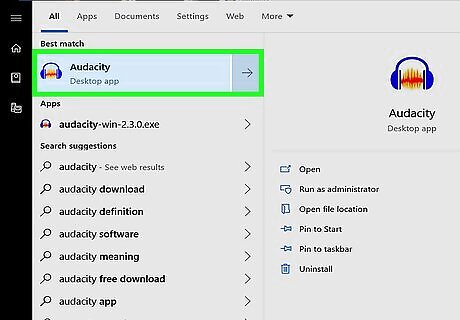
Open Audacity. It's an icon resembling an orange sound wave in the middle of a blue pair of headphones.
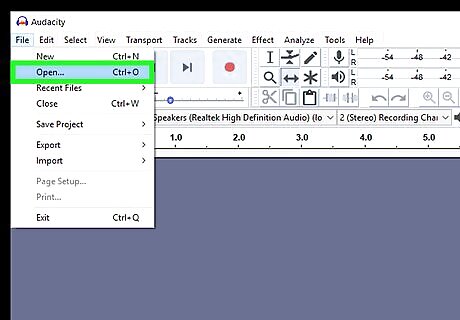
Import a track. Click File, click Open..., select your audio track, and click Open to import it into Audacity. It may take several seconds to several minutes to import your track.
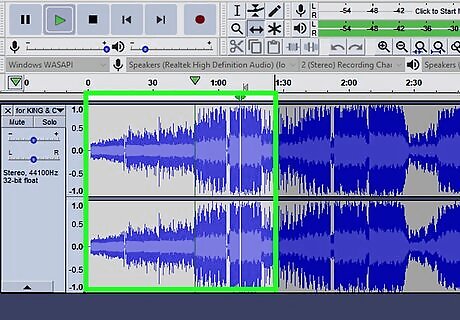
Select a section of the track. Click and drag your mouse across a few seconds' worth of the background noise. It's best to find sections with only background noise if possible.
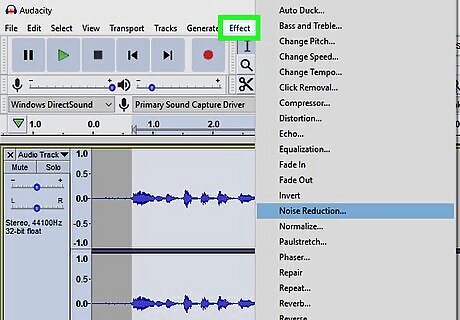
Click Effect. This tab is at the top of the Audacity window (Windows) or at the top of the screen (Mac). Doing so prompts a drop-down menu.

Click Noise Reduction…. It's near the middle of the Effect drop-down menu.
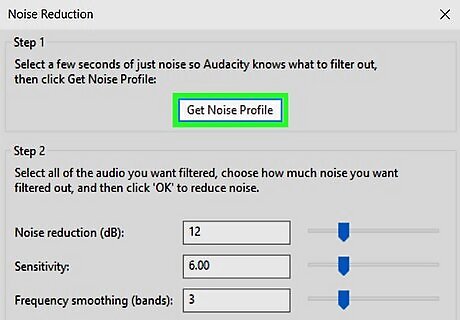
Click Get Noise Profile. This button is at the top of the window. This will help Audacity determine what is background noise and what isn't.

Select the section of track that you want to clean up. You can also click the track and then press either Ctrl+A (Windows) or ⌘ Command+A (Mac) to select the whole track.

Re-open the Noise Reduction menu. Click Effect and then click Noise Reduction....
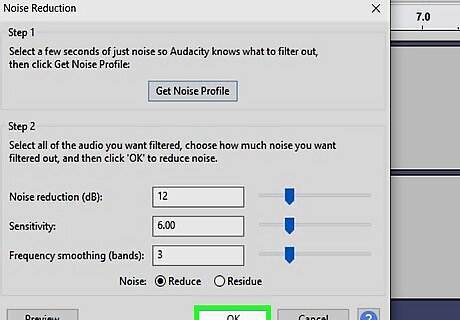
Click OK. It's at the bottom of the window. This will remove the background noise from the selected section of track.
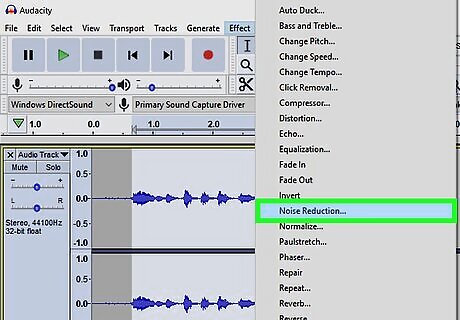
Repeat this process if the background noise is still present. If there's still a noticeable amount of background noise, repeat the noise removal process. You may have to do this several times. You can raise the amount of background noise removed by sliding the "Noise reduction" slider to the right.
Removing Clipping
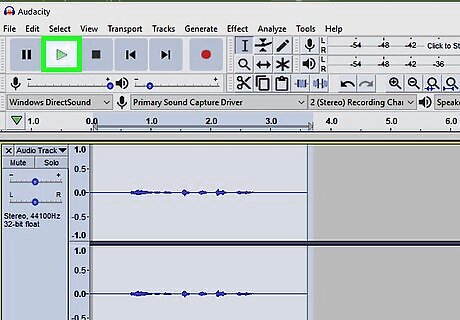
Listen for clipping. Clipping is typically characterized by rough, grating, and/or distorted playback.
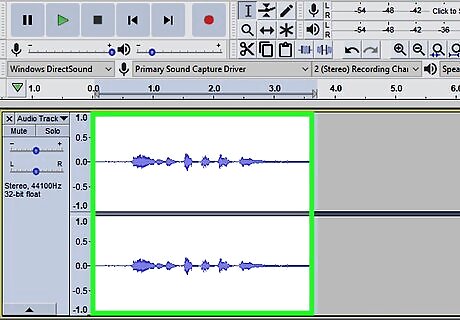
Locate an instance of clipping. Clipping visually resembles higher-than-average peaks of sound activity in the Audacity window. If you notice one section that's significantly louder than other sections in the track, it's most likely clipping.
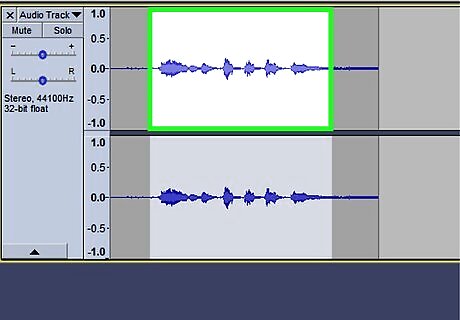
Select the peak. Click and drag your mouse across the peak to select it.
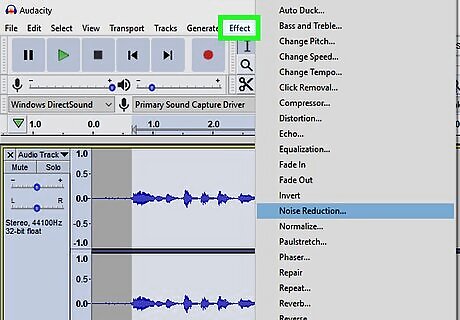
Click Effect. A drop-down menu will appear.
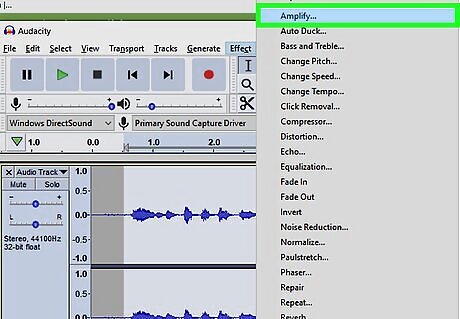
Click Amplify…. This is near the top of the Effect drop-down menu.
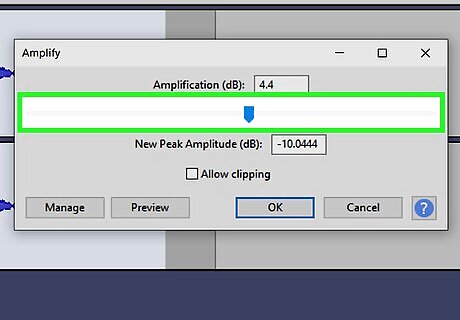
Click and drag the slider to the left. The "Amplify" slider is in the middle of the window; dragging it to the left reduces the volume of the selected section, which in turn reduces the clipping. Don't overdo this step. You should only need to drag the slider a decibel or two to the left.
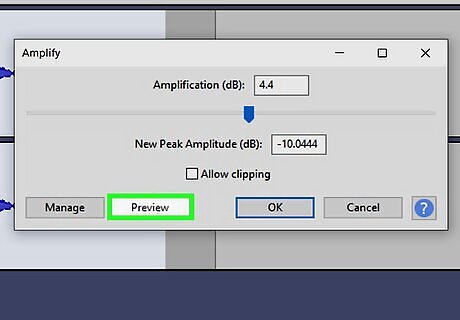
Click Preview. It's on the left side of the Amplify window. This will allow you to listen to the selected section with your settings applied.
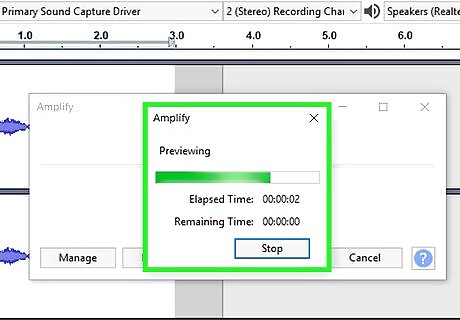
Listen for a lack of clipping. If the section no longer clips, you're good to go; however, make sure that it isn't too quiet in comparison to the rest of the track as well. If there's still clipping, reduce the volume some more.
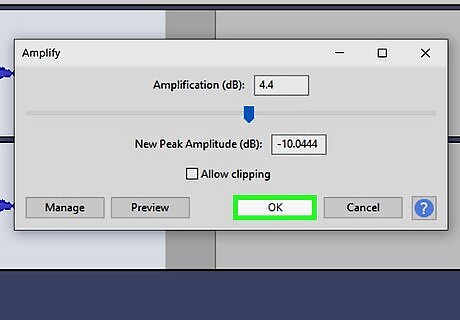
Click OK. It's at the bottom of the window. Doing so saves the changes and applies them to the track. You can repeat this process for other instances of clipping throughout the track.
Saving in High Quality
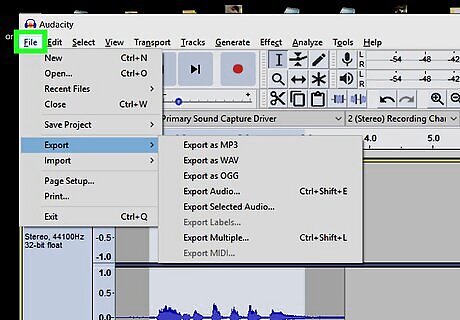
Click File. It's in the top-left corner of the Audacity window (Windows) or the upper-left side of the screen (Mac). A drop-down menu will appear.
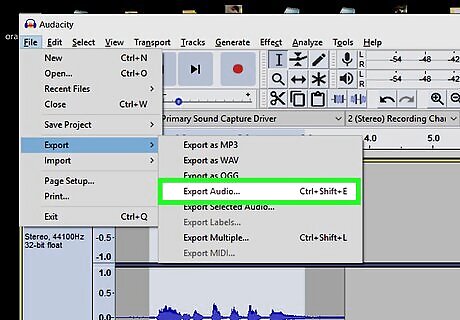
Click Export Audio…. This option is about halfway down the drop-down menu. Doing so will open a new window. If you receive an error about the "LAME encoder", first do the following: Windows - Go to https://lame.buanzo.org/#lamewindl and click the Lame v3.99.3 for Windows.exe link. Double-click the setup file, click Yes when prompted, and follow the on-screen steps. Mac - Go to https://lame.buanzo.org/#lameosxdl and click the Lame Library v3.99.5 for Audacity on macOS.dmg link. Double-click the DMG file, then verify and install LAME.
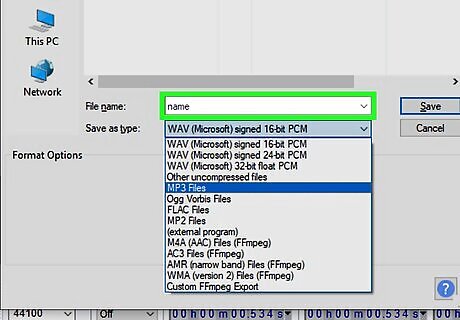
Enter a file name. Type a name for your finished file into the "Name" field.
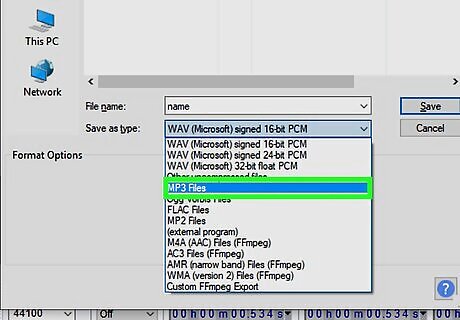
Click the "Save as type" drop-down box. This is in the middle of the page. A drop-down menu will appear.
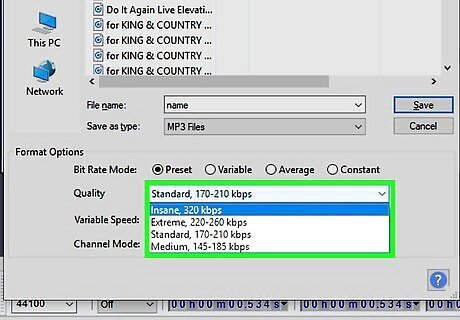
Click MP3. Selecting the MP3 option makes your song playable on nearly any platform.
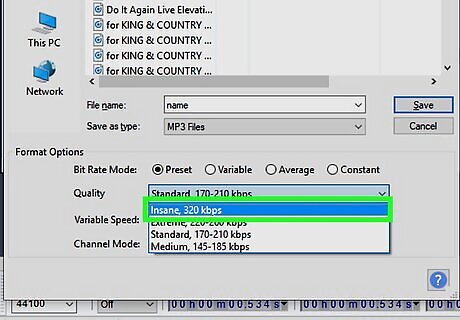
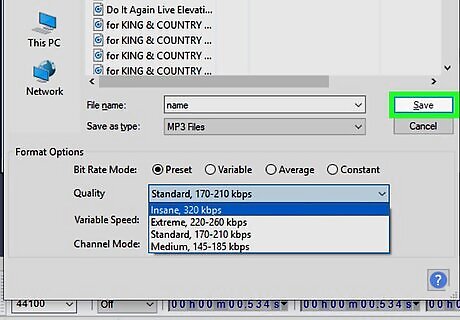
Click the "Quality" drop-down box. You'll find this near the bottom of the window. A drop-down menu will appear.
Select a quality level. Click either Extreme or Insane in the drop-down menu. This will make the track's quality much higher than average.
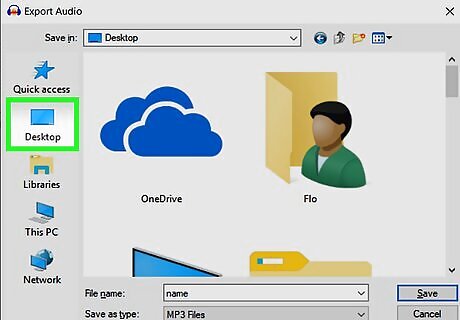
Select a save location. Click one of the folders on the far-left side of the window. On a Mac, you may first have to click the "Where" drop-down box to select the folder.
Click Save. It's in the bottom-right side of the window. Doing so will save your project as an MP3 file and export it in the highest possible quality.


Comments
0 comment