views
Sewing the First Seam

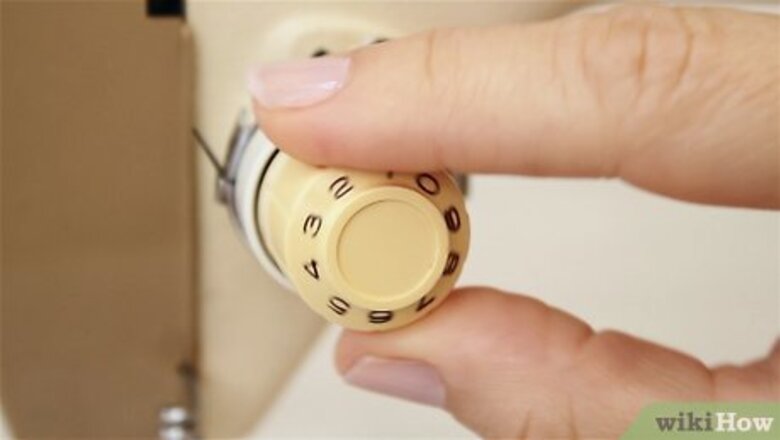
Set up your sewing machine. Use a straight stitch, not a zigzag stitch. Consider the stitch size setting and thread tension you will need for sewing your particular fabric. If you are unsure, consult the directions for your sewing machine and adjust settings accordingly. Also prepare your sewing machine by threading it with a thread that matches the color and strength of the material you are going to sew. This is also a good time to plug in your iron, so that it's already heated up when you need it.
Pin your fabric together so that the wrong sides are facing each other. Putting the wrong sides together is the opposite of what is normally done when sewing a basic seam, so don't worry if it feels counterintuitive. A French seam requires you to stitch each seam twice, folding over your first line of stitches in order to make your finished seam face the right direction. Be sure to pin all the way down the seam you are sewing. This will help to make sure your fabric doesn't slip out of line. It's a good idea to put pins in so they are perpendicular to your seam line, this way they won't stick you as you move the fabric along in the sewing machine and they will be easy to grab as you move your fabric in the sewing machine.
Sew the fabric together using a ⁄4 inch (0.6 cm) seam allowance, removing pins as you go. To keep your seam allowance the same width as you sew your seam, keep an eye on the seam allowance guide that should be printed on the thread plate of your machine. Another option is to use a ⁄4 inch (0.6 cm) presser foot, that way you can just make sure the outer edge of your fabric always lines up with the edge of the presser foot. The seam allowance is the amount of fabric that is between the edge of the fabric and the seam. Patterns usually give a specific amount of seam allowance to use, so that your finished project doesn't turn out too bit or too small. Remember that the french seam will basically require about double the allowance you use on this first seam, so make sure when you are cutting out your pieces of fabric that you have figured that into your measurements. Feel free to increase the seam allowance on this first seam to ⁄8 inch (1.0 cm), if you are more comfortable sewing that width, but keep in mind that you will need to increase your overall seam allowance to accommodate this. It's best to remove pins right before you are about to sew over them. This will keep the fabric in place but will avoid the risk of hitting one with your sewing machine needle, which could easily break the needle. Remember to clip any threads and remove any remaining pins after sewing.
Trim the outside edge of the seam so you are left with ⁄8 inch (0.3 cm) seam allowance. You can use regular scissors or pinking shears, but if you are using a delicate fabric, pinking shears may be best to help prevent excessive fraying. Remember, this seam is not going to show by the time you are finished. Don't worry if the cut edge is a bit frayed or messy. Be sure to use very sharp scissors for this. While it would be great if you could just sew a ⁄8 inch (0.3 cm) seam, and therefore not waste any fabric, most sewing machines need more than ⁄8 inch (0.3 cm) of fabric for the machine's feed dogs, the pieces of rough metal under the presser foot, to grab onto and pull along.
Iron your first seam. Open the pieces of fabric and lay it out flat on an ironing board. Iron across the seam on both the right side and the wrong side of the fabric so it lays perfectly flat. Then fold the fabric so that the right sides are facing each other (the opposite of how it was when you sewed the first seam). Iron the piece with the seam you just sewed going straight down the outer edge of the fabric. You'll want to iron very carefully and neatly so that the seam on the outer edge is perfectly straight. Make sure your iron is set to the correct temperature for the fabric you are using. If it is set to high you will risk singeing the fabric.
Sewing the Second Seam
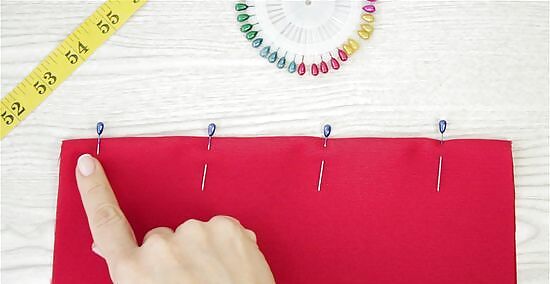
Pin your fabric so that the wrong sides of your fabric are facing out. This should be easy, as you have just ironed them into place. Again, put your pins in horizontally all the way down the side of the seam so that they can be easily removed while you are sewing. The frayed edge should now be concealed between the two pieces of fabric and the outer edge is just the neat row of your first set of stitches.
Sew your second seam, this time using a ⁄8 inch (1.0 cm) seam allowance. You need this amount of allowance so that the frayed edge of the fabric is tucked away neatly between the two seams. As you sew, remove the pins. Once again, remember to clip threads and remove any stray pins after sewing the seam. If your seam allowance is too small on the second seam, the rough edges of the fabric could end up sticking out of the second seam on the finished side of your project. Its better to be cautious and make your seam allowance a bit generous.
Iron the completed double seam one more time. Press the seam to one side, depending on where you would like it to lay in your finished project. Your raw edges are no longer exposed as they are enclosed inside your newly made French seam.




Comments
0 comment