
views

Click the Start Menu icon Windows Start. You can also press the ⊞ Win key to open your Start Menu. This will not work if you have updated Windows to 20H2. Any editing you do to the registry will create a black box in the arrow's location.
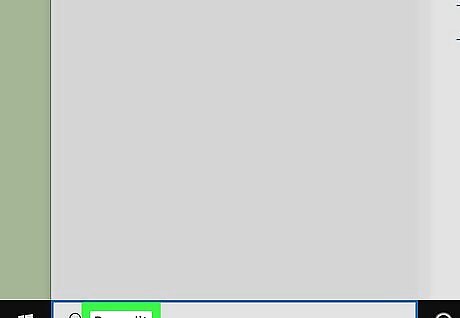
Search "Regedit" in the search bar. You might need to click the search icon Android 7 Search to open the search bar first. As you type, you'll see search results populate.
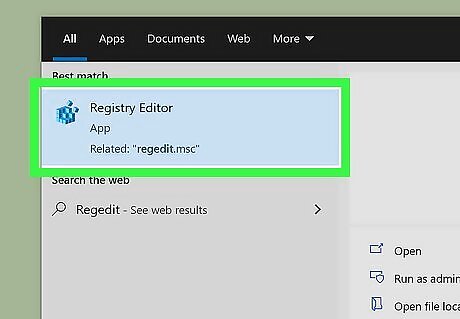
Click regedit. It's labeled as "Registry Editor" and an executable app.
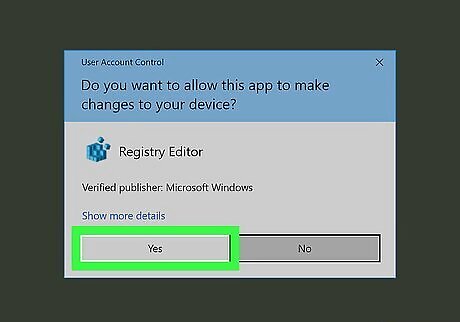
Click Yes when prompted. Before the app runs, you'll get a pop-up asking if the program "Registry Editor" can make changes to your device. You'll need to allow this by pressing Yes to continue.
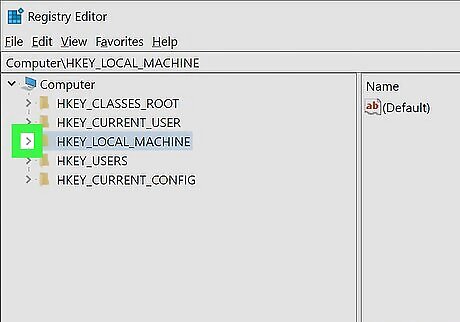
Click Android 7 Expand Right next to "HKEY_LOCAL_MACHINE." You'll see this folder in the panel on the left side of the window. When you click the expand arrow, you'll see a list of folders that are inside "HKEY_LOCAL_MACHINE."
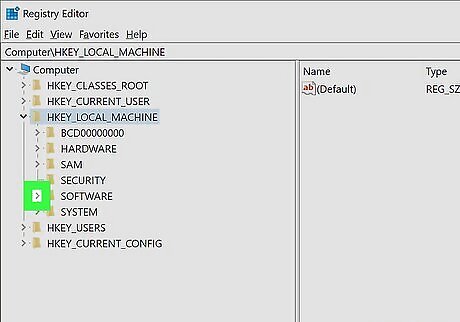
Click Android 7 Expand Right next to "SOFTWARE." A list of folders inside "SOFTWARE" will expand down.
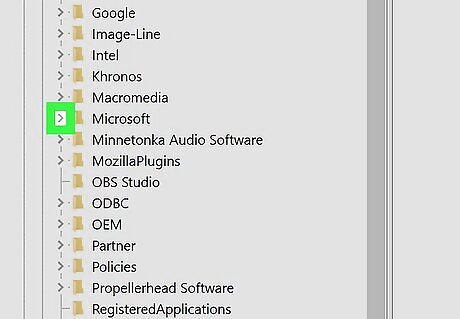
Click Android 7 Expand Right next to "Microsoft." A list of folders inside "Microsoft" will expand down.
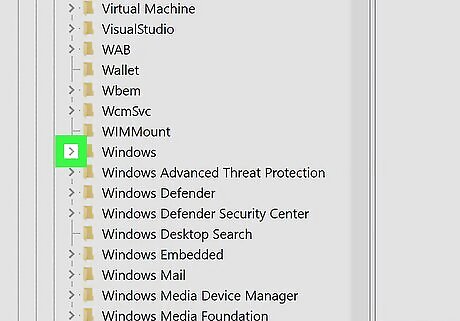
Click Android 7 Expand Right next to "Windows." You'll find this by scrolling down, and a list of folders inside "Windows" will expand down.
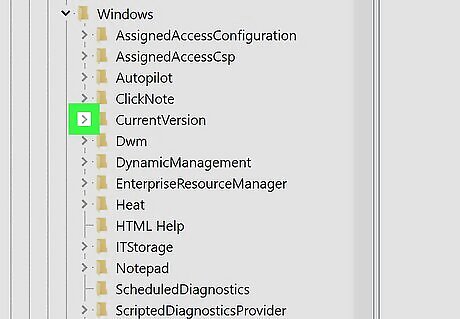
Click Android 7 Expand Right next to "CurrentVersion." A list of folders inside "CurrentVersion" will dropdown.
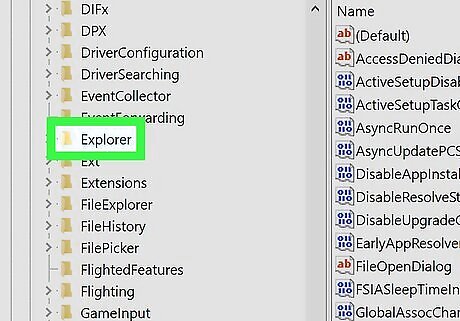
Click Explorer. A list of folders inside "Explorer" will drop down and you'll see the address bar at the top reflect the navigation to the Explorer file: "Computer\HKEY_LOCAL_MACHINE\SOFTWARE\Microsoft\Windows\CurrentVersion\Explorer".
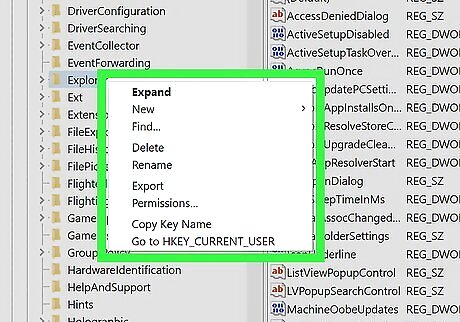
Right-click the Explorer folder. A menu will pop up at your cursor.

Hover your mouse over New and click Key. You're creating a new folder inside the "Explorer" folder.
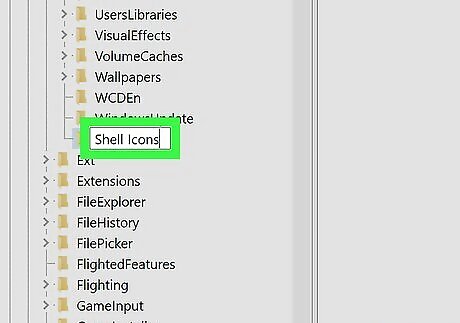
Name the folder Shell Icons. It'll prompt you to name it as soon as you create it, but if you don't, you can always right-click on the new folder (called "New Key #1 by default) and select Rename.
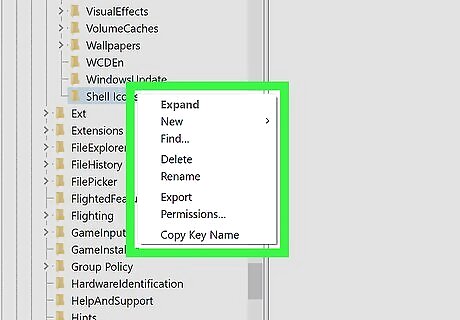
Right-click the Shell Icons folder. A menu will pop-up at your cursor.
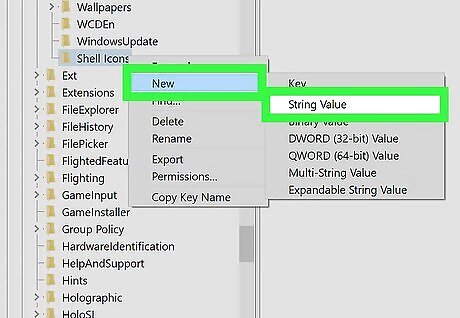
Hover your mouse over New and click String Value. This will create a new file in the Shell Icons folder.
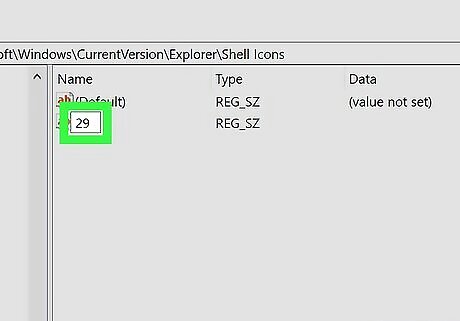
Name your file 29. You should now have a default file and a 29 file.
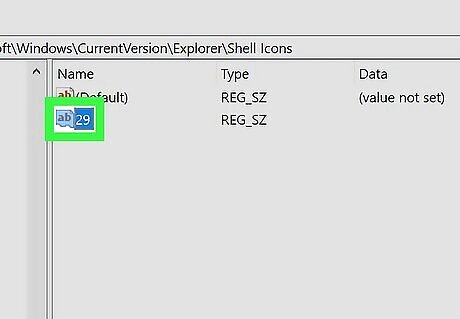
Double-click the 29 file. Another window will open.
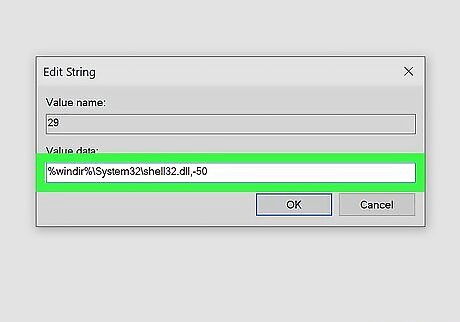
Paste the following in the Value Data field: %windir%\System32\shell32.dll,-50. Entering the wrong text here can result in a broken icon system, which means that clicking on your shortcut won't do anything, or the shortcut icon won't appear at all. With the most recent Windows 10 update, this code does not work and will instead create transparent, black, or white boxes instead of arrows over the shortcut.
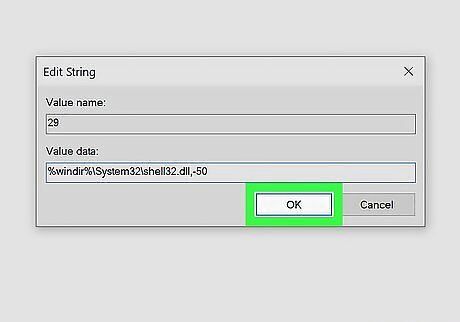
Click OK. You'll see this button at the bottom of the window.
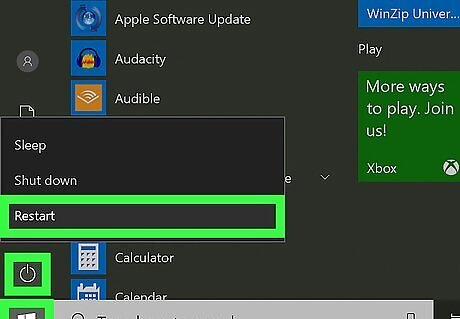
Restart your computer. You can go to the Start Menu and press the power icon to select to restart your computer. After your computer restarts, you will no longer see the arrows on the shortcut icons.


Comments
0 comment