
Combining Burlap and Freezer Paper
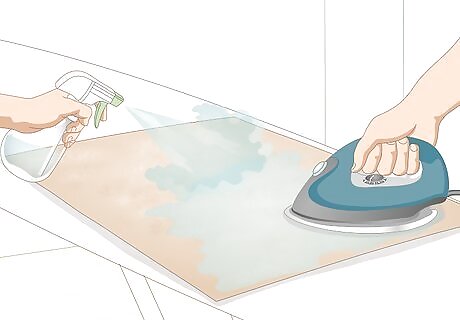
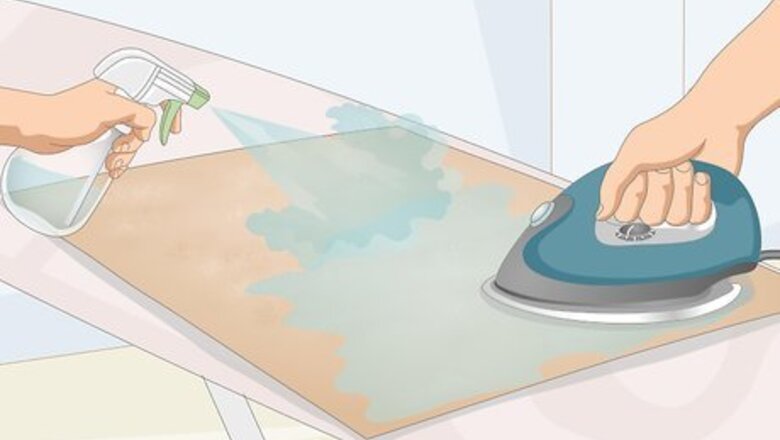
Spray your burlap with water and iron it until it's flat. Lay the piece of burlap out on your ironing board. Set your iron to the hottest setting and let it heat up. Spray any wrinkled areas with water from a spray bottle. Iron over the wrinkles until they are flat. It’s better to spray with a spray bottle rather than use the steam setting on your iron, because then you can specifically target the wrinkled spots. It’s important to iron your burlap before you measure or cut it so that your measurements are more accurate.
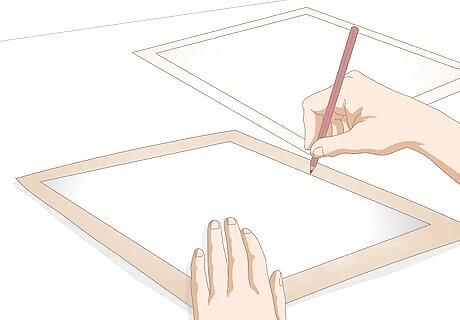
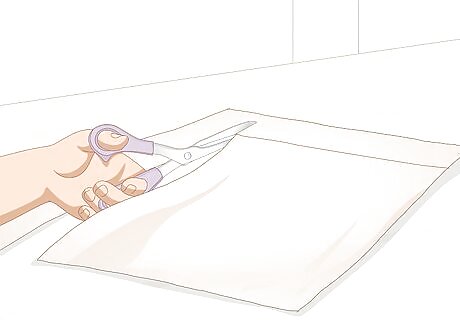
Trace a piece of printer paper onto your burlap and freezer paper. Set down your burlap and unroll some freezer paper. Put a piece of printer paper on top of the burlap, and trace around the edges of the paper with a pencil. Then do the same with the freezer paper. In the US, the standard size for printer paper is 8 ½ inches x 11 inches, but it varies by country. Make sure you’re using freezer paper, not wax paper.
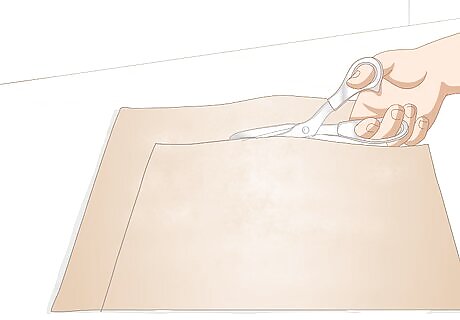
Cut out the burlap with fabric scissors or a rotary cutter. The blade should very sharp to prevent fraying. Cut along the straight line with fabric scissors, or put the burlap down on a cutting board and cut the line with a rotary cutter. If you’re a kid, ask an adult for help for this step.
Cut out the freezer paper using regular scissors. Don’t use fabric scissors or a rotary cutter on the freezer paper, because the paper will dull the blade. Instead, cut out your paper using regular scissors by carefully following the outline you traced. The purpose of the freezer paper is to give the burlap enough stability to go through the printer.
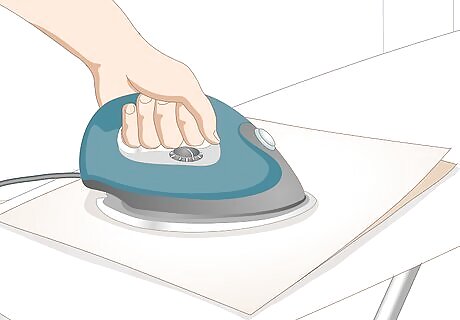
Iron the freezer paper onto the burlap until it sticks. Put your burlap down on the ironing board. Place the shiny side of the freezer paper face-down on top of the burlap. Use a hot, dry iron to press the paper onto the fabric. The heat of the iron will adhere the freezer paper onto the burlap. Make sure all the corners and edges of the freezer paper are firmly attached to the burlap.
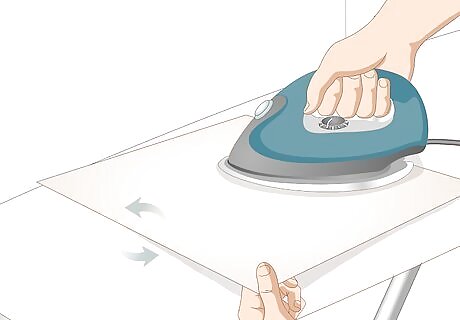
Flip the burlap and freezer paper combination over and iron it again. This time, iron with the fabric-side up. Press the iron gently down onto the burlap. Don’t move the iron along the fabric in a swiping motion, because that might make the edges fray. Use a hot, dry (no steam) iron. This second ironing helps ensure the burlap is smooth enough to feed through your printer.
Printing with an Inkjet Printer
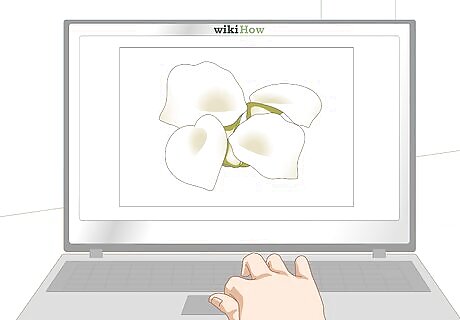
Create your design on the computer. Stick with a simple design with bold lines, because it will show up better on the burlap. You can print in color or black ink. Remember that the dimensions of your design need to fit onto the dimensions of your fabric. If you want, you can test out your design by printing it on a piece of paper first.
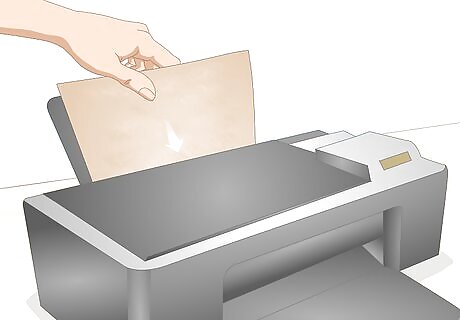
Put the burlap in an inkjet printer so that it will print on the fabric side. If you’re not sure whether to load your printer with the burlap facing up or down, test the printer with a piece of paper. Write the word “top” on the top side of a paper, and print a sentence on the paper. If the printed words are on the same side as the word top, then put your burlap in the printer fabric-side up. If the printed words are on the opposite side, put in the burlap fabric-side down.
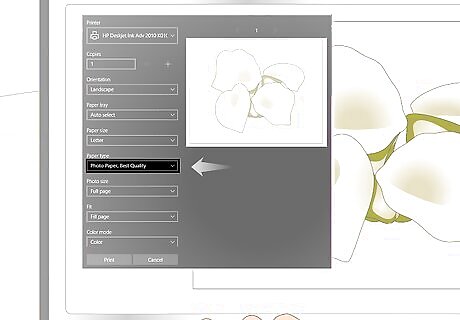
Print your design on a photo setting. Adjust the settings on the print preview to select the “photo setting,” so that the printer uses more ink. Make sure the paper size is the same as the burlap you prepared, rather than photo-sized. Then, press print. When printing on the photo setting, your printer will work more slowly, so be patient.

Lay the burlap out flat and let it dry overnight. Set the burlap-freezer paper combination somewhere safe and wait for the ink to dry. It may take a while for the ink to dry, depending on your design, so it’s best to just leave it overnight and come back to it the next day, when it will definitely be ready. Don’t touch the inked part of the burlap while it’s drying, or it will smudge.
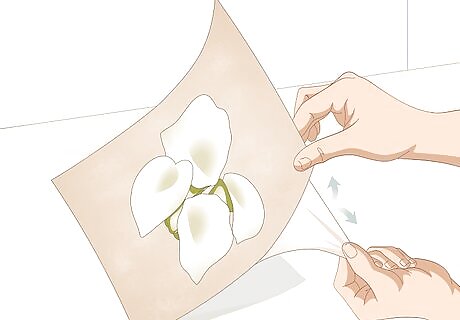
Peel the freezer paper off the back of your burlap. Start at a corner of the freezer paper and peel it off the back of your burlap. It should come off fairly easily. You can either throw out the freezer paper or save it to use again if you want to print on another piece of burlap.


Comments
0 comment