
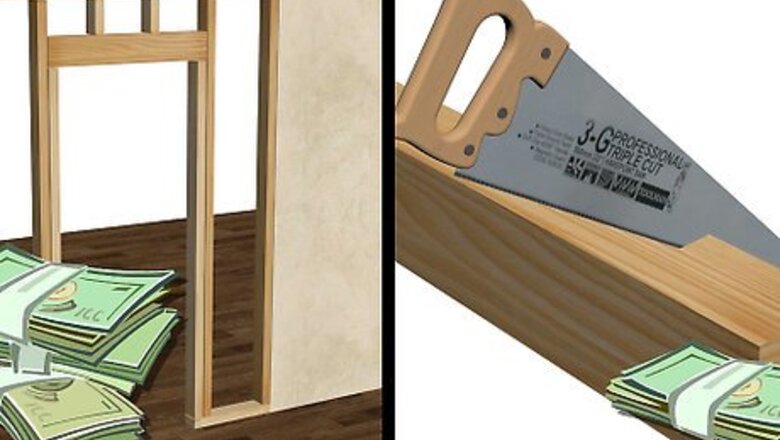
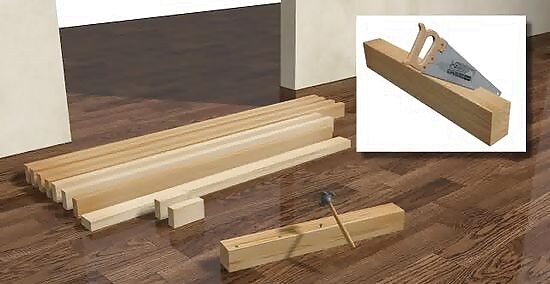
Measuring and Cutting

Decide whether to buy a frame or build one. Building your own door frame can save some money, provided you have the time, skills and tools to do the job correctly. If you are uncertain, it is usually much easier to buy a pre-made door frame assembly or prehung door unit. Usually such pre-made products are not much more expensive, and will save you time and potential headaches.
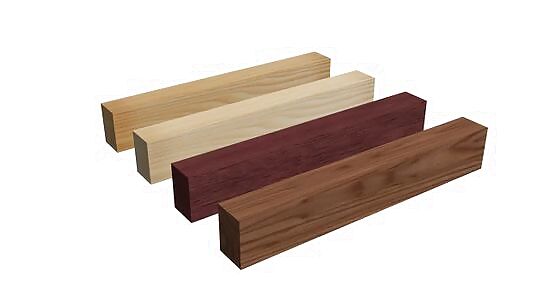
Know what lumber to purchase. Determine the size of the framing members in the wall you are framing the door in. Wood studs are most often 2x4 nominal size, but 2x6 and other size studs are also used in residential framing. You can purchase the lumber you need at a lumberyard or home improvement warehouse store. In terms of the best type of wood to use for the frame, feel free to choose lumber based on aesthetics rather than strength. Interior doors and frames are not exposed to the same harsh elements as exterior ones, so your main concern should be picking a type of wood that you like and which goes well with the door you're planning to hang on it. Common wood types used for interior frames are: Alder Fir Birch Pine (the most popular)
Determine the size of the door. Normal, single interior doors are 22" - 42" wide and 6' 8" tall. Take into consideration what types and sizes of items you will be placing in the room. For example if the door leads to a laundry area, make sure the door will be large enough to fit a washer and dryer through, and preferably 36" wide.
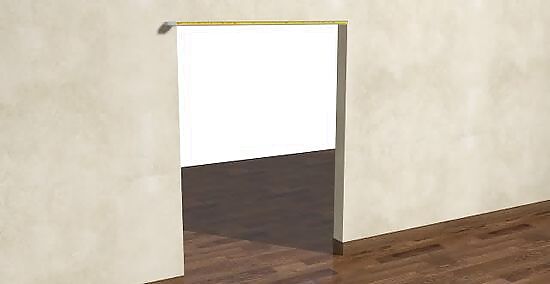
Determine the size of the door opening. The size of the door opening will vary depending on the size of the door you plan to install. A typical door opening is 2 inches (5.1 cm) wider than the door size being installed to allow for the thickness of the jamb material and shims to plumb the jamb. Measure your door carefully and cut the opening to fit using a reciprocating saw. Make the opening the width of the door plus 2 inches (5.1 cm), and if additional studs are needed, a space for these, as well. Visualize renovations step-by-step. "Converting my formal dining room into a home office, I needed to frame in an opening for french doors. The detailed animations showing measurements and construction order gave me the visual walkthrough I required to properly execute this project. Now I can recreate the process." - Kathy S. Determine the proper door size. "Needing a laundry room door, the tips here on gap allowances and standard door sizes helped me select the right 36” option with proper margins to account for the frame and leveling. This spared frustration." - Erik M. Confirm correct techniques. "As a visual learner planning my first solo framing project, I appreciated the clear textual steps paired with animations demonstrating proper techniques like toenailing. I can now double-check my work to make sure I’m doing this right." - Bernanrd M. Gain framing fundamentals. "With no prior experience, these straightforward instructions taught me framing basics I can apply to future jobs, like measuring and cutting various stud lengths to custom fit any wall opening. I’m no longer intimidated to take this on myself!" - Carlos V. Visualize, then actualize. "I’m a hands-on learner, but was confused trying to envision framing a new doorway without seeing it done first. These step-by-step animations gave me the mental model I needed. Now I get it and can recreate the process in my own home!" - Patty S. We want to hear from you! Advice from our readers makes our articles better. If you have a story you’d like to share, tell us here.
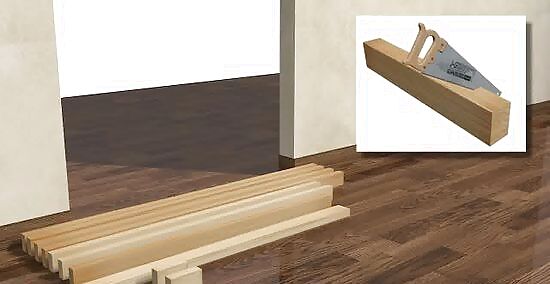
Cut the studs and sole plate to the width required. Never cut a wall top plate! The boards secured in an upright position along the sides of the frame are referred to as studs., and are used to support the wall. The board that transverses the top of the studs is called the top plate. To make the studs, measure the height of the door to be installed. Cut 2x4s to the height of the door plus 1 1/2 inches (5.1 cm) to allow room for the top of the frame and allowance for leveling the jamb. To make the door header, cut 2x4s to the width of the original opening. A "king stud" is one that runs continuously from the top plate (usually a double plate) to the bottom plate. The "jack stud" is nailed to the king stud, but it's shorter as it supports the door header.
Cut the door header. To make the door header (the top of the door frame), cut two 2x4s to the same length as the width of the original opening and nail them securely together. You will need to add 1/2" of plywood between the 2x4's to get the right wall thickness of 3-1/2". This is the actual thickness of a 2x4.
Putting It Together
Insert the top plate. Nail the top plate through the ceiling into the ceiling joists or blocking using 12D nails.

Insert the sole plate. Nail the sole plate to the floor, driving the nails into the floor joists or blocking. Don't nail the sole plate to the floor between the jack stud locations because this portion of the plate will be removed before the door is installed. Use Tapcon screws (or other appropriate fastener) to insert the sole plate.
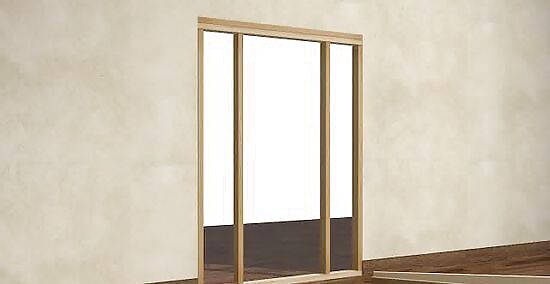
Nail the king studs in place. Use 12D nails to nail the king studs in place. Drive the nails at an angle to make a toe-nailed joint, or you can attach the studs with metal connectors.

Nail the jack studs to the king studs. Position the jack studs against the inside of the king studs, and nail them in place.

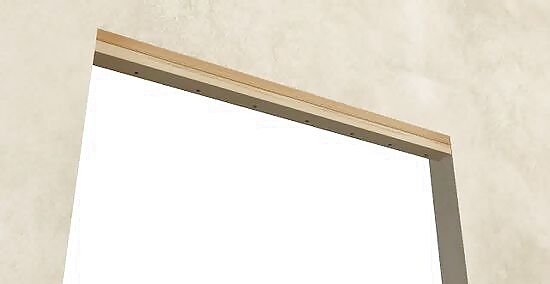
Insert the header. Take two 2x4s that are cut to a length that equals the width of the original door opening. Use them to make a header that will sit above the door. Once in position, nail these header pieces together to secure. The header should fit between the king studs and sit snugly atop the jack studs.
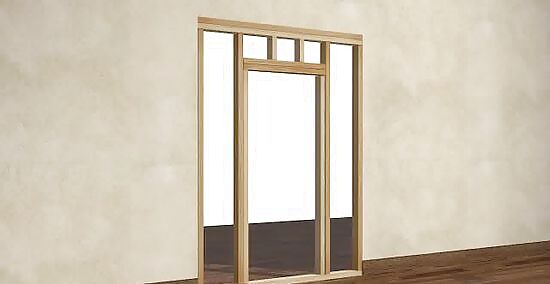
Insert a cripple stud. Measure and cut one (or two depending on the width of your door) studs to fit between the header and the top plate. This is a cripple stud. Use a toenail to secure the cripple studs to both the header below them and to the plate above them.

Remove the sole plate. Saw through the 2x4 sole plate at the inside edges of the jack studs. Remove the cut portion of the plate.


Comments
0 comment