
Drying Soaking Wet Books
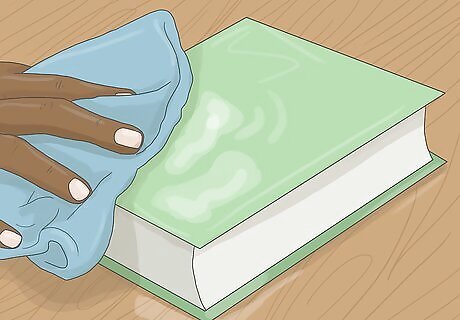
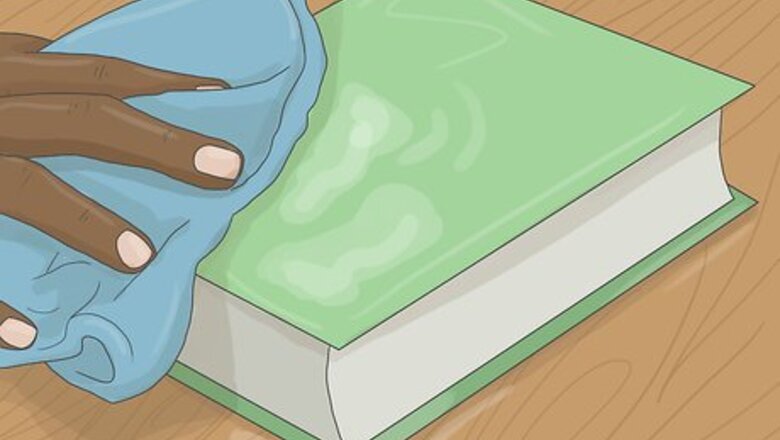
Wipe or fling excess water from the book. When it comes to drying a wet book, the exact steps you take will differ based on how wet the book is. If your book is completely soaked — so wet that it drips — you'll first want to carefully remove as much excess water from the outside of the book as you can. Hold the book shut and shake it gently to remove any external liquid. Follow this by gently wiping the outside of the cover with a rag or paper towel. Don't open the book yet. If it's dripping wet, its pages will likely be so delicate that they'll easily tear. At this point, just concentrate on removing moisture that's on the outside of the book.
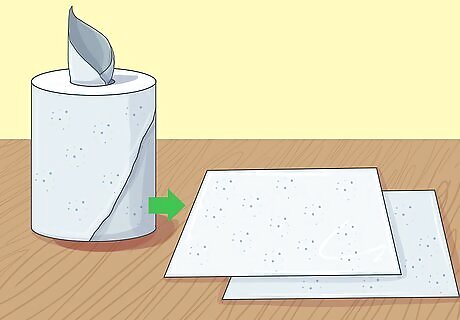
Lay down a few paper towel sheets. Next lay down a few sheets of plain white (not dyed) absorbent paper towel in a clear, flat dry area. Pick a spot where the book is unlikely to be disturbed as it dries. If you live in a dry climate, this spot can be outside. However, regardless of where you live, you won't want to leave your book out overnight, as the dew that forms in the morning can easily undo any progress you've made. If you don't have any plain white paper towels handy, dry rags can work well. Don't use dyed paper towels, as these can bleed color when wet.
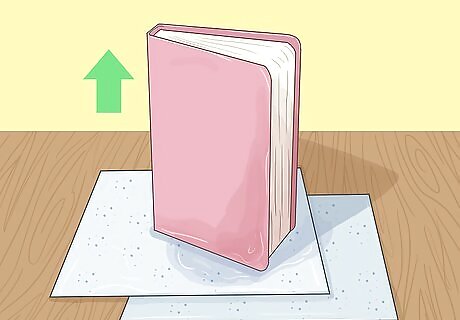
Stand the book upright. Take your wet book and place it on top of your paper towels so that it stands straight upright. For hardcover books, this should be easy. Simply open the covers slightly (without separating the pages) until your book can stand balanced without any assistance. For paperbacks, this can be trickier. You don't want your book to sag at all as it dries, so, if need be, use bookends or weights to keep your book standing straight upright.
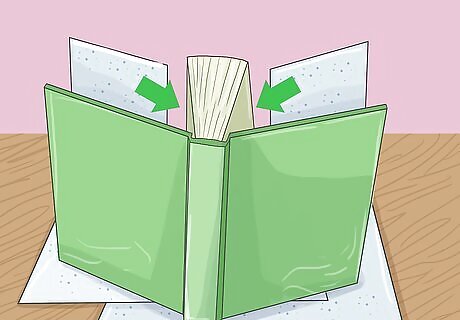
Place paper towel sheets inside the covers. Next, take two paper towel sheets (or, if none are handy, thin, dry rags) and tuck one inside each cover. The towels should sit between each cover and the text block (the internal pages of the book). Don't disturb the pages when you do this. The text block should basically remain in one large "mass". Fanning the pages at this point can lead to crumpled or deformed pages when the book dries.
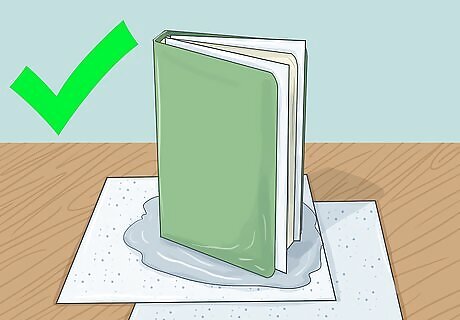
Allow the book to sit. When you've arranged all of your paper towels, simply allow the book to sit in its standing position. The absorbent material of the paper towels should quickly begin to pull moisture out of the book. If you want to, you can put one or more dried sponges underneath the paper towels the book is resting on to aid in the absorption process.
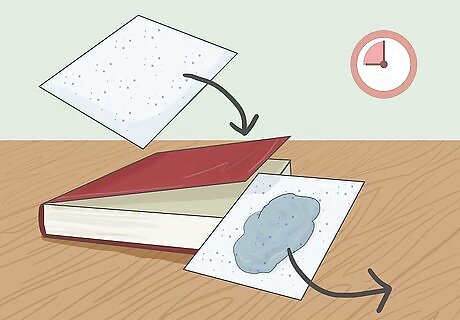
Replace paper towels as needed. Check on your book's progress every hour or so. As the paper towels pull moisture out of the book, they'll eventually become saturated, unable to hold any more liquid. When you notice that any of your paper towels have become saturated, carefully remove them and replace them with fresh, dry towels. If you're using a sponge, ring it out and return it to its place under the paper towels. Don't forget to keep an eye on your book. Mold can begin to grow on wet paper within 24 to 48 hours if the moisture is allowed to stagnate. Continue in this fashion until the book no longer drips or leaves puddles when you pick it up. Next, you'll want to proceed to "Drying Somewhat Wet Books" below.
Drying Somewhat Wet Books

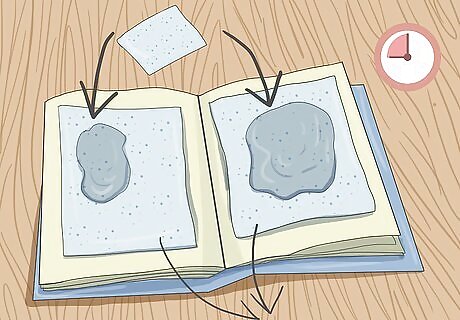
Place paper towels every 20-30 pages. If your book isn't dripping wet (or was and has now dried partially), it should be safe to carefully and gently flip through the pages without ripping them. Open your book and carefully flip through the pages, placing absorbent paper towel sheets between the pages every 20-30 pages or so. In addition, place paper towel sheets inside each cover between the cover and the text block. Be careful with the number of paper towels you place in the book this way — if you place too many, it's possible to cause the spine of the book to bend backwards, which can deform the book if allowed to dry like this. You may need to space your paper towels more widely if this becomes a problem. Save a book from an accidental spill. "My daughter accidentally left a leaking water bottle on my nightstand, and it got my library book completely soaked. I panicked at first, but this article walked me through exactly how to dry it out carefully using paper towels. I'm so glad I was able to save the book and avoid having to pay for a replacement." - Moya T. Dry a school book without paying fees. "I had a bit of a disaster when my lunchbox leaked all over a book I borrowed from the school library. I was worried I'd have to pay to replace it, but the steps here on slowly absorbing the moisture with paper towels worked perfectly. Now it's good as new thanks to this guide." - Davin S. Allow time for the drying process. "After an unfortunate spill, I started the process of drying my book based on these instructions. I'm replacing the damp paper towels every few hours, as it says. It's a slow process, but I'm being patient, and I can already see the book improving. I feel confident I can get it back to normal by following the steps." - Sandra F. Act quickly to separate stuck pages. "I made the mistake of letting a wet book sit too long before thoroughly drying it. Now, some of the pages are stuck together. In the future, I'll monitor damp books closely and separate sticky pages right away, as the article recommends. Lesson learned!" - Daksha H. We want to hear from you! Advice from our readers makes our articles better. If you have a story you’d like to share, tell us here.
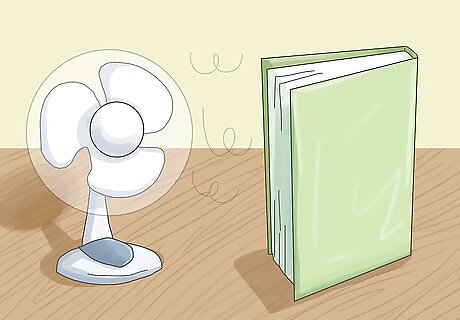
Let the book sit on its side. After you've finished laying paper towel sheets throughout the book, set the book down on its side to dry, rather than standing it upright. The absorbent paper towel sheets should begin to draw moisture away from the inside of the book. This process can take some time, so be patient. To speed the process up, ensure that your book is in a location where dry air is able to circulate continuously. If you live in a humid climate, a dehumidifier can be a big help here. Otherwise, turning on a fan or opening a few windows will usually suffice.
Replace paper towels as needed. As above, you'll want to regularly check on your book as it dries. When you notice your paper towels becoming saturated with liquid, carefully remove them and insert new paper towels roughly every 20-30 pages or so. To ensure the book dries evenly, try not to lay down paper towels between the exact same pages each time. Each time you replace the paper towels, flip the book over. This helps prevent the pages from deforming and "ruffling up" as they dry.
Keep the book square as it dries. As paper and cardboard dry, they stiffen and harden. This means that if your book is lying at a slanted angle as it dries, it can eventually become permanently deformed. To avoid this, keep the book perfectly "square" as it dries. If the book resists your efforts to straighten it out, use heavy bookends or weights to hold its edges in place. Eventually, your book will dry to a point that your paper towels no longer become saturated — merely damp. At this point, you'll want to proceed to "Drying Slightly Damp Books" below.
Drying Slightly Damp Books
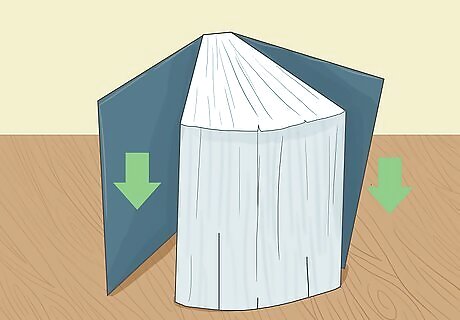
Stand the book upright and open it. Begin to dry your damp book by standing it up vertically. As noted above, this is usually easy if your book is hardbound, but can be trickier if you have a paperback. If you need to, you can use heavy weights or bookends to keep the book upright. Open the book a moderate amount — no more than about 60. Ensure the book is well-balanced and is unlikely to fall over before proceeding.
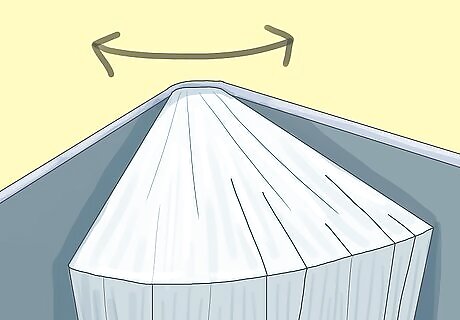
Fan the pages out. Without opening the book's cover to more than about 60, gently fan the book's pages out. Try to arrange the pages so that there is a tiny gap between most (if not all) of them. The pages should be able to stand roughly upright — none should hang at a diagonal angle or flop limply against neighboring pages.
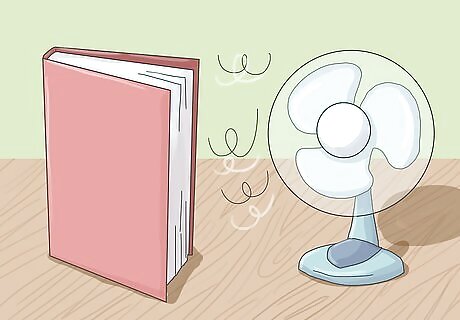
Circulate dry air in the room. When your book's pages are evenly fanned out, allow it to begin drying in its upright position. To speed the drying process, ensure that relatively dry air is circulating freely through the room. Use a fan or create a draft by opening a few windows, or, if the ambient air is fairly humid, use a dehumidifier to make it drier. If you use a fan or a natural breeze, look at the edges of the book's pages closely. The movement of the air shouldn't cause the pages to flutter or flap in the wind, as this can lead the pages to become ruffled and "puffed up" when they dry. Be patient here. It can take days or even a week or more for the book to dry completely. Check on your book frequently to get a sense of how quickly you're making progress.
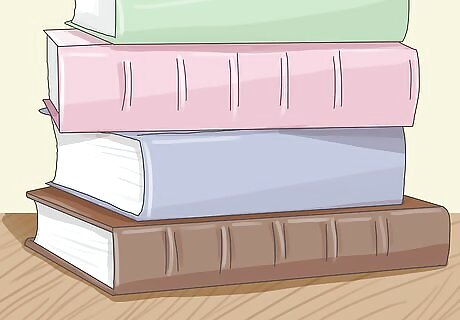
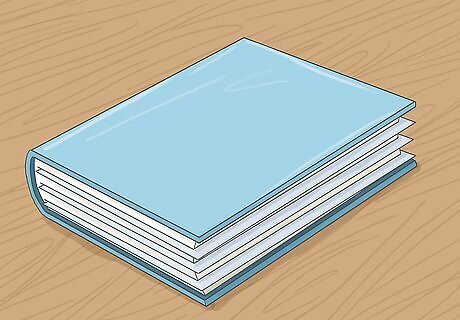
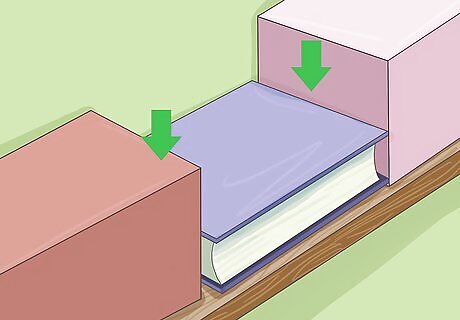
When dry, place under weight to flatten. Eventually, after you've allowed your book to dry patiently, no further moisture should remain in its pages. However, even if you've followed the instructions very carefully, it's likely that the book won't sit completely flat once it's dry. The paper used for most books' pages is somewhat fragile and can easily warp and deform as it dries, leaving the book with a "crumpled" or "ruffled" appearance when it's finally dry. Luckily, to a certain extent, this can be fixed. Lay your dry book flat and place a heavy weight on top of it (thick textbooks are great for this) and allow it to sit for several days to a week. This can substantially reduce the "crumpled" effect that drying can produce, though it may not fix it completely. To avoid deforming your book, make sure that its edges are perfectly square as it lays under the weight. Don't let the weight sit on top of it in a way that bends the book or forces the edges of its pages to lay at a diagonal angle.
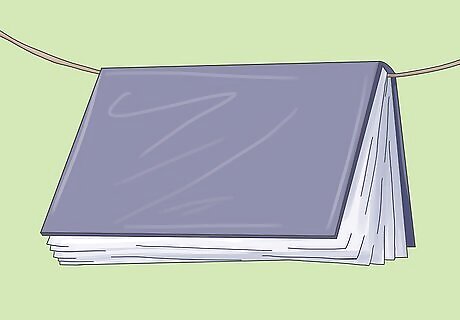
Hang small paperbacks over a fishing line. While the methods above should work well for most books, small, thin paperbacks can be dried with a shortcut that requires a little less effort than the fanned pages method above. If your paperback is very wet, dry it as you normally would according to the methods above until it reaches a point where it's just damp — paper towels inserted into its pages should no longer become saturated with moisture. At this point, string a fishing line, a thin wire, or a piece of string between two vertical surfaces and hang the book over it so that it opens downward. If you're indoors, circulate the air with a fan or use a dehumidifier. Within a few days, the book should be dry. As noted above, if you're hanging your paperback outside (for instance, if you're using an existing clothing line), don't let it stay out overnight. Dew that forms in the morning can dampen the book. Don't hang paperbacks that are very wet. Since moisture makes paper more fragile, the fishing line or wire can tear the book under its own weight if it's too wet.
Drying Books with Glossy Paper
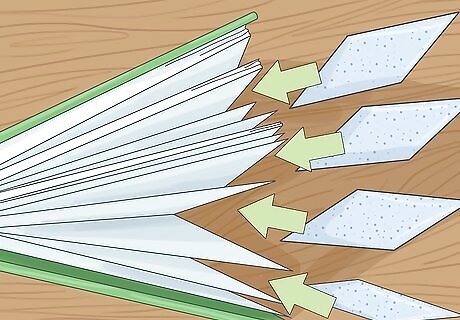
Place separation sheets between every wet page. When books with shiny, glossy pages (like many magazines and art books) become wet, the situation is somewhat more urgent than with ordinary books. Moisture can dissolve the pages' glossy coating, turning it into an adhesive substance that can make the pages stick together permanently if allowed to dry. To prevent this, immediately separate the wet pages from each other by placing sheets of waxed paper in between every single pair of wet pages. Remove and replace the sheets as they become wet. It's important to put a separating sheet between every wet page. If two wet pages are allowed to touch as they dry, they can become stuck together in such a way that even professionals can't repair them. If you don't have waxed paper handy, plain white paper towels will work so long as they are replaced frequently.
When damp, remove sheets and fan out to dry. When the pages of the book dry to a point that they're simply damp and the separating sheets are no longer becoming wet, remove the separating sheets and stand the book upright. If it can't support its own weight, use two bookends or heavy objects to support it. Fan the pages out to a width of no more than 60. Allow the book to dry in this position. As above, you'll want to ensure that the air around the book is circulating if you can by using a fan or opening a window to create a draft. As also noted above, dehumidifiers can be helpful, especially if the air is humid.

Monitor frequently to prevent sticking. Though the pages are now damp, rather than wet, there is still a risk that they may stick together. To avoid this, check on the book frequently as it dries — if you can, once every half hour or so. Thumb through the book's pages carefully. If you notice any beginning to stick together, separate them and allow the book to continue to dry. Eventually, the book should dry out completely. Some minor instances of pages sticking together (especially in the corners) may be unavoidable. As above, if you're using a fan, you won't want the book's pages to flutter in the moving air, as this can lead to a crumpled or ruffled appearance once the book dries.
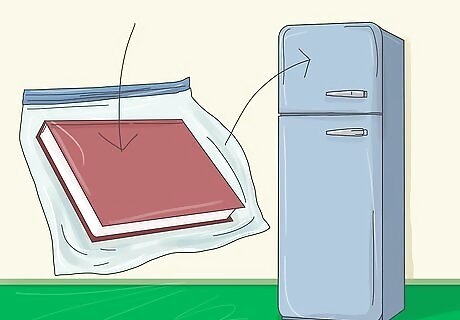
If short on time, freeze the book. If you have a wet book with glossy pages on your hands and you don't have the time or materials to separate the pages at your disposal, don't let the book sit. Instead, place it in a freezer-safe plastic bag, seal the bag, and place it in a freezer (the colder the better). Freezing your book won't do much to dry it, but it will prevent damage, giving you time to get everything you need to be able to dry the book properly. Don't forget to put the book in a freezer bag before putting it in the freezer. Doing this prevents the book from sticking to the inside of the freezer or other objects.
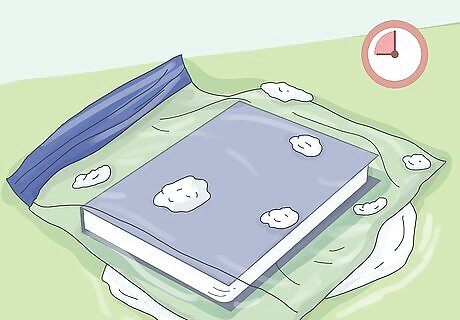
Allow frozen books to thaw gradually. If you're ready to attempt to dry your frozen book, remove it from the freezer but keep it in its bag and set it in a room-temperature location. Allow the book to thaw gradually within its bag — this can take from a few hours up to several days, depending on how large and wet the book is. When the ice is completely melted, remove the book from the bag and dry it as described above. Don't let a thawing book sit in its bag past the point that it thaws. Leaving your book in a damp, confined space encourages mold growth.


Comments
0 comment