
Drawing a Cartoon Apple
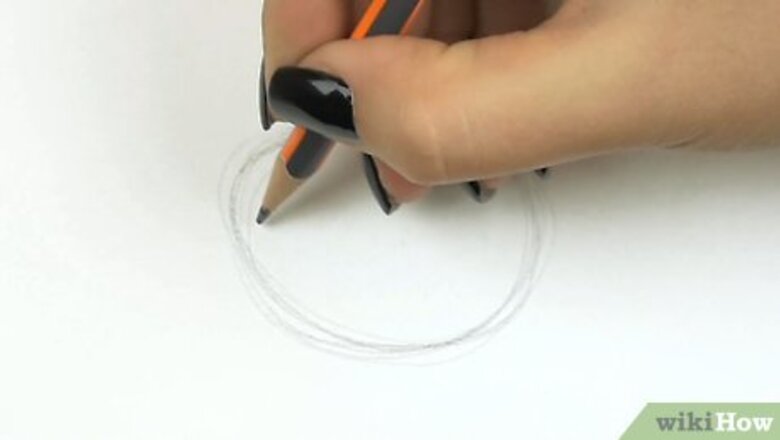
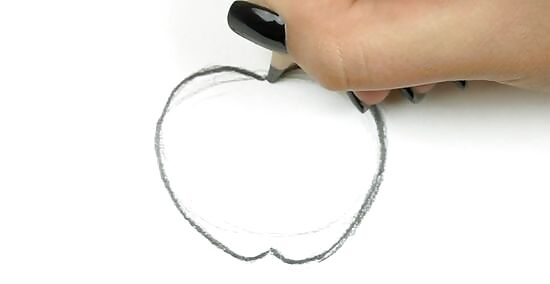
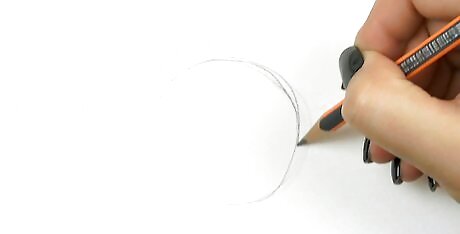
Sketch a circle that's as wide as you want the apple to be. Press lightly with your pencil as you draw so you can go back later and erase unnecessary lines. The circle doesn't need to be perfectly symmetrical, but make it as big as you'd like your cartoon to be. To give your apple a distinct look, you could draw a circle that's shaped more like a tilted oval. You can make a light, rough outline in pencil, going quickly rather than slowly. This helps you search for the overall shape.
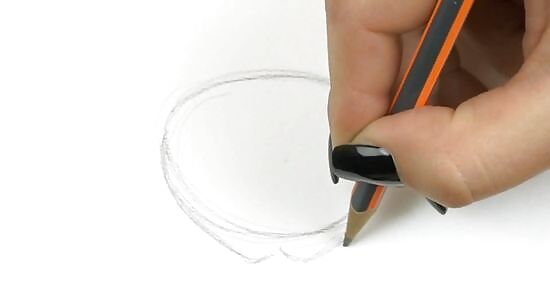
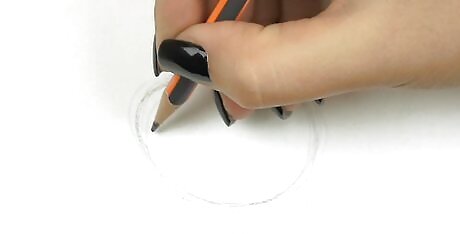
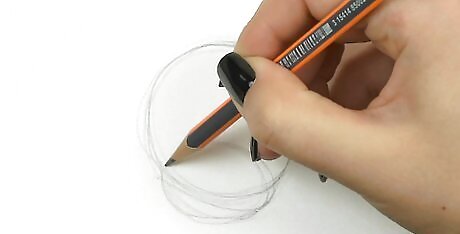
Draw a w-shaped line that connects to the bottom of the circle. Since apples aren't perfectly round, sketch a slightly pointed base for it to sit on. Place your pencil on 1 side of the circle where the line begins curving down. Then, bring your pencil down and up near the center of the circle's bottom. Curve the line back down before bringing it up to meet the side of the apple's circle. You can make the w-shaped line as curved or pointed as you like. Remember that cartoons can exaggerate such features.
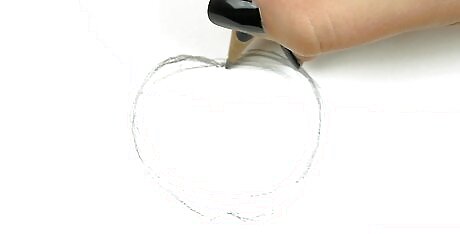
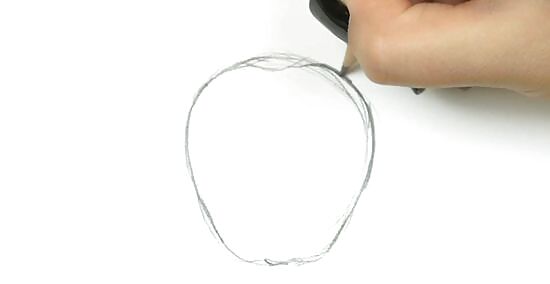
Make an m-shaped line along the top of the circle. To give the apple its classic indent at the top, draw an m-shaped line that overlaps slightly in the center. Make the middle point of the m-shape as deep or shallow as you like. You'll place the stem in the middle of this m-shape.
Draw over the apple to make the outline bold. Once you have the basic outline, take a darker pencil and sketch over the outline so the apple really stands out. Ensure that you don't draw over the unnecessary guidelines.Tip: The apple doesn't have to be perfectly symmetrical. You might want 1 side of the apple to be angled toward the center, for instance. Erase the unnecessary guidelines using a small eraser.
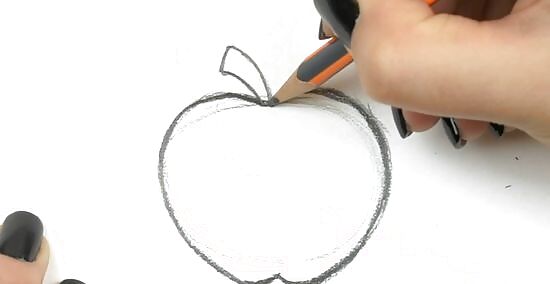
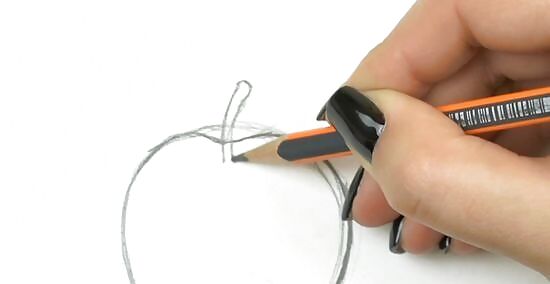
Make 2 parallel lines extend from the top of the apple for a stem. Put your pencil in the middle of the m-shape you made for the apple's top. Draw a small line that curves up and to the right or left. Then, make another parallel line that's almost directly next to the first line. Sketch a tiny oval at the end of these lines to connect them and complete the stem. If you don't want the cartoon apple to have a stem, you can skip this step.
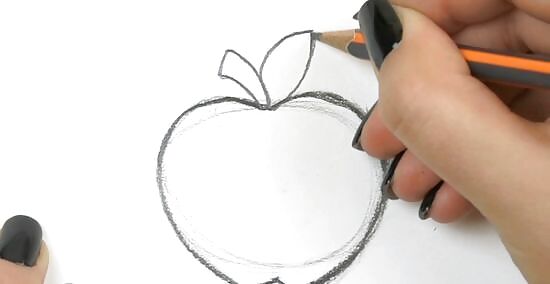
Sketch a pointed oval coming off of the stem to make a leaf. If you'd like your apple to have a little leaf, draw a horizontal oval that extends from the stem. Make both ends pointed so the oval looks like a leaf. To add a little more detail, draw a straight line through the middle of the leaf. You can place the leave near the top, middle, or base of the stem.
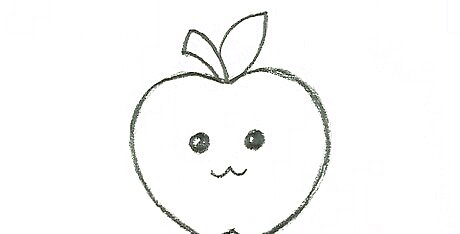
Add 2 circles for eyes and a smile if you want to draw a face. To give your cartoon apple a cute expression, draw 2 circles near the middle of the apple. Make the circles as large as you want the eyes to be and add as much detail as you like. Then, draw a curved line underneath them to make the apple's smile. For example, make large eyes with small circles in the centers for pupils or draw small solid-black eyes for simple eyes.
Sketching a Realistic Apple
Sketch a circle that's as large as you'd like the apple to be. Keep in mind that your circle doesn't need to be perfect since most apples have a unique, irregular shape. Press lightly so you can easily erase guidelines later.
Draw a horizontal oval that overlaps the bottom quarter of the circle. Sketch a horizontal oval that's about two-thirds as long as the circle's width. Draw it so it overlaps the bottom quarter of the circle. You'll use this oval as a guideline for the bottom of the apple where it narrows.
Create an m-shape at the top and an upward indent at the bottom. Press firmly and draw a line that curves in an m-shape across the top of the circle. Keep pressing firmly as you draw down the sides of the circle to connect to the bottom of the oval. Draw across the bottom of the oval and make a slight indent up in the middle. Make the indent come up about a quarter of the way up the oval or less. If you make the indent too pronounced, your apple will look more tooth-shaped.
Sketch 2 narrow parallel lines to make a short stem. Draw a short horizontal line near the top of the apple and make the ends curve up like a smile. Then, draw a short vertical line that's the same size as the indent line, but make it curve away to the right or left. Sketch another parallel line with barely any space in between them. Draw a short line at the top to connect the parallel lines of the stem. You can make your stem as short or long as you like.
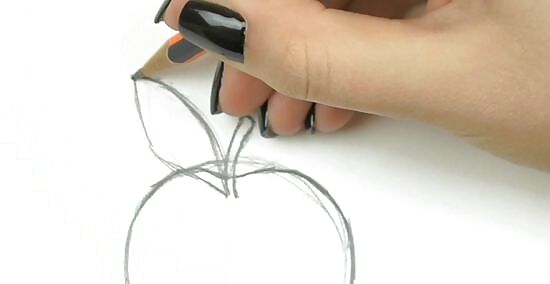
Draw an oval-shaped leaf attached to the stem. Sketch an oval that's slightly longer than the stem and position it near the top, middle, or base of the stem. Make the ends of the oval pointed and draw a straight line through the center of the oval to give the leaf a realistic look. If you don't want your apple to have a leaf, skip this step.
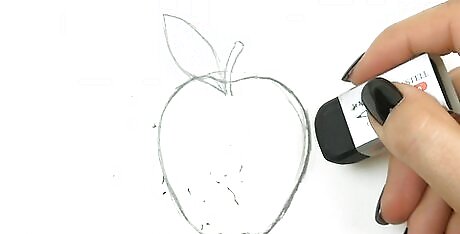
Erase unnecessary guidelines from the middle of the apple. Use the eraser on the back of your pencil so you can erase just the visible guidelines and not your apple outline. Carefully erase the guidelines in the center of the apple as well as the visible ones at the top and bottom of the apple. Ensure that you're using a clean eraser or you may accidentally smear the graphite.
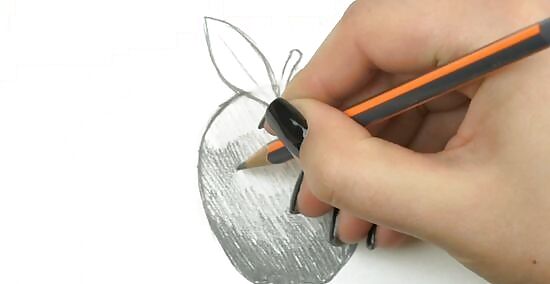
Use cross-hatching and shading to make your apple appear 3-dimensional. Shade across the entire apple in 1 direction. Imagine where the light is hitting the apple and add more shading to parts of the apple that are hidden in shadow, such as near the bottom. To make the apple look realistic, cross-hatch by shading in these darker areas in the opposite direction.Tip: Remember to shade in the stem and leaf if you drew one. Keep in mind that 1 side of the leaf will be darker than the other because of the way the light falls on it. For example, if the light is hitting the top left portion of the apple, add lots of shading to the bottom right side of the apple and leaf as well as the indent at the top of the apple.
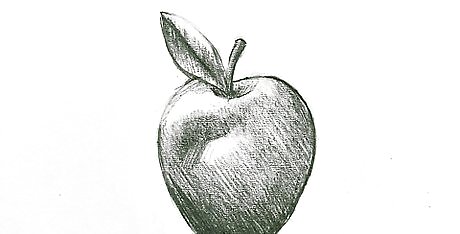
Erase areas near the top of the apple that you'd like to highlight. Take a rubber eraser or use the clean eraser on the end of your pencil and gently erase a circular space near the top of the apple on 1 side. Imagine where the light's hitting the apple so you know exactly where to erase. Go back and use your finger or a blending stump to smudge the edges of the highlighted space so they realistically blur into the rest of the apple. Dab at any overly shaded areas with a kneaded eraser to pick up some of the excess graphite.


Comments
0 comment