
views
Building a Shelter Out of Tree Branches

Look around in your immediate area for the best spot to build a shelter. If you’re in the woods, find a decently flat area with a tree that splits its trunk about 3 to 5 feet (0.91 to 1.52 m) off the ground. Or, if you’re in a coniferous area with trees that don't typically split their trunks, stick a sturdy "Y" shaped branch into the ground to simulate a tree with a split trunk. Ideally, try to find 2 trees with low split trunks that are within 10 feet (3.0 m) of each other. If you can’t find this type of set-up, just look for 1 tree in a flat area. Build your shelter near a strong, stable face of rock if you can. This can reduce your wind exposure as well as reflect the warmth of a fire back into your shelter. Be sure to build on the flattest ground you can find, avoiding the tops of hills, bottoms of valleys, and any other low points or flood zones where colder air will settle.
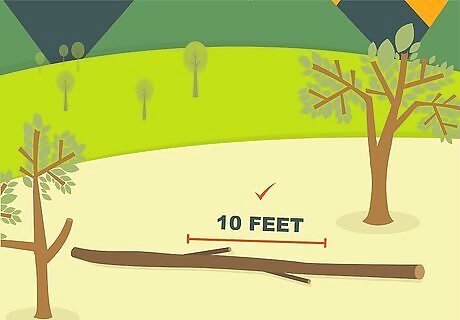
Find a thick, straight tree branch that’s about 10 feet (3.0 m) long. Make sure the branch is 3 to 6 inches (7.6 to 15.2 cm) thick; otherwise, it probably won’t be sturdy enough to support your shelter. The straighter the branch, the better. If you have a serrated survival knife that doubles as a wood saw, you can also saw down any 10 ft (3.0 m) branch that you find to make it straight enough for your shelter.
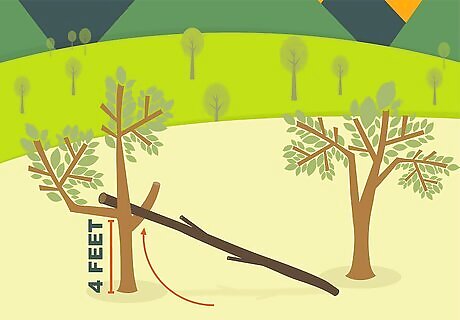
Place 1 end of this branch in the “V” of a tree. The “V” is the part of the tree where the trunk first splits as it moves upward. Place the end of the branch in a “V” that’s about 3 to 5 feet (0.91 to 1.52 m) off the ground. If there isn’t a tree with this low of a split trunk near you, you can also prop a long stick that ends in a “V” against a tree, then place the end of the branch in this “V.” If you have rope with you or you have access to nearby vines, tie the branch to the tree to make it more secure. You can also use this tying material to the branch to the side of a tree if there isn’t a tree with a split trunk nearby. However, make sure you use a very strong tying material if you do this.

Lay the second end of the branch against another tree or on the ground. Place this end of the branch in the “V” of a nearby tree to make a horizontal frame for your shelter. If you leave the end of the branch on the ground, your shelter will have an A-frame, which will make it slightly smaller.
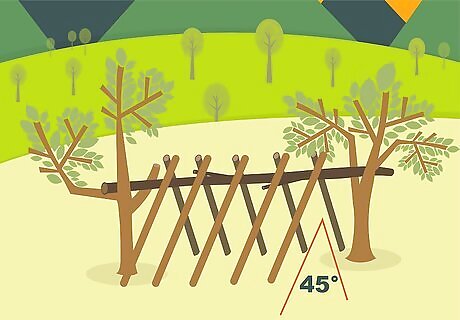
Lean several long, thick branches against this main branch. Use relatively thin branches, about 1 to 2 inches (2.5 to 5.1 cm) in diameter. Lean these branches along both sides of the branch at about a 45- to 50-degree angle so that they make “ribs” for your shelter. Avoid placing the branches at a smaller angle than 45 degrees, since this would make your shelter too big. A small shelter will do a better job of keeping you warm than a large shelter. Yours should be small enough for you to lean on your side while you’re lying down. Place smaller sticks along the sides of your main branch as well to fill in the space between the thicker “ribs.” These smaller sticks should be less than or equal to 1 inch (2.5 cm) in diameter.
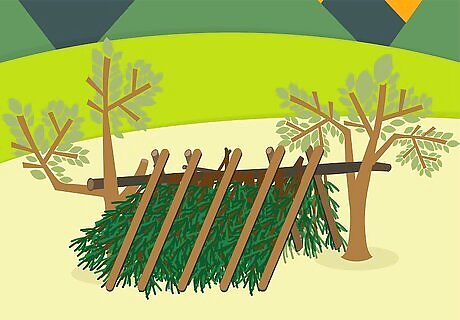
Place insulation over these branches to protect you from the elements. Use a tarp if you have one, but you can also use dead leaves, moss, and other forest debris as your insulation. Put some more small branches over this insulation to help keep it in place. Other things you can use as insulation include thin twigs, leaves, brush, or even mud. Use these types of materials in whatever combination is available to you. Add all of this to the frame of the shelter in order of decreasing size until you can't find any holes you can fit your fist through. Add as many layers of insulation as time will allow. This will increase heat retention and weather resistance.
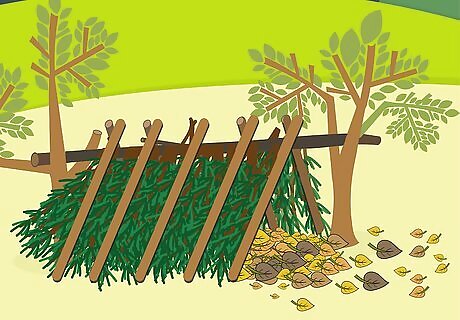
Lay additional insulation on the ground to use as a bed. Gather extra dead leaves, pine boughs or whatever other insulation materials you may have left over and spread them over the floor of your shelter. This will help stop the cold ground from sucking all of your precious body heat away. In a pinch, you can even use a pile of branches as a bed. Although this probably won’t be very comfortable, it will do a better job of keeping you warm than the ground will.

Test your shelter’s stability by gently pushing down on the branches. Do this very carefully! You want to check the structure's safety by finding a spot where it feels like it might start to give way, but you don't want to actually put enough pressure for it to collapse. Reinforce any weak spots with a couple of sticks tied together into a “Y” shape and propped up against the weak spot.
Making a Snow Shelter
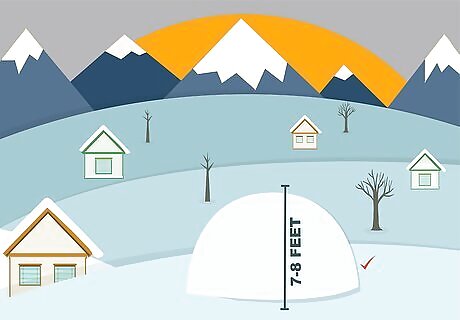
Build a pile of snow about 7 to 8 feet (2.1 to 2.4 m) high. Pile the snow in a rounded shape to make your eventual shelter less likely to collapse. Poke several 2 ft (0.61 m) long sticks through the top of the dome once you finish. These will serve as guide sticks when you eventually hollow out the inside. If possible, mix snow of different temperatures (i.e., frozen snow with partially melted snow) to give your shelter a harder surface.

Poke several “guide sticks” through the top and sides of the mound. You’ll use these sticks to keep the sides of your shelter equally thick when you go to hollow out the inside of the mound. Use sticks that are each 2 feet (0.61 m) long to give the sides of your shelter the optimal thickness. Poke these sticks throughout the entire outside of your mound, keeping them about 1 to 2 feet (0.30 to 0.61 m) apart from each other.
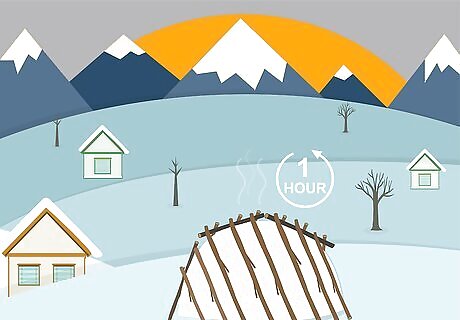
Give the snow about an hour to freeze, if you can. The snow will have partially melted when you piled it. If you give it time to freeze, your shelter will be much sturdier. If your situation is more urgent, try to allow at least 15 minutes for the snow to partially freeze. If your situation isn’t urgent, allowing your snow up to 90 minutes to freeze will make your shelter even stronger.

Dig a small entrance to your mound on the downhill side. Use a snow shovel to simply dig a small hole in the side of the mound that you’ll eventually use to enter and exit your shelter. Placing this entrance on the downhill side of the mound will make it less likely for the entrance to be sealed if more snow is piled in front of it (such as in an avalanche or a snowstorm).
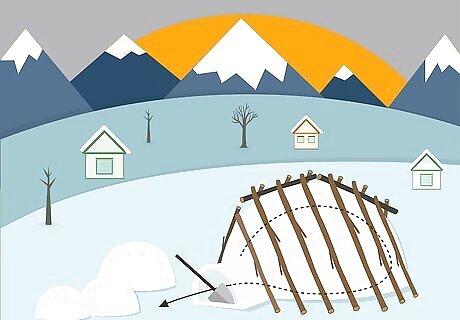
Hollow out the center of the mound to create a small enclosure. Starting from your entrance hole, continue digging into the center of the mound and begin hollowing out the inside by removing snow in each direction. Stop removing snow in a particular direction once you run into the 2 ft (0.61 m) guide stick you poked through the top of the mound earlier. This will ensure that the walls of your shelter are 2 feet (0.61 m) thick, which is the ideal thickness for it. If you didn’t use these guide sticks before, avoid making your walls so thin that they’re translucent. If you can see sunlight shining through, they’re too thin.

Make a fist-sized hole in the mound’s ceiling to provide ventilation. Use a thin trowel or ice pick, if you have one, to create this hole without making it too wide. Try to place this hole in the center of the ceiling to best maintain the integrity of the structure.
Creating a Shelter in a Sunny Climate
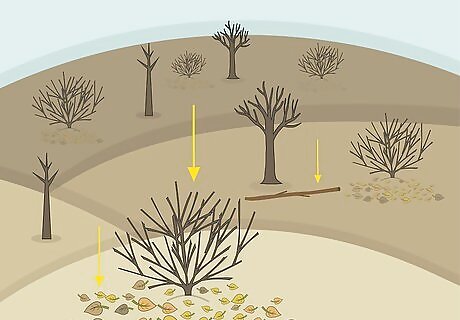
Look for dry shrubbery or branches you can use to build a shelter. Look for branches that are about 4 to 5 feet (1.2 to 1.5 m) tall, as this will make your shelter relatively tall but still easy to build. If you’re in an area with sparse vegetation, like a desert, you may need to resort to using shrubs and branches that are only 2 to 3 feet (0.61 to 0.91 m) tall. Whatever branches you use, make sure they’re about 1 to 2 inches (2.5 to 5.1 cm) thick to make it less likely for them to snap. Don’t use branches that are shorter than 1.5 feet (0.46 m). This will make your shelter too short to be effective.
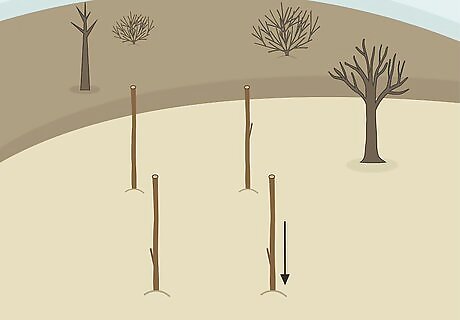
Drive 4 branches into the ground in a square formation to serve as posts. Use your hands or a rock to drive them into the ground if you don’t have a better tool on hand. If you can’t drive the branches into the ground with your hands or a rock, dig a hole about 1 foot (0.30 m) deep, place the branch vertically in the hole, and replace the soil that you dug out. Place these branches about 5 feet (1.5 m) apart from each other. You can also use 3 branches to make a triangle formation, if you’re in an area with sparse vegetation and can’t find 4 branches. Be careful if you try to hammer the branches into the ground with a rock. You don’t want to inadvertently break them.
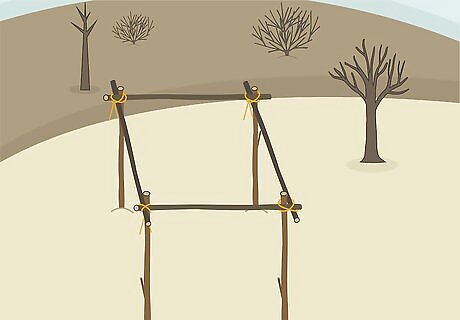
Tie lightweight branches in between these branches, if possible. Use parachute cord, if you brought some with you, to tie a thin 5 ft (1.5 m) branch in between each pair of vertical branches. This will add stability to your shelter and make it less likely for your roof to fall down. If you don’t have any tying material with you, you can also use vines or long, thick blades of grass as cordage. Avoid using branches that are thicker than about 1 inch (2.5 cm) in diameter. Anything bigger than this will probably be too heavy.
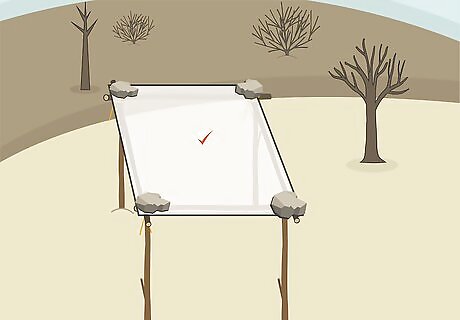
Lay your tarp across the top of this structure. Place some thin, flat rocks on the corners of the tarp to keep it from being blown away or falling off of your shelter. If you don’t have a tarp, you can also use any long pieces of foliage to block out the sun.


Comments
0 comment