
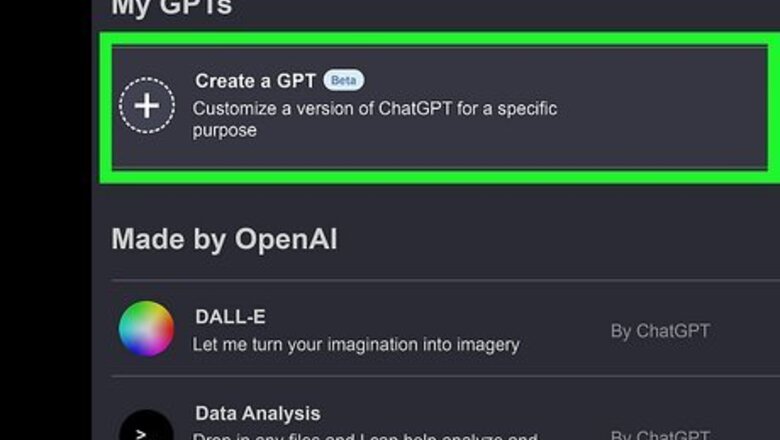
- To create a GPT, go to https://chat.openai.com/gpts/editor, log in with your ChatGPT Plus or Enterprise account, and click "Create a GPT."
- You can train your GPT with custom instructions, upload training data, fine-tune its responses, and more.
- Once created, you can share your GPT publicly, keep it private, or deploy an internal-only GPT for your business.
How to Create a GPT

Go to https://chat.openai.com/gpts/editor and click Create GPT. If you're not signed in to your OpenAI account, you'll be prompted to do so. You will need to subscribe to ChatGPT Plus or have an Enterprise account to create a GPT.

Describe your ideal GPT to the chatbot. Just as you would when prompting ChatGPT, tell the GPT Builder the type of GPT you'd like to make. "Create a chatbot that helps teenagers with math homework." "Create a GPT that provides technical support to my less tech-savvy parents." "Build a bot that provides contact information for the people in my organization."
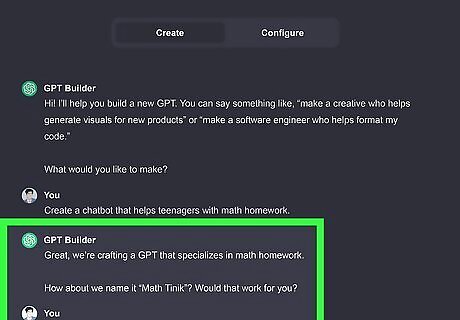
Name your GPT. GPT Builder will suggest a name for your bot. If you like the name suggestion, you can confirm by saying "yes" (or similar). If not, just let the bot know which name you'd like to use. Once a name is selected, a preview will appear in the right panel.
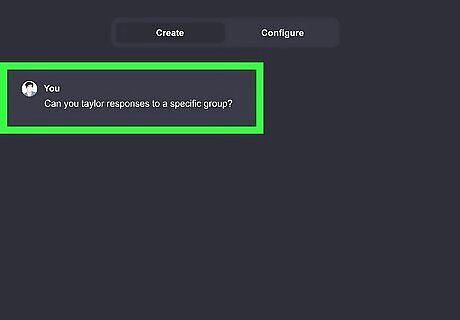
Enter some instructions. Once your GPT chatbot has a name, GPT Builder will ask you some questions to fine-tune its behavior. You'll have a chance to upload documents and give more precise instructions later, but for now, continue interacting with GPT Builder in the left panel as prompted. As you keep adjusting the instructions, issue prompts into the Preview panel to make sure your GPT answers how it should. For example, if your GPT is aimed at youth and the bot's responses aren't age-appropriate, you can tell GPT Builder to tailor responses to a specific age group. You may ask the bot to be less wordy, sound more professional, change its tone, and more.
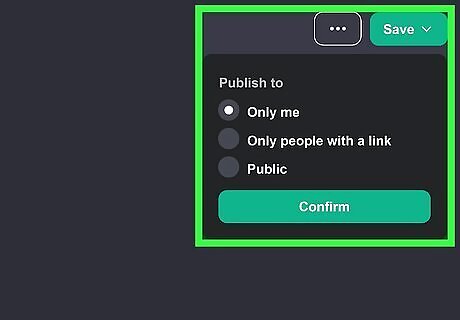
Click Save to save your changes. You'll be able to choose whether to publish your GPT to Only me, Anyone at (your enterprise), Only people with a link, or make it public. Your GPT is now ready to be configured. To edit your GPT in the future, return to the GPT Builder and click Edit next to your GPT. If you decide to delete your GPT, return to the GPT Builder, click the three horizontal dots at the top-right, and select Delete GPT.
How to Configure Your GPT

Click the Configure tab to fine-tune your GPT. On this tab, you can provide more specific instructions for your GPT. If you want to edit the GPT's name and description, you can do so at the top of this tab. You can also click the profile photo for your GPT to select a new one from your computer or use DALL-E to generate one.

Add custom instructions. In the Instructions area, you'll see some sample instructions generated by GPT Builder. These instructions should give you an idea of how to format your instructions. You can add, remove, or edit instructions to fine-tune your GPT.
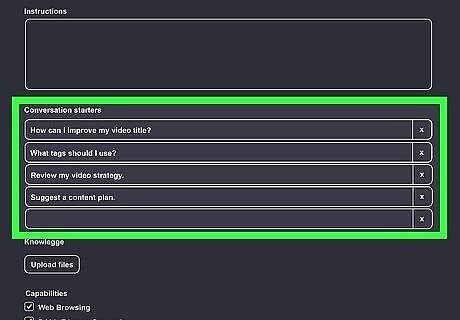
Add some conversation starters. GPT Builder will suggest four conversation starters, which are example prompts your GPT will display to users. You can click any of the example prompts to edit them and add additional prompts as needed.
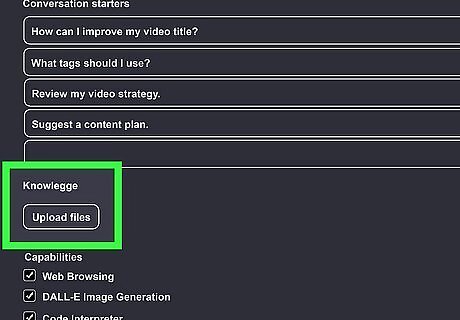
Train your GPT. If your GPT needs specific instructions to answer questions, you can upload files that contain training data. Click Upload files under "Knowledge" to upload a document, spreadsheet, CSV, PPT, or PDF the bot can refer to. Each GPT can have up to 10 uploaded files, each no larger than 512 MB. After uploading knowledge data, play around with prompting your GPT in the Preview panel to make sure it can query your data. If it's not using your supplied data correctly, you can add additional instructions to the "Instructions" panel as needed.

Choose your GPT's capabilities. In the "Capabilities" section, you can choose whether your GPT can access Web Browsing to find answers to questions, use DALL-E Image Generation to create images, and/or use the Code Interpreter to help users write and test code. If your GPT needs access to a third-party API to retrieve specific data, click the Actions tab to enter your Open API schema and set up authentication.

Click Update to save your changes. To share your GPT's URL, click its name at the top-right corner and select Copy Link. The GPT's you create with GPT Builder will also appear in the left panel of ChatGPT. You can edit your custom GPT anytime by returning to the GPT Builder and selecting Edit next to the GPT.


Comments
0 comment