
Enabling Apple Cash

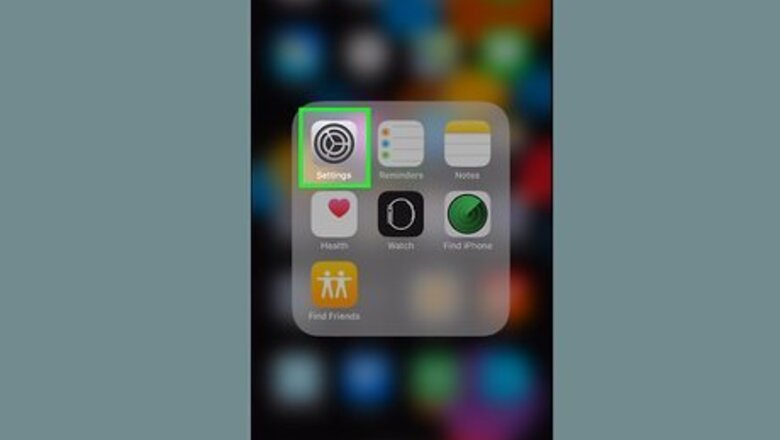
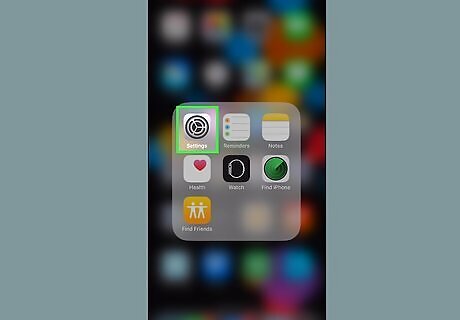
Open your iPhone or iPad's Settings iPhone Settings App Icon. You'll find it on the home screen.
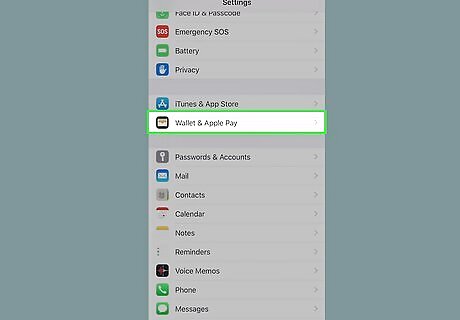
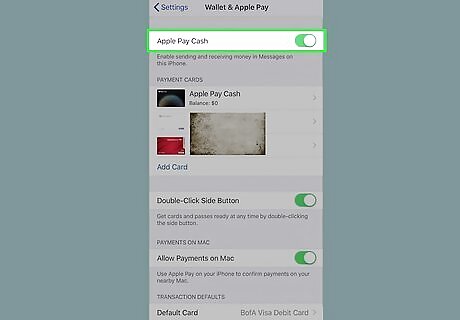
Scroll down and tap Wallet & Apple Pay. It's the option with a multicolored wallet icon. This opens your Apple Pay settings.

Slide the "Apple Cash" switch to On iPhone Switch On Icon. You should now see a card called "Apple Pay Cash" under the "PAYMENT CARDS" header.
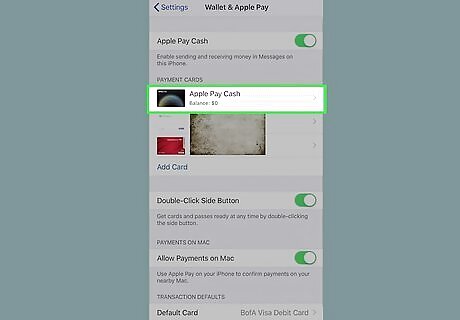
Tap Apple Cash under "PAYMENT CARDS." When you receive money from someone else through Apple Pay, the amount is applied to your Apple Cash payment card. You can then transfer that money into your bank account or use it to make future payments with Apple Cash.
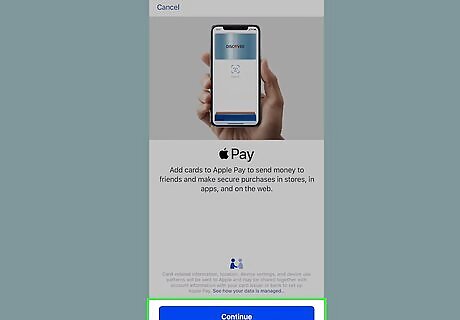
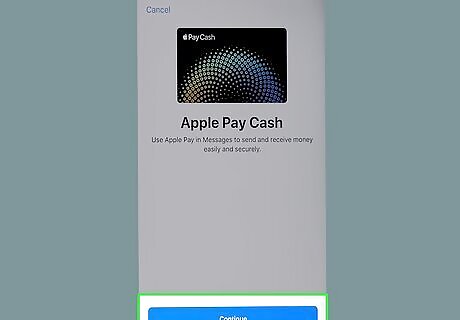
Tap the blue Continue button. It's at the bottom of the screen.
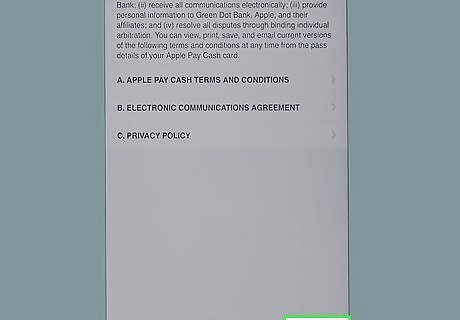
Review the terms and tap Agree. Tapping Agree confirms that you've read, understood, and agree to the rules of Apple Cash. After a few moments, you'll see a screen that confirms Apple Cash is ready to use.
Tap Continue on the confirmation screen. Now that your Apple Cash card is set up, you can receive payments from others. Any incoming payments will automatically be applied to the balance of your Apple Cash card.
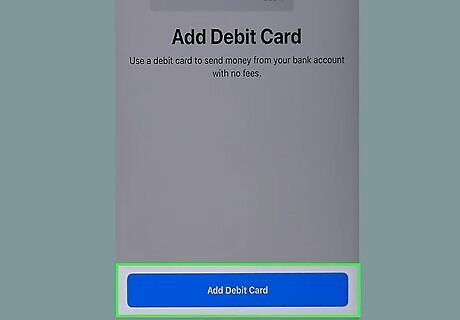
Add or confirm a debit card. Apple Cash automatically uses your debit card to send money. If you haven't already added a debit card to your Apple Wallet, tap the blue Add Card button, and then follow the on-screen instructions to input your information. Otherwise, follow the on-screen instructions to confirm your current debit card. If you want to add a card later, tap Add Card Later in Wallet to continue. For more information about other ways to make payments from your phone or tablet, see How to Use Apple Pay.

Set up your incoming payment preferences. Incoming payments will automatically be applied to your Apple Cash card upon receipt. If you'd rather approve incoming payments rather than accept them automatically, follow these steps: Open your Wallet & Apple Pay settings. Tap your Apple Cash card. Tap Manually Accept Payments if you would like to approve incoming payments.
Adding Money to Apple Cash

Open your iPhone or iPad's Settings iPhone Settings App Icon. You'll find it on the home screen. Although Apple Cash will automatically draw money from your bank account, you also have the option to add money in advance. This method will teach you how to apply funds from your debit card to your Apple Cash virtual card.

Scroll down and tap Wallet & Apple Pay. It's the option with a multicolored wallet icon. This opens your Apple Pay settings.
Tap Apple Cash under "PAYMENT CARDS." This displays information about your Apple Cash payment card, which is a virtual "card" you can use to send and receive money. The money you receive is automatically added to the card.
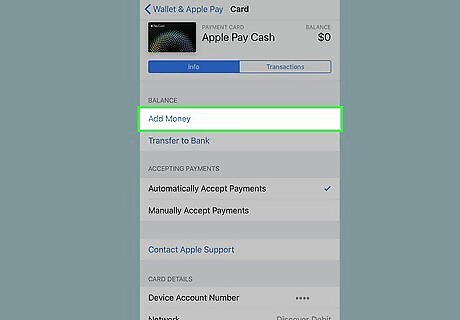
Tap Add Money. It's the gray button with a dollar ($) sign inside.
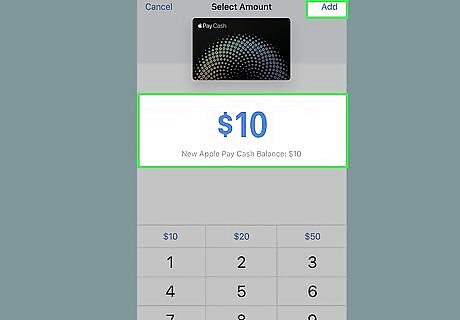
Enter the amount and tap Add. You can enter any amount $10 or greater.
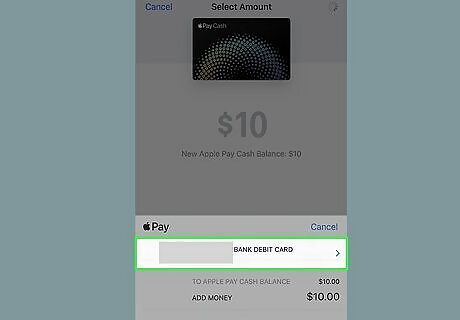
Confirm your payment card. If the card that appears is the one you want to use, follow the on-screen instructions to confirm. If not, tap the right-pointing arrow next to the default card, select a different card, and then follow the on-screen instructions to confirm.
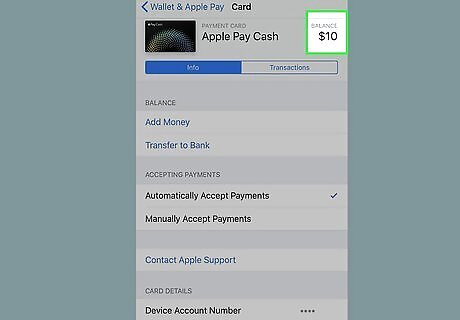
Check your balance. You can always find your Apple Cash balance by opening your Apple Cash card in Wallet & Apple Pay settings. The balance appears next to "Balance" about halfway down the first screen.
Sending and Requesting Money
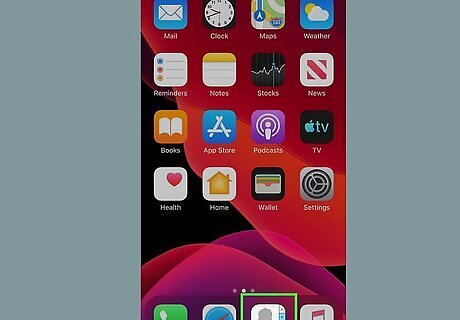
Open the Contacts app. It's the gray icon with colored tabs on the right side. You'll usually find it on the home screen, but it may be in a folder. If you have added money to Apple Cash, it will be used to pay your recipient. If it's not enough to cover the cost, the remaining amount will come from your debit card.
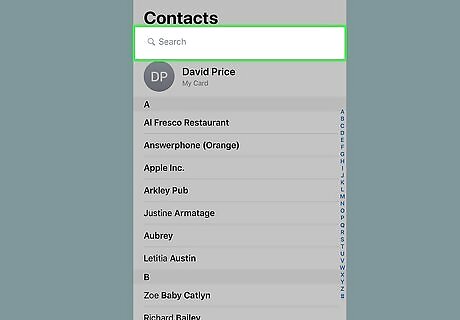
Tap the contact you want to pay or request money from. This opens the contact's info.
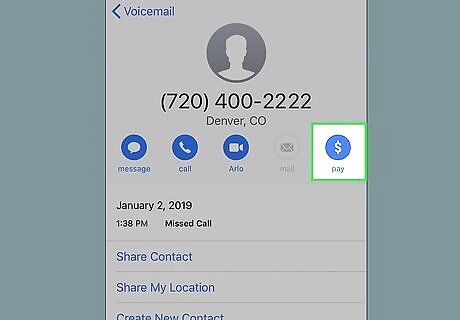
Tap the blue Pay icon. It's the dollar sign ($) in a blue circle at the end of the top row of icons. This opens a new conversation with the selected person. If you have more than one piece of contact information (e.g., phone number, email address) for this person, you'll be prompted to select one now. Select the phone number to send a text, or the email address to send an email.
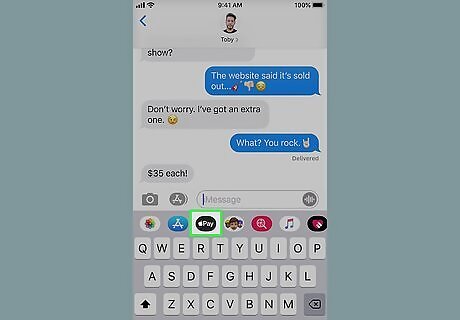
Tap the Apple Pay iPhone iMessage Apple Pay icon. It's the black oval with a white Apple and the word "Pay" inside. This opens the payment panel at the bottom of the screen.
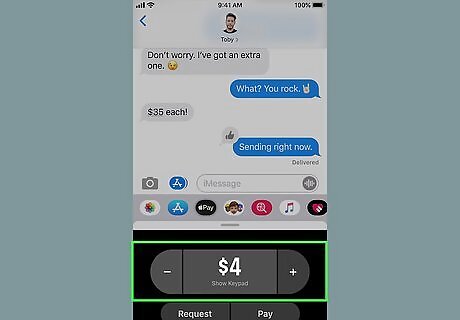
Enter the amount. Use the + and - symbols to increase or decrease the value. If you'd rather enter an amount with the keypad, tap Show Keypad below the amount.
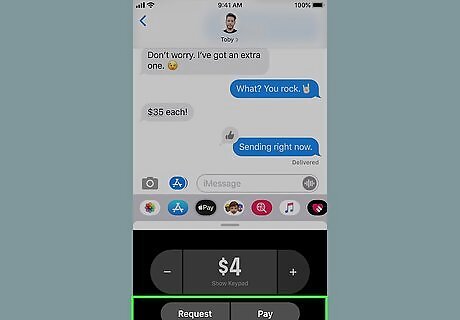
Tap Pay or Request. It's at the bottom-right corner of the screen. A virtual payment or request card will appear in the typing area of your conversation. If you'd like to include a message with your payment, you can type it now.
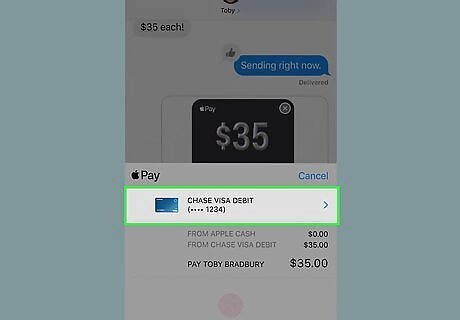
Tap the upward-pointing arrow next to the card. You will be prompted to confirm your identity.
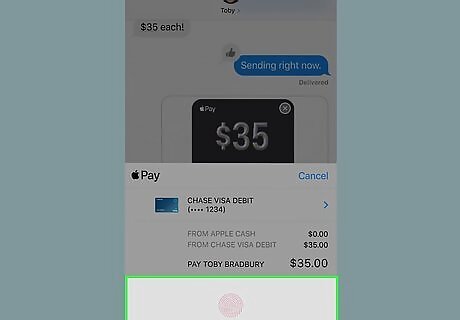
Confirm your identity with Face ID, Touch ID, or a passcode. The option required to confirm your identity will vary depending on your phone or tablet. The payment or payment request will be sent immediately. If you made a payment: The money will be debited from your Apple Cash card or debit card immediately. If you made a request: If the person sends money in response to your request, the amount will be applied to your Apple Cash card. As soon as you receive the money, you can either transfer it to your bank account or use it to make other payments.
Transferring Cash to your Bank Account
Open your iPhone or iPad's Settings iPhone Settings App Icon. You'll find it on the home screen.

Scroll down and tap Wallet & Apple Pay. It's the option with a multicolored wallet icon. This opens your Apple Pay settings.

Tap Apple Cash under "PAYMENT CARDS." You'll see your total balance next to "Balance."
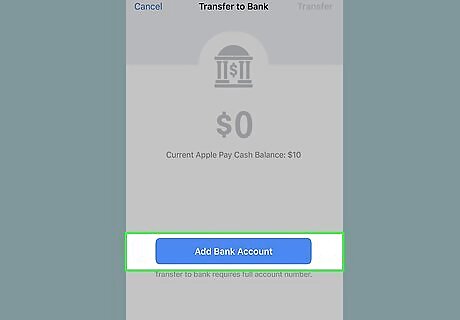
Link your bank account with Apple Cash. If you want to move the money you've received to your bank account, you'll need to link that bank account first. Here's how: Scroll down and tap Bank Account. If you've already added a bank account to your Apple Wallet, you'll see it as an option here. To link it to Apple Cash, just tap it and then skip to the next step. Otherwise, tap Add Bank Account to continue. Enter the 9-digit routing number from your check or bank statement. Enter your 4-17 digit account number from your check or bank statement. Tap Next at the top-right corner of the screen. Follow the on-screen instructions to confirm. Return to the Apple Cash card payment card screen.
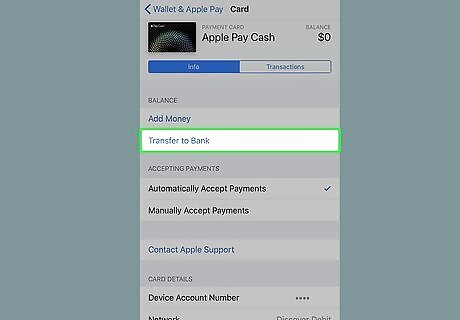
Tap Transfer to Bank. It's the blue arrow icon above the balance.
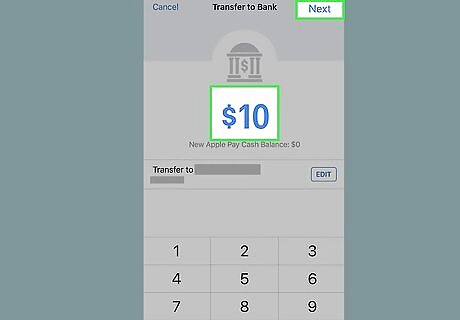
Enter the amount you want to transfer and tap Next. You can transfer your entire balance or just a portion if you wish. The minimum transfer amount is $1, and the maximum is $10,000.
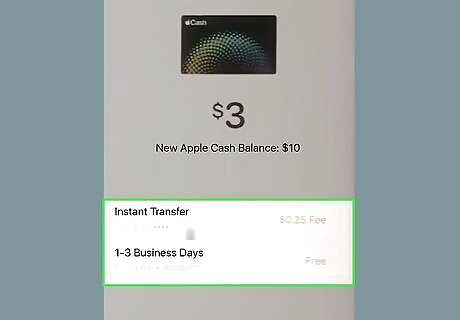
Select a transfer method. You have two options for transferring money to your bank account: Tap Instant Transfer to have the money reach your bank account in under thirty minutes. This option uses your debit card to transfer the money and charges you a 1% fee (with a minimum of $.25 and a maximum of $10). Tap 1-3 Business Days to use the totally-free option. Although it takes a little longer for the transfer to go through, there will never be any associated fees.

Select your account. If you're doing an Instant Transfer, select the debit card associated with your bank account. If you're doing a 1-3 Business Day transfer, select your bank account.
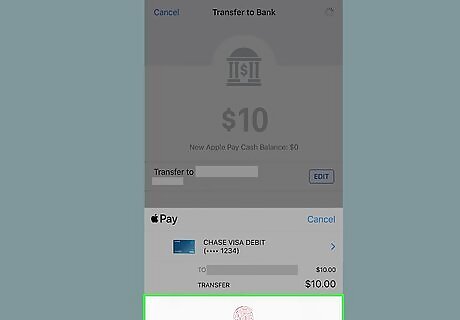
Follow the on-screen instructions to confirm the transfer. Depending on your security settings, you'll have to use Face ID, Touch ID, or a passcode.


Comments
0 comment