views
Clinch Knot
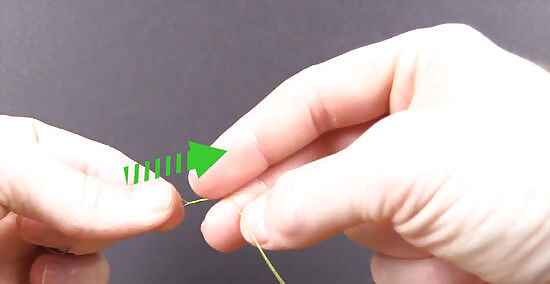
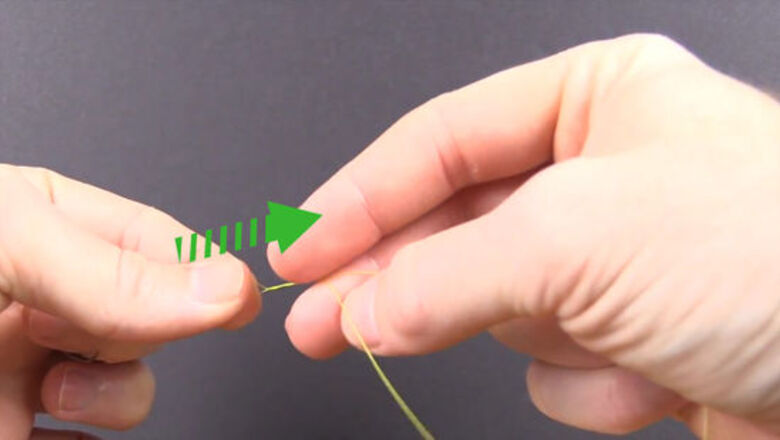
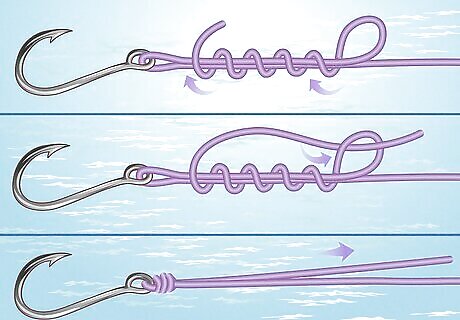
Choose a clinch knot as your go-to fishing knot. Thread the end of a fishing line through the eye of the hook. Leave 4 in (10 cm) of tag end (excess line) on the right and leave a gap above the hook eye. Use this thread to make 5 to 7 wraps around the line. Clinch knots are a popular choice for fishermen. It’s known to be reliable and quick to tie, which means more fishing time!
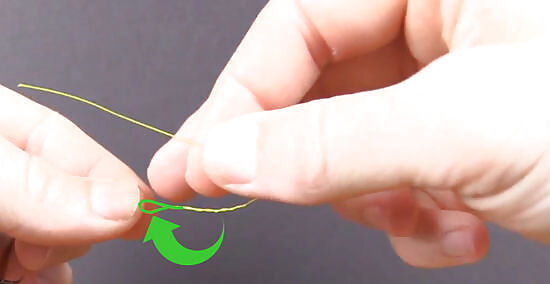
Thread the tag end through the gap to make the knot. Thread the tag end through the gap above the hook eye made in Step 1. Pull the knot tight. A little moisture may help. Wet it in your mouth to provide some lubrication. Clip off the excess line above the knot, leaving ⁄8 in (0.3 cm) of line.
Orvis Knot
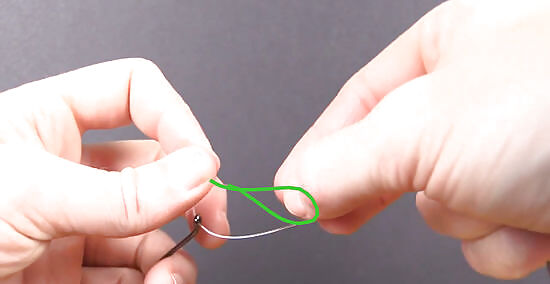
Use the Orvis knot as a strong and easy alternative to the clinch knot. Pass a line through the hook eye from below. Twist the tag end behind the main line to form a loop. Go behind the loop and forward with the tag end to create a figure eight shape.
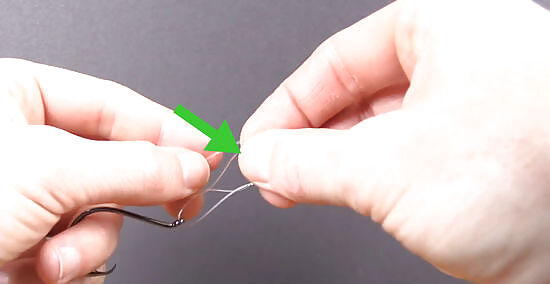
Thread the tag end two times and finish the knot. Feed the tag end through the top of the second loop and repeat this process twice. Then, lubricate the line with your mouth or a dab of water. Pull the tag end tight to close the knot and trim.
Palomar Knot
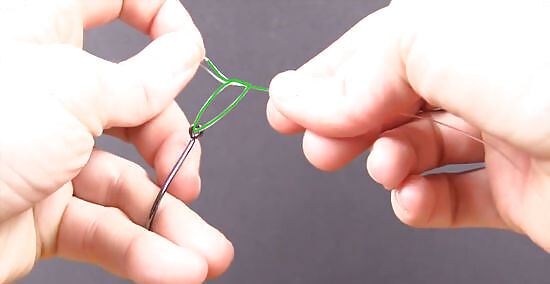
Utilize the Palomar knot with braided lines for a strong knot. Double 6 in (15 cm) of the line and pass the doubled line through the eye of the hook. Create a simple overhand knot with the doubled line, ensuring the hook is hanging at the bottom of it.
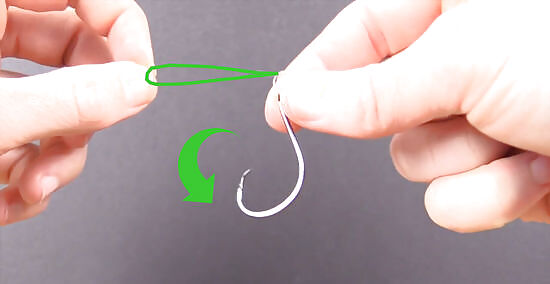
Slide the doubled line under the hook and tighten it to secure the knot. Above the eye of the hook, slide the doubled line under the hook and back up. Tighten the knot by pulling on the standing lines and the tag end. Clip off the tag end once the knot is secured.
Davy Knot
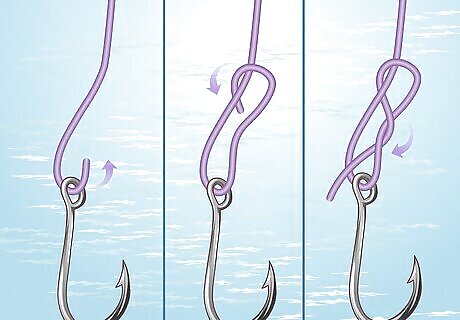
Opt for the Davy knot for small flies. Hold the hook in your left hand in an upright position. Feed the line down through the eye. Bring the tag end overtop and around the running line. Then back and over top of itself. Bring the tag's tip up through the loop and hold it between your thumb and index finger. It should look like a modified figure eight. The Davy knot is commonly used among fly fishermen who want a quick, simple, unobtrusive knot to tie. It'll get you back fishing if you break a line.
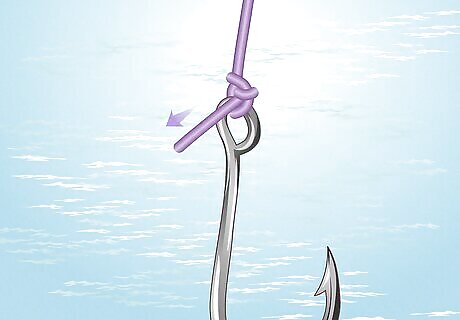
Draw the knot tight by pulling on the end of the line. Instead of pointing the tag end rearward and under the eye, point it outward at a 90-degree angle. Adjust the line as you pull the line closed to secure it.
Baja Knot
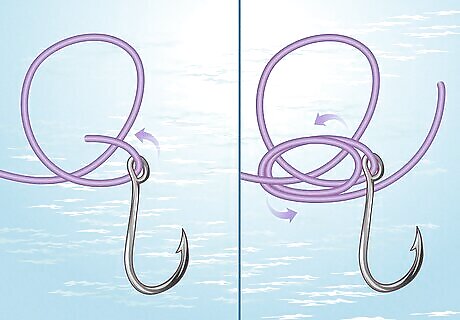
Use a Baja knot for heavier mono-lines. Place one end of the line right over the left to form a loop. On the tag end, slip the hook through. Circle the tag end around the loop and your thumb once. Then, slip the thread back through between the thumb and forefinger, pinching it with your fingers to keep it in place. Baja knots may also be called the Perfection or Mexican loop.
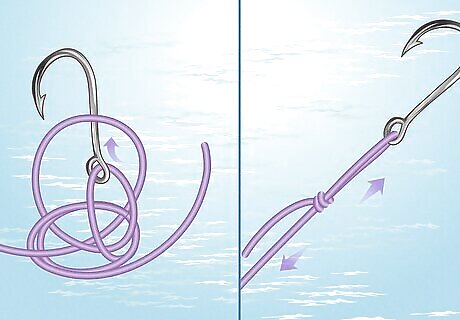
Slide the hook through the loop and tighten it. Bring the hook through the loop. Pull down on your running line to make the loop smaller. Then, pull the line hard to tighten the whole ring. If necessary, secure the hook with pliers. A baja hook allows the bait to swing freely without worrying about losing it.
Pitzen Knot
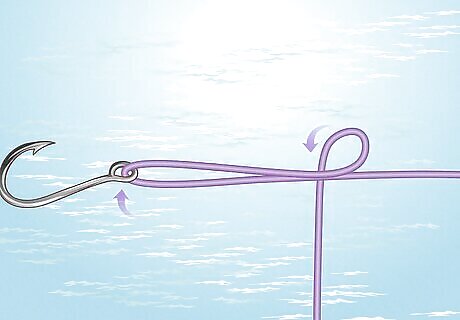
Apply the Pitzen knot for its incredible strength. Thread a line through the eye of the hook. Loop the tagline back under the standing line. Using your index finger as a stopper, hook the line around your finger. The Pitzen knot is also called the Eugene Bend or 16-20 Knot. It can hold up to 95% of the line's breaking strength, so use it for catching bigger fish. While it may be tricky to tie, it's worth it. The name 16-20 Knot refers to a successful catch of a salmon that weighed sixteen pounds using this knot.
Wrap the line 4 times before tightening the knot. Wrap the line back around the paralleled lines four times. Pass the tag end back through the small loop created by your finger. Tighten the knot by sliding it down towards the eye of the book with your fingers. Wet the line to make tightening the knot easier.
Uni Knot
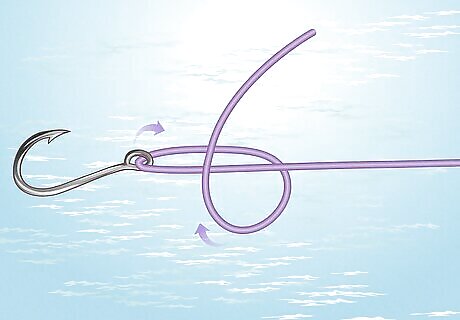
Use a Uni knot for fine tippets and small flies or to join lines. Slide a line through the hook. Lay approximately 6 in (15 cm) of tag end over the main line. Pinch the line right above the hook eye. Curve the tag end around to form a loop before the doubled lines. Leave the tag end pointing upward.
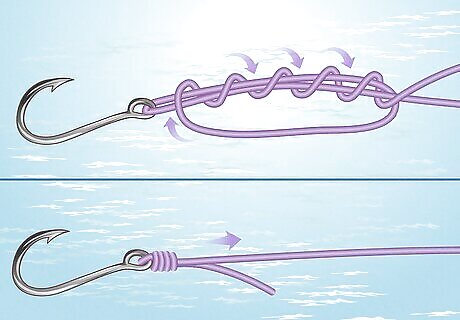
Wrap the tag end around the doubled lines and pull tight. Twist the tag end around the doubled lines going through the loops in each pass. Wrap it five times. Ensure the wraps go left to right and towards the tag end. Then, pull the tag end to cinch the ends down. Continue pulling until the knot slides the top of the hook.
Snell Knot
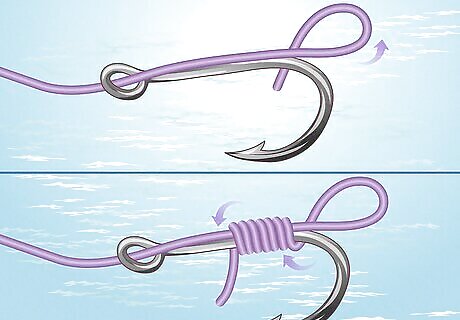
Opt for a Snell knot to attach a fishing line to the shank. Pass a line through the eye of the hook. Feed out a nice section and fold it down on itself to form a little loop at the end. With your fingers, pinch the loop off. Then, with the tag end, wrap the shank and the line down towards the eye. It usually takes 6 to 10 wraps.
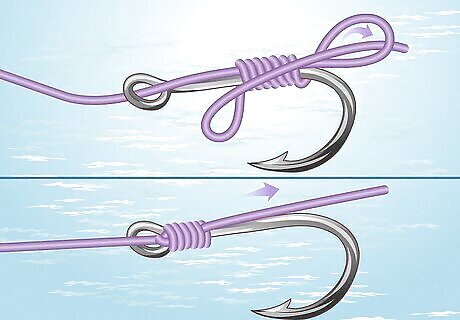
Feed the tag end through the loop and tighten it to secure it. Take the tag end and feed it back through the loop. Pull the tag end and mainline tight to secure the knot. Snip the tag end to remove excess thread.
Turle Knot
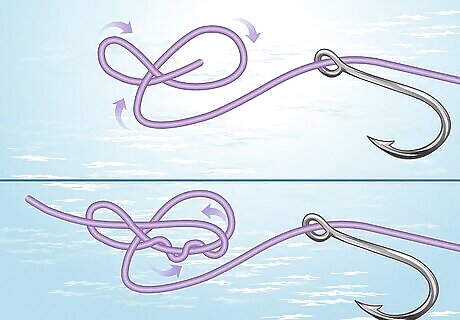
Choose a turtle knot for flies with small or turn-downed eye hooks. Feed the tag end through the eye of your hook. Make a loop around the back of the standing end. Wrap the line 2 or 3 times around the standing end. Pass the tag end back through the loop closest to your thumb.
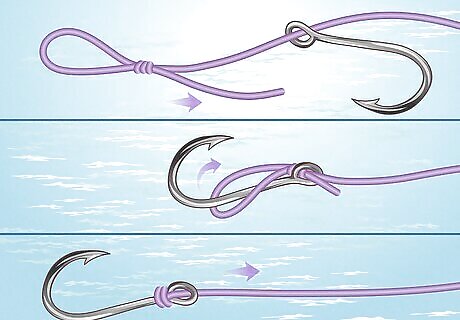
Slide the knot and bring the loop over the hook. Snug the knot down, ensuring it can slide up and down the standing end. Slide the hook towards the knot. Trim the tag end and bring the loop over the back of the hook. Tighten to secure the knot.
Blood Knot
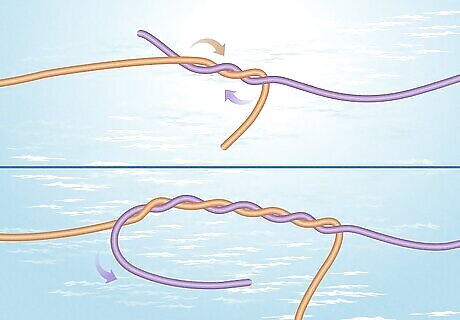
Use a Blood knot to join similar-sized pieces of leader and tippet. Overlap 5 in (13 cm) of leader line and main line. Pinch the overlapping point with your fingers. Make 5 to 7 wraps around the leader line with the tag end of the main line. Ensure all the wraps move down the leader line.
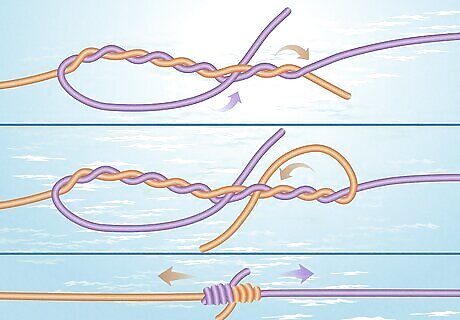
Wrap the tag end of the leader line and tighten. Put the tag at the end of the main line through the "V" at the overlap point. Cinch the new point with your hand. Repeat these steps using the tag at the end of the leader line. Lubricate the knot and pull both lines and tag ends tight. Cut the tag ends off.


Comments
0 comment