views
Joining a Google Classroom as a Student
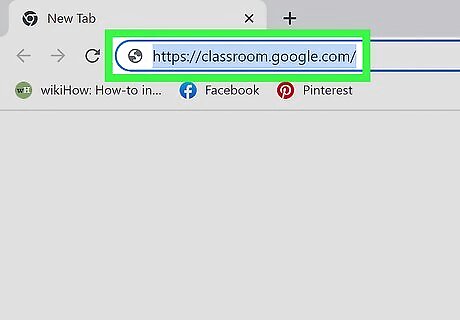
Go to https://classroom.google.com/ in a web browser or open the Google Classroom app. If you are using a desktop PC, Mac, or Chromebook, go to the Google Classroom website. If you are using a mobile phone, open the Google Classroom app. If you don't have the Google Classroom app on your smartphone, you can download it for free from the Google Play Store on Android or the App Store on iPhone and iPad. Alternatively, if your teacher sent you a link to Google Classroom, open your student email and click the link your teacher sent you instead.
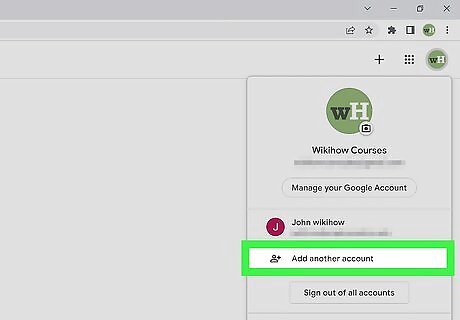
Make sure you are signed into the correct account. You may need to sign in to your student account. Your school should provide you with your email address and password. If you are not signed into the correct account, use the following steps to sign into the correct account: Click or tap your profile icon in the upper-right corner. Click or tap Add another account at the bottom of the list of accounts. Sign in with your student email address and password.
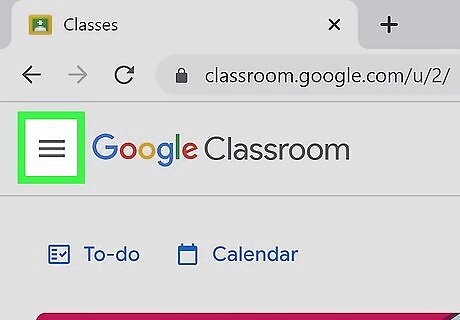
Click or tap ☰. It's the icon with three horizontal lines in the upper-left corner. This displays the menu.
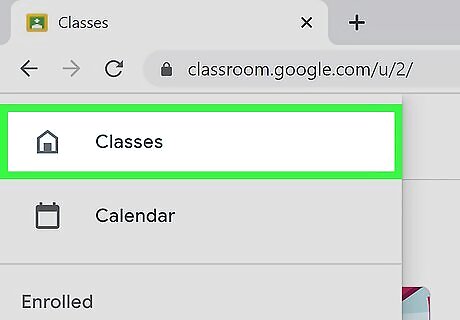
Click or tap Classes. It's the first option in the menu. This displays all your classes as well as any class invitations you have.
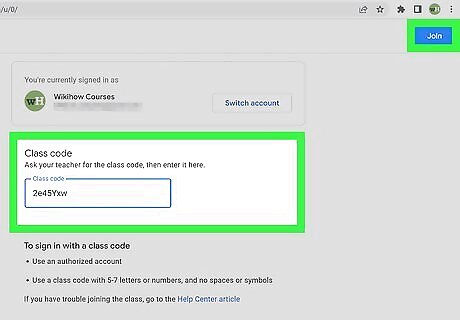
Join a class. You can join a class using an invite link or by using a class code. Use one of the following steps to join a class. Invite Link: Look for the class and click or tap Join on the class card. Class Code: If your teacher sent you a class code, click or tap the plus (+) icon. It is in the lower-right corner in the mobile app, or upper-right corner on a desktop browser. Then click or tap Join Class. Enter the class code your teacher provided you and click or tap Join in the upper-right corner.
Creating a Google Classroom as a Teacher
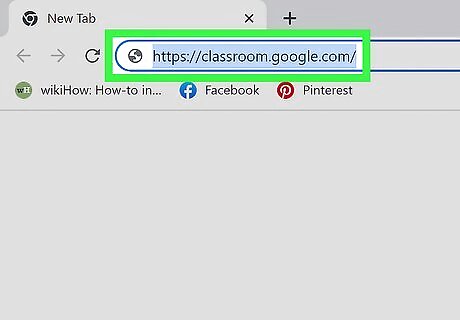
Go to https://classroom.google.com/ in a web browser. You can use any web browser on any computer, but Google Chrome will provide the best experience.
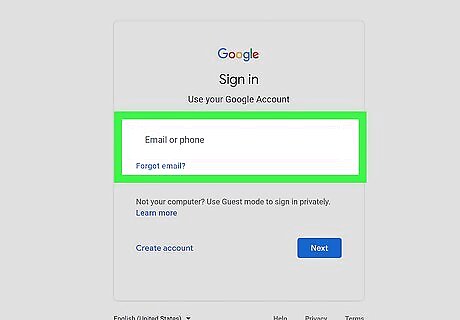
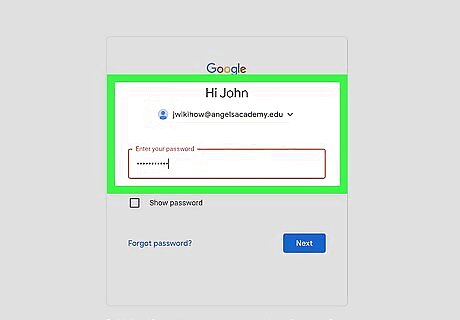
Sign in to your Google account. As a teacher, you can create a classroom for your students using a personal account. Even if you are using a personal account, it is recommended you create a separate account for classroom use. If your school has a Google Classroom for Education account, then your administrator will provide you with the login for a Google account to be used for school use. Use the following steps to sign in to your account: Click the profile icon in the upper-right corner. Click Add another account. Enter the email address associated with your classroom Google account and click Next. Enter the password associated with your classroom Google account and click Next.
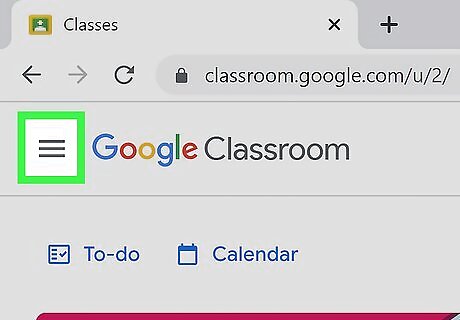
Click ☰. It's the icon with three horizontal lines in the upper-left corner. This displays the menu.
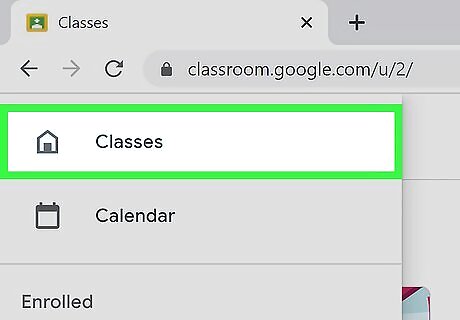
Click Classes. It's the first item at the top of the menu to the left.
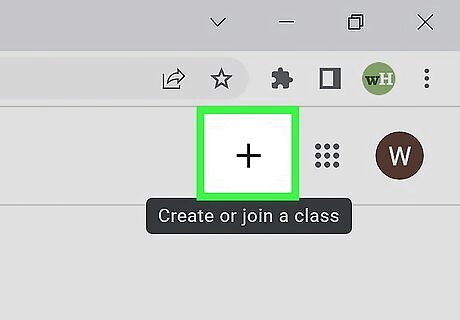
Click or tap +. It's the button with the plus (+) icon in the upper-right corner. This displays a drop-down menu.
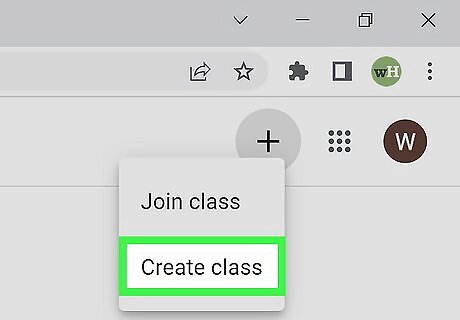
Click Create Class. It's the second option in the menu that appears when you click the plus (+) icon. If you don't see the "Create Class" option, your school administrator may not have granted you permission to create a class. Contact an administrator for further assistance.
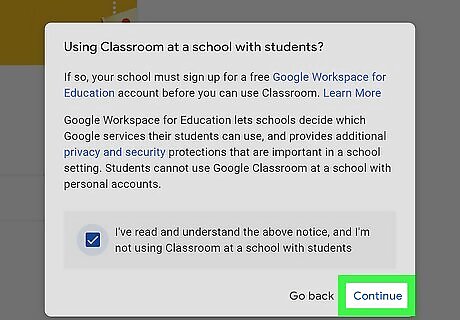
Click the checkbox and click Continue. The pop-up informs you that if you are using Google Classroom at a school with students, the school should sign up for Google Workspace for Education. Google Workspace give schools more control over the services they want to use, as well as provides additional security. Click the checkbox to indicate that you have read the statement and click Continue.
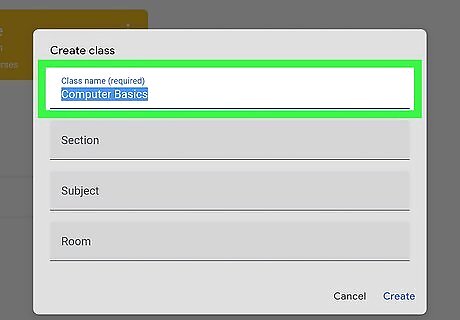
Enter the class name. The first field at the top asks you to enter your class name. This is the only field that is required.
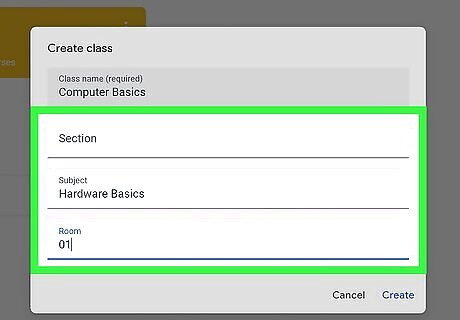
Enter the optional information. The three other fields are optional. If you want, you can use the other three fields to enter your class subject, section, and room number.
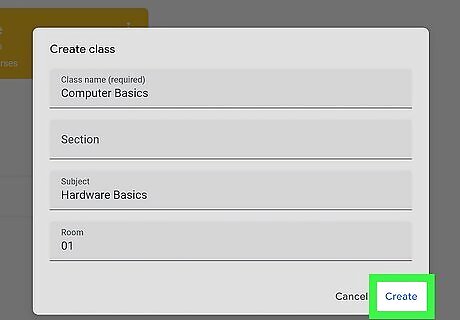
Click Create. It's the blue text in the lower-right corner. This creates your Google Classroom.
Signing Up for Google Workspace for Education
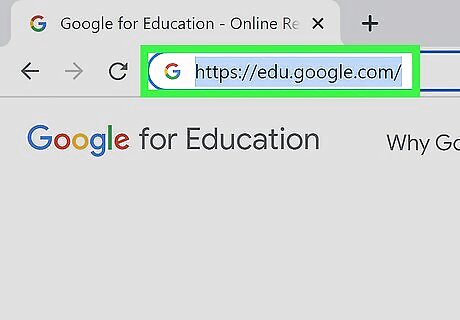
Go to https://edu.google.com/ in a web browser. This website allows you to sign up for a free 30-day trial of Google Workspace for Education free edition. If you want to see what features are available and decide what plan is best for your institution, you will need to contact a sales specialist. To have a sales specialist contact you, go to https://edu.google.com/intl/ALL_us/contact/ and fill out the form. Eligible institutions can continue using the free version of Google Workspace for Education after the 30-day trial period.
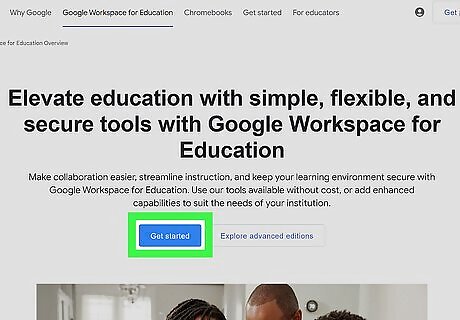
Start the sign-up process. There are a couple of pages you have to click through to get started. Use the following steps co get started. Click Get Started with Google Classroom for Education Click Get Started. Read the information and click Next.
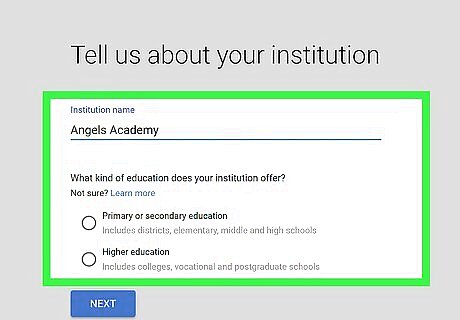
Enter your institution name, select your school type and click Next. Use the field at the top of the page to enter the name of your school. If your school is an elementary, middle, or high school, click the radio option next to "Primary or secondary education." If your school is a college, vocational school, or post-graduate school, click the radio option next to "Higher education." Then click Next.
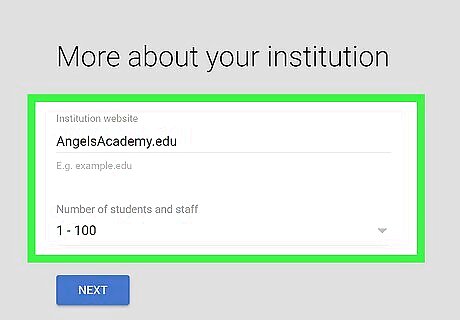
Enter the institution's website and select how many students and staff you have. Use the first field at the top to enter the school's website. Then use the drop-down menu to select how many students and teachers you have. Then click Next at the bottom.
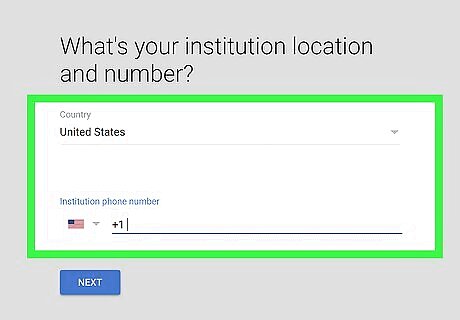
Select your country and enter your phone number. Use the drop-down menu at the top to select your country. Enter a contact phone number and click Next at the bottom.
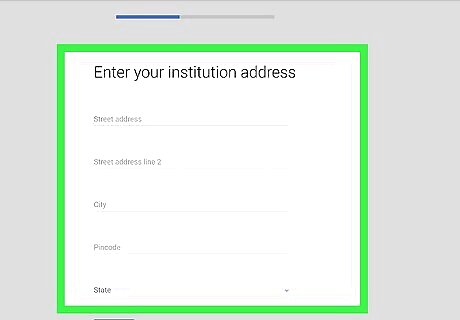
Enter the address for your institution and click Next. Use the first line to enter the street address. Then enter the city on the third line. Use the drop-down menu to select your state and enter your zip code on the last line. Then click Next.
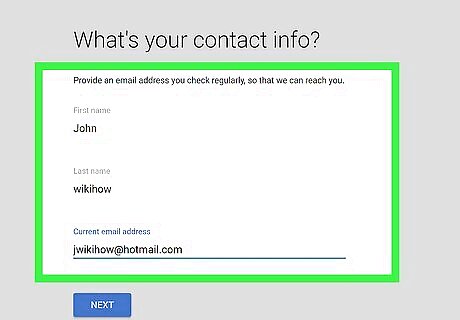
Enter your name and email address and click Next. Use the first two lines to enter your first and last name. Enter a contact email on the last line. Then click Next.
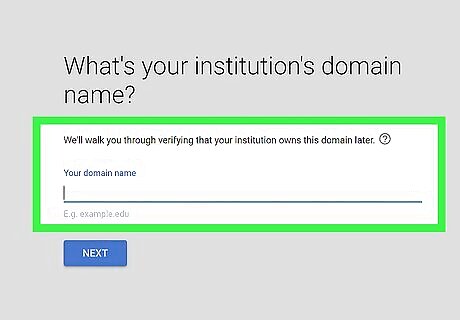
Click if your institution has a domain. If your institution has an email domain (i,e, "wikihow.edu"), click Yes I have one I can use. If you do not have a domain, click No, I Need One. If you do not have a domain, you will be asked to sign up for a domain. Enter your desired domain name to see if it is available. If it is available, click your desired domain name to purchase it.
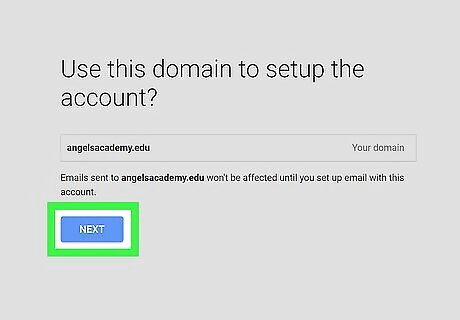
Enter your domain. If you have a domain, enter your domain (i.e "wikihow.edu") to set up your account.
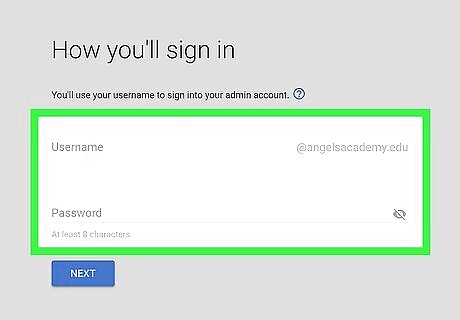
Enter your desired username and password and click Next. This is the username you will use to sign in to your account. Enter your username on the first line before your domain name, and then enter your password. Click Next to continue.
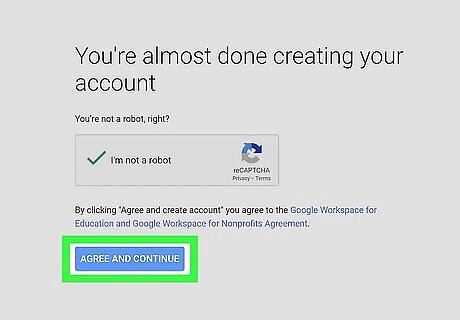
Finish up the sign up process. Use the following steps to finish the sign up process. Click Ok if you want to receive email updates, offers, and news from Google Workspace for Education. Otherwise, click No Thanks. Read the consent form and click {Agree and Continue. Click the checkbox in the Captcha and click Agree and Continue.
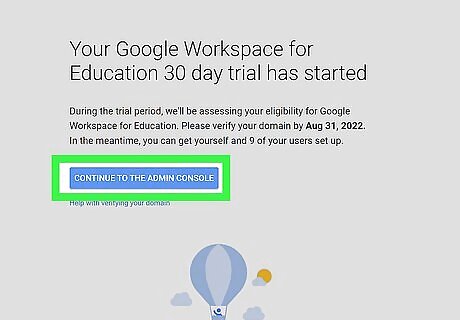
Sign in to the admin console. After you are finished, click Log in to Admin console. Then enter the email address and password you enter to establish your Google Workspace for Education account.
Check your email. You will receive instructions on how to verify your domain as well as what documentation you need to provide in order to verify your eligibility. Once Google has all the information they need, they can process your application To verify your domain, you will need to sign in to the Google Workspace for Education admin console and copy the verification code from the setup tool. Then you will need to log in to your domain's DNS records and paste the verification code for your domain. Once the verification code is published, Google will be able to verify your domain. The documentation you will need to provide includes your institution's website, a scanned copy of your institution's official accreditation document stating your educational status, as well as your name, contact email (not related to Google Workspace for Education), and your role within the institution.


Comments
0 comment