

Plan your guitar's design.

Design your guitar body shape and choose your materials. Before you begin, you’ll want a solid idea of what you want your instrument to look like. Once you’ve settled on a design, draw the body, full scale, on paper, and cut it out. Then, settle on the materials you'd like to use—common woods for guitar necks include maple and mahogany. Rosewood or maple are standard choices for fingerboards. You can draw inspiration from a classic model like a Fender Telecaster or a Gibson SG, or make your own unique design. The guitar body shape can be rounded, like a Gibson Les Paul or a Fender Stratocaster, or angled, like a Gibson Explorer or Flying V. You can also choose a unique shape for your guitar, such as a square or circle. Some guitarists prefer a single cutaway to access the higher frets, some like a double cutaway, or you might choose not to have a cutaway at all. Some of these woods are rare or protected, and hard to come by. You can experiment making an electric guitar with any kind of wood you would like, however. There is room for variation in terms of the thickness of an electric guitar body. Select a wood size based on the thickness of an existing guitar, or on what feels comfortable to you. Each kind of wood has its own tonal quality that makes a unique sound. Woods that are dense and heavy, like walnut or mahogany, have a tone that's thicker and more base-heavy. On the other hand, lighter woods, like basswood or alder, have a tinny, brighter sound.
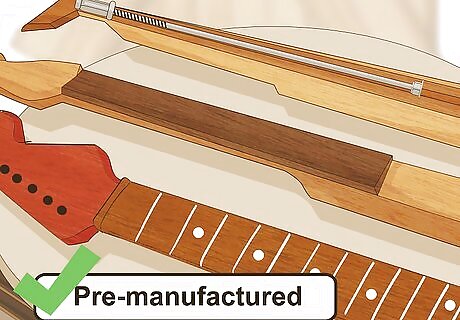
Purchase the required hardware and a pre-manufactured neck.

There’s a lot of variety in terms of the looks and capabilities of the parts you’ll need for your guitar. You can choose based on the kind that existing guitars you like use, or experiment with something new. You can easily buy the equipment you’ll need from most guitar shops or online. For an electric guitar, you’ll need: One or more pickups (single coil or humbuckers) A bridge Tuning pegs A nut Volume and tone controls and knobs A pickup selector switch An input for a ¼ inch cable A pickguard (optional) Strap pegs (optional, but recommended) A truss rod (optional, but recommended) Fret wire (if you are building your own neck) Strings A pre-manufactured neck
Cut the body blank.
Lay the cut-out of your guitar body design on the wood you selected, and trace the design onto it. Use a jigsaw (or another saw) to cut through the wood, following the outline you drew. Sand the sides of the body blank after cutting it out. If you would like to round off the top and bottom edges of the guitar, use a sander for that as well.
Mark the position of all the body hardware.
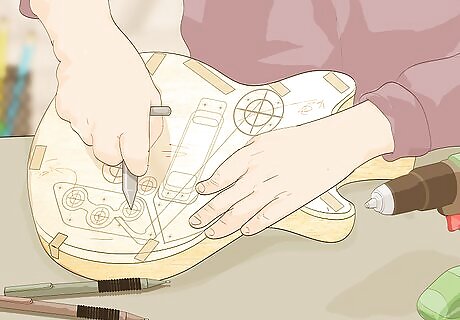
Draw a line down the center of the body blank for reference. Then, draw marks on the body blank to identify where you want hardware like volume controls and the pickups to go. You can position things like volume and tone controls, the pickup selector, and the plug input more or less wherever you like. Follow the design of an existing guitar, or choose what feels comfortable to you. Pickups should sit under the strings, centered with the fretboard. Mark the position of the pickups by referencing the center line you drew. The bridge needs to be positioned so that the distance between it and the nut on the neck correspond to the scale length of the neck, which varies somewhat depending on the guitar. If you purchased a pre-manufactured neck, use its scale length to position the bridge accordingly. Otherwise, most guitars have scale lengths ranging from 24-26 inches.
Route the body.
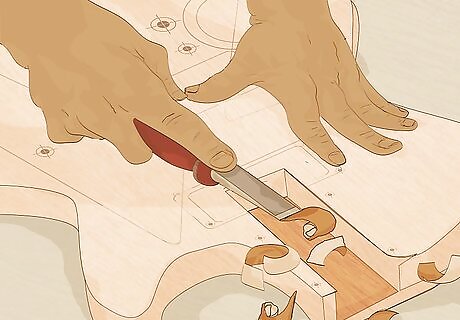
You’ll need to make a cavity in the back of the guitar. This fits the electronics for the volume, tone, and pickup selection controls. You will cover it later with a bit of material (usually hard plastic). You’ll also need one cavity in the front of the guitar for each of its pickups. Rout the pickup cavity (or cavities) to the depth recommended by the manufacturer. You will also want to rout a cavity where the neck will attach to the body that is wide enough and deep enough to secure the parts together. A cavity is a hole that goes partly through the body of the guitar.
Drill holes for the electronics.
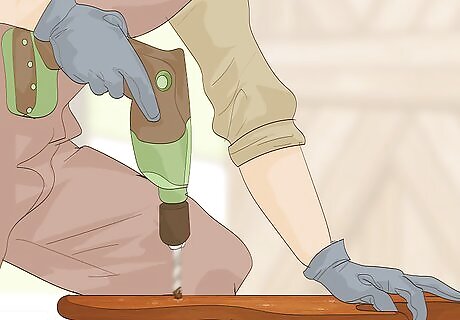
Use the marks you made earlier as a guide. The number and position of the holes you’ll need will depend on the exact hardware you’re using. Generally, however, you will need holes: For the bridge hardware For the volume, tone, and pickup selector controls To allow the pickup wires to pass from the front cavity to the back one To fit the cord input in place For the strap pegs (if you are using them)
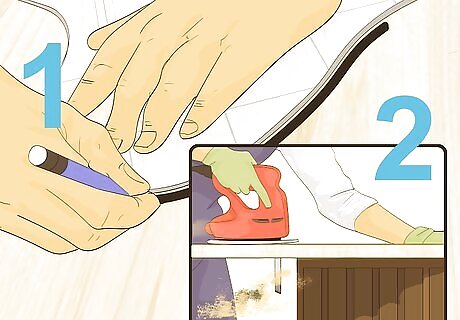
Paint or finish the body.
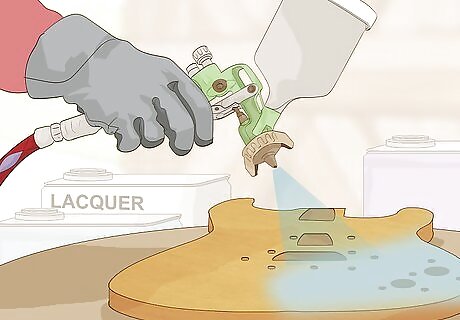
Much of the creativity in guitar building shows in the way the body looks. So, use your imagination here. The possibilities are endless! You might try: An oil finish to give your guitar a natural look A colorful paint and either a high-gloss or matte finish Multiple colors to create a striking pattern Painting an image or design on the body for a standout look
Cut the neck, if needed.
If you purchased a pre-manufactured neck (recommended), skip this step. If not, you’ll need to cut the guitar neck to the width and thickness you prefer. Leave the headstock end wider to accommodate the tuning pegs. Round off the back of the neck (using a belt sander, for instance) until it has a comfortable profile. Neck widths are usually about 1.5–1.75 inches (3.8–4.4 cm) at the nut, and widen slightly as the frets get higher. Make the headstock whatever contour you like. Routing a hole through the length of the neck to insert a truss rod is recommended, but not required. If you are adding a fingerboard to your neck, cut a thin piece of wood to the same width as the neck, and glue it on top. Round the edges of the fingerboard to give it a “radius.” Cut fret wire to size for each fret, then gently tap the frets in place, then file their edges smooth. Measurements need to be highly precise, so use a spacing template (available online). Glue the nut where the fingerboard meets the headstock. Attach the tuning pegs to the headstock, drilling holes if necessary.
Bolt or laminate the neck to the body.
Attach the neck to the body where you previously made a cavity for this purpose. You can glue the neck in, or run bolts through the back of the body and the neck to fix it in place.
Attach the bridge to the body.
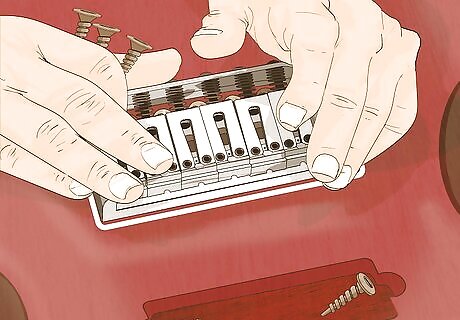
There are a number of types of bridges. So, the exact directions for attaching yours will depend on its design. The simplest varieties, however, simply require a few screws to fix the bridge in place.
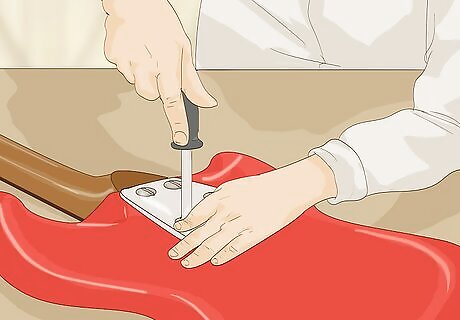
Drop the electronics into place.
Run the pickup wires through the holes you previously drilled. Drop the pickups into the cavities on the front of the guitar body, and fix them into place with the screws provided by the manufacturer. Do the same for the volume, tone, and pickup selector controls, as well as the input for the guitar cord.
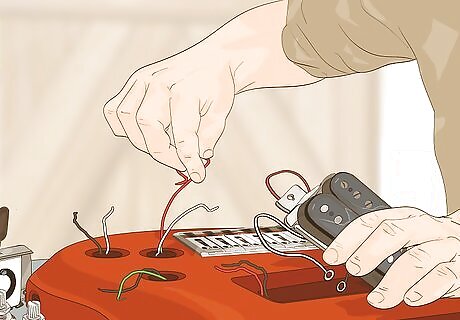
Solder the electronics.

The pickups you purchased should come with a schematic. This shows exactly how to connect these to the controls and to the input for the guitar cord. Follow this schematic, using an ordinary electronics soldering iron to complete the job. Wrap any wiring connections with electrical tape, unless the manufacturer’s instructions suggest another method. Once the electronics are in, cut a piece of hard plastic to cover the cavity you created in the back of the guitar body. Fix it in place with small screws.
String your guitar and test it.

Use your favorite string gauge. After they’re in place, try playing your guitar a bit unplugged to make sure everything feels right. Then, plug your guitar in and play. If all has gone well, the guitar is done! You might need to make small adjustments to perfect the guitar's intonation, such as changing the bridge pins or saddle height. If you need help doing this, take your guitar to a local shop.


Comments
0 comment