views
Steps
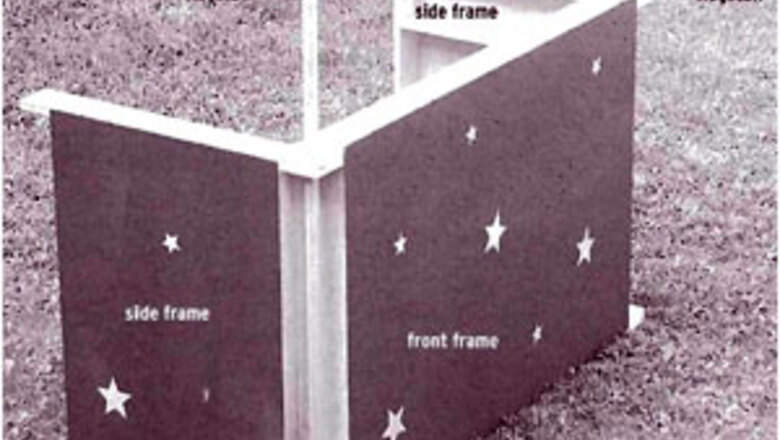
Start with a lemonade stand. Either use one that you already have or build one from scratch. If you are using an existing one, it must be wide enough to accommodate the top of the stage that you'll be building in the next part. If building one from scratch, cut three base panels to the height of choice, using the following widths: Cut one piece 59" long for the front panel. Cut two pieces 34" long for the two side pieces. The height should be determined by what will be high enough to cover an adult squatting down behind the panel. Only your hands should be observed (covered in the puppets), none of your body or head.
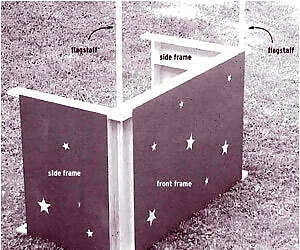
Attach the side pieces to the front pieces using brackets. Screw these into place firmly. You may also need to glue the edges together for a firm fit, that depends on how well the brackets are holding the pieces together.1 265.jpg The image demonstrates another option for attaching the panels together, using metal square pole joints instead of bracketing the wooden pieces closely together. Cut the flagstaffs (long poles, see image above) to size. Don't make any shelves, as they'll only get in the puppeteers' way. If you need a place to hold items, boxes can be shifted in and out from the back of the stage, as needed.
Put to one side. After you've built the lemonade stand, you have made the base of the puppet stage. You'll now need to make the top of the stage, from which the curtains will hang.
Making the top of the stage (top frame)

Stack the two 1"x6" boards on top of each other with their ends even. They are now ready to be cut as follows: Cut two pieces 59" long. These will become the long sides of the curtain-top frame. Cut another pair of pieces 34" long.These pieces will become the short sides of the frame. Cut two 23" lengths which will become the filler pieces.Puppet stage size 1.jpg
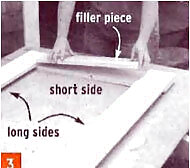
Position the cut pieces on your work surface.3 145.jpg Place the 34" side pieces first. One goes on the left and the other on the right. Set the 59" front and back pieces perpendicular to the 34-inch side pieces, with their ends resting on top of the 34" pieces. This forms a rectangle. Set the 23" filler pieces on top of the 34" side pieces and between the 59" front and back pieces. You should now have a rectangle in one plane on the top. Square up the pieces using a framing square to align the outer edges.
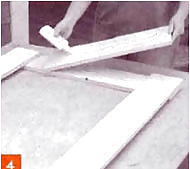
Glue up the top frame.4 105.jpg Carefully lift up the filler pieces and put carpenter's glue along the bottom surfaces. Replace them and check the alignment with a framing square again. Drive four #8 or #10 x 1-1/4" long screws through each filler piece into the end pieces below, securing the two pieces.
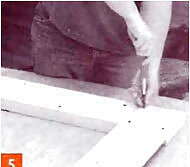
Lift up one of the long sides and put glue on the top surfaces of the two ends beneath it.5 78.jpg
Replace the piece. Holding the long side in place, drive three 1/4-inch screws through each end, into the side piece below Avoid driving a screw in the extreme outside corner of each corner; you'll be drilling holes for the curtain rods there later.
Repeat previous step with the other long side.
Check the alignment one last time and try to get the top frame as close to square as you can. (Perfection is not required.)
Drilling holes (curtain rod ends)
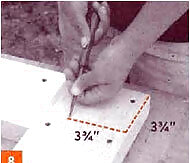
When the glue is dry, turn the top frame over. At each corner, square a line 3-% inches in from each outside edge, so that you have two lines that intersect. Use an awl to punch each intersection point.8 38.jpg
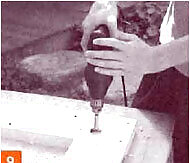
Put the 1 1/4-inch Forester bit in the drill chuck set the spur of the bit in one of the small holes you punched with the awl.9 32.jpg
Drill a hole all the way through the long side and the end piece beneath it. Repeat at the other three corners.
Turn the top frame upside down on your work surfaces, with the filler pieces facing down and the short sides to your left and right. Square lines across the nearer long side 28 inches (71.1 cm) in from either end. On one of these lines, mark a point 1 inch (2.5 cm) in from the near edge of the frame.
On the other line, mark a point 2 inches (5.1 cm) in from the near edge of the frame.
Reach across to the long side away from you and square a line 1 inch (2.5 cm) in from each edge at one of the far comers. Mark the point where the two lines intersect. Do the same on the other far corner. If there is a screw in the way at these crosshairs, rake it out now.
Put the 5/16-inch bit in the drill chuck. Drill a hole all the way through the top frame at each of the four points you've marked. These smaller holes are for the curtain-rod ends.
Making the awning ruffle
Cut the ruffle cloth into three 12-inch-widc s tulips. Each one should measure 11 f 'ct by 12 inches.
Fold each piece in half lengthwise and run a hot iron along the folds. You should now have three 11-feet by 6-inch lengths of cloth.
Turn the top frame so that the filler pieces face up and one of the long sides hangs about 2 inches (5.1 cm) off the front of the wad (?) surface. Clamp the frame in place. Then find the center of the front edge of the frame and make a small pencil mark there.
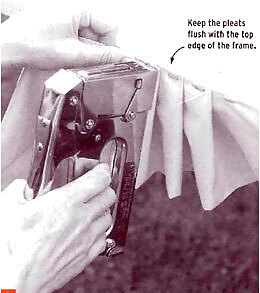
Find the midpoint of one of the pieces of ruffle cloth. At the midpoint, staple the unfolded edge of the cloth to the center of the front edge of the frame, keeping the edge of the cloth flush with the top edge of the frame. At this stage, the unfolded edge of cloth should be stapled to the wood and the folded edge should hang down.15 13.jpg
Make the first pleat. Grab hold of the top edge of the cloth a few inches to the left of the midpoint. Bring that top edge back against the midpoint staple, making a loop of cloth that points out toward you. Keeping the top edge in position, flatten the loop to the left and staple its end to the edge of the frame. The new staple should be just about an inch away from the midpoint staple. You've just made one pleat.
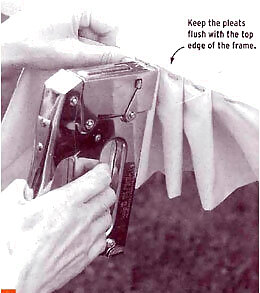
Make the next pleat. Grab the cloth a few inches to the left of the pleat, pull the top edge back to the staple you just placed. Fold the loop of cloth down to the left, and staple it flush to the top edge of the top frame. Working to the left, create a series of flat, folded pleats across the top of the top frame. The end result will appear just like the tops of old-fashioned curtains. Try to keep each of the folds even, stapling every inch or so. You may also find that pleating may be an easier task with two people working together, one to fold and hold the cloth and the other to staple.
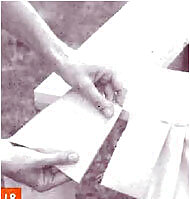
When you reach the end of the cloth, staple the end to the frame. Get another length of fabric, and keep going. Overlap the new fabric over the "ruffle" of the old fabric by an inch or so.18 9.jpg
When you get to the corner of the top frame, turn and reclamp the frame on the work surface and turn the corner with the fabric.
Continue pleating until you reach the end of the short side. At this point, cut the fabric about ⁄2 inch (1.3 cm) longer than you need, and fold this extra underneath before putting in the last staple, just before the corner.
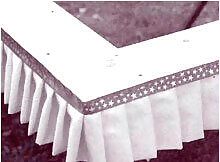
Go back to the middle of the front and repeat the pleating and stapling process, working to the right, until you have completed the ruffle all the way across the front and the other short side.21 6.jpg
Glue a long piece of ribbon along the top of the ruffle to hide the staples. Start at the end of one short side, moving across the front, and finishing on the other short side. Cut off any excess ribbon when you are finished. Gluing, smoothing, and holding the ribbon in place may require a few extra sets of hands. The result will be a beautiful finished ruffle.
Crafting the curtains
Cut the curtain fabric in half. Each piece should be 5 ⁄2 feet (1.7 m) long (but longer is okay too).
Lay one of the pieces of fabric flat on the work surface.
On one of the long sides, fold over 1 inch (2.5 cm) of the edge. Iron it down. Then, staple it in place.
Repeat this process on both of the short sides of the top frame. Then bring the other piece of fabric to the work surface, ironing and stapling using the same three folds.
Fold, iron, and staple the remaining long sides. Figure out how much you'll have to fold over to make the final width of each cloth 36 inches (91.4 cm). If your fold is more than 2 inches (5.1 cm), use two or even three rows of staples to hold it down. Alternatively, you can trim off some of the extra cloth to make your fold less than 2 inches (5.1 cm).
Clip the curtain loops to one of the long sides of each piece. Start at a corner and place a clip every 6 inches (15.2 cm) or so.
Shaping the curtain rods
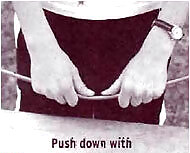
Uncoil the two lengths of copper tubing. Bend them until they are basically straight.26 6.jpg To bend (or straighten) the tubing, grasp it with both hands, with your thumbs pointing toward each other and about an inch apart. Gently push in with your thumbs until you feel the tubing move. Shift your hands along the tubing and press down again with your thumbs, bending the tubing just a little in each place along its length to avoid creating kinks.
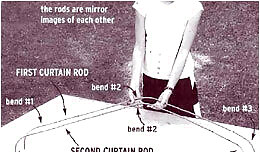
When the copper tubing is straightened, lay the two lengths side by side. Mark both tubes together at three even intervals where the tubing is going to be bent into shape: a bend in from each end of the tubes and one bend in the middle. The two end bends at each side should be exactly the same measurement in from the ends, about 11 inches in from each end, while the center bend is dead center, 31 3/4 inches from the end (see the image to help you see where to make the bend points).Puppet stage 26b.jpg
Grab one length of tubing in both hands. Hold the end you have just measured from in your right hand. About 11/2 inches (5.1 cm) from the end, begin bending the tubing. Bend a little, moving your hands farther down, then bend a little more. When you reach the first layout mark on the tubing, stop bending and check your progress. Your goal is to make the tubing turn 90 degrees evenly between the end of the tube and the first layout mark. Adjust the curve being shaped by bending more (or unbending if necessary), spreading your efforts along the whole length of bent tubing. (Perfection is not required, and you will be able to make adjustments later.)
Grip the tube at the second mark (31 3/4 inches from the end, in the center), with the bent end on your right and pointing up. Begin making a second bend along a horizontal plane, trying to complete a 90-degree turn by the time you reach the third layout mark. You should end up with a left-hand bend.
Hold the tubing with the unworked end on your left, the second bend pointing downward, and the first bend pointing toward you. Make the end bend as for the first end bend.
Repeat. The second curtain rod will be a mirror image of the first.
Putting the curtain frame in place
Place the curtain frame upside down with the 5/16 -inch holes in the corners closest to you. Hold the completed curtain rods up to the curtain frame to check their alignment, remembering that they overlap at the center of the frame.
Insert the ends a short way into the 5/16-inch hole until the rods support themselves. The rods should curve around the outside of the larger holes (so that on opening night the curtain can follow the same path around the pole that will run through the holes). If the rods are out of alignment, bend them into position now.
Remove the curtain rods one at a time. Slip the curtains onto them.
Insert the ends of the rod back into the 3/16–inch holes. Work the ends of the rods down into the holes until they reach all the way through the frame to the work surface.
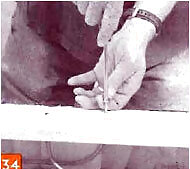
Set the frame on edge with its top surface facing you. Drive the sheet-metal screws into the tubing until the screw head contacts the wood frame. This is an unorthodox use of screws and copper tubing, but with some extra force, the threads should bite into the copper and flare it right against the sides of the drilled hole.34 1.jpg


Comments
0 comment