views
Making a Handheld Bottle Cap Launcher
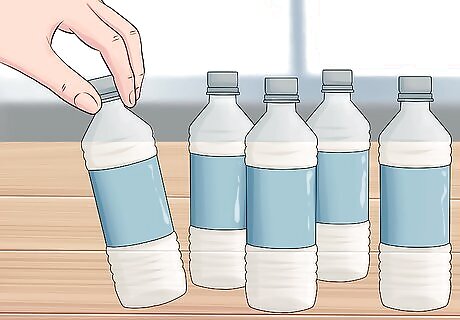
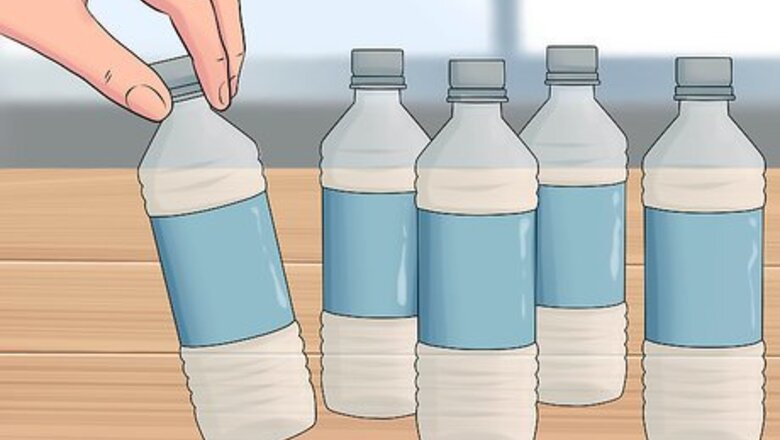
Gather the water bottles. Standard cylindrical water bottles work best for the ammunition. You want bottles made with thinner plastic that you can easily crush when they’re empty. However, don’t crush them. Bottles in the twelve-ounce size are the most common and work very well for this purpose.
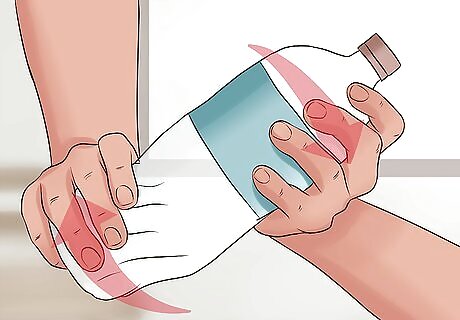
Twist the empty bottles. With the caps on, twist each empty bottle just below the label. You want to twist until you feel the pressure in the bottle bulge the upper half. It may take several twists. You will have to keep a grip on both ends to keep the twisted portion from righting itself. When the upper portion doesn’t squish but feels firm from the pressure, the bottle is ready.
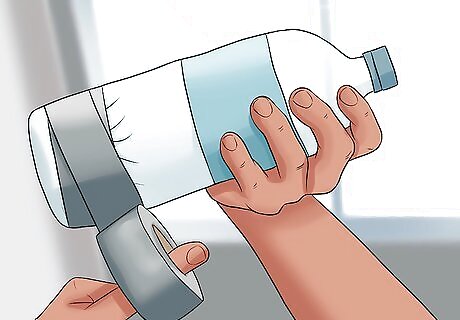
Tape over the twisted portion. Use a wide strip of tape the holds firmly to go around the twisted part of the bottle and stop it from unwinding. Duct tape works well.
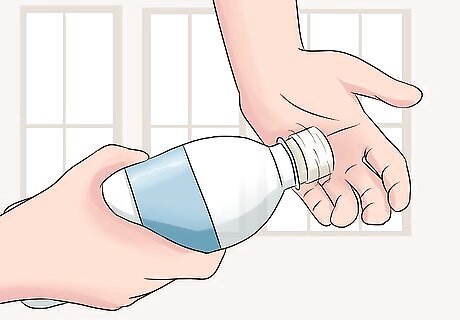
Loosen the cap. If you simply want to shoot the cap like this without the launcher, loosen the cap until it starts to turn easily but without depressurizing the bottle. Then aim away from people, pets, and fragile items and use the palm of your hand to spin the cap quickly. The pressure in the bottle will carry the cap several yards.
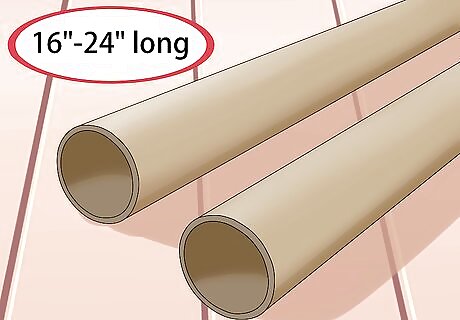
Gather the two tubes. The two tubes you have should be the same size, roughly 16” to 24” long, and with a diameter that allows your water bottle ammo to slide easily down them with gravity alone. Wide mailing tubes that people use for posters or blueprints work well, and you can easily find them at a post office or other mail supply store. Ensuring they are wide enough for the bottles is the most important part.
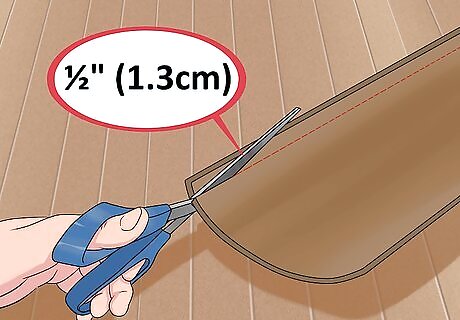
Cut 1/2” out of the first tube. With a pair of scissors, cut the first tube in a straight line from end to end. Uncurl it enough so that you can measure ⁄2 inch (1.3 cm) in and make another cut parallel to the first. The removed strip will be ⁄2 inch (1.3 cm) wide and as long at the original tube.
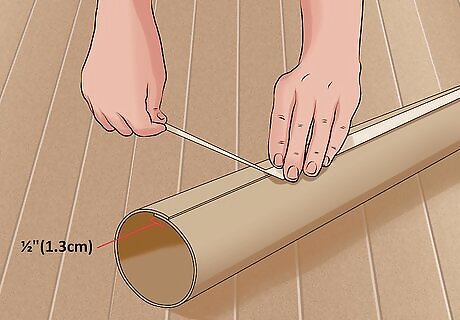
Tape the tube back together. Fold the tube back into a cylinder and tape it well with duct tape so that the seam down the length of the tube can’t reopen. The finished product will look like the same tube, but it will have a ⁄2 inch (1.3 cm) smaller circumference than the original. Test that this tube now fits snugly inside the second tube. It should slide in but without being able to easily fall out. If, when you gather your tubes, you can find one that fits inside the larger barrel tube snugly, then you can skip this part, but most mailing tubes have too much size difference, and you just need to trim one.
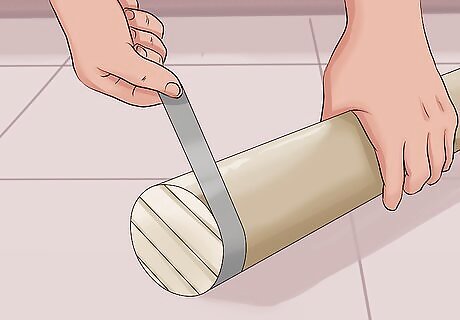
Tape over one end of the trimmed down tube. Using duct tape, close off the hole at one end of the smaller tube. You will essentially be using this end of the smaller tube as a ramrod to push the water bottles down the barrel of the larger tube, so make sure it’s sturdy tape.
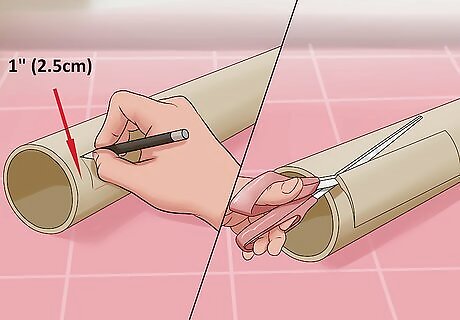
Cut a rectangle out of the larger tube 1” from the end. Take the larger tube and draw a rectangle just a bit larger than your chosen water bottles on one end. However, make the rectangle 1 inch (2.5 cm) from the actual end of the tube. Since you’re leaving 1 inch (2.5 cm) instead of cutting from the end of the tube, you’ll have to poke a hole into the drawn rectangle and cut it out from there. In the finished product, this hole will be where the water bottle ammo falls into the barrel from a magazine.
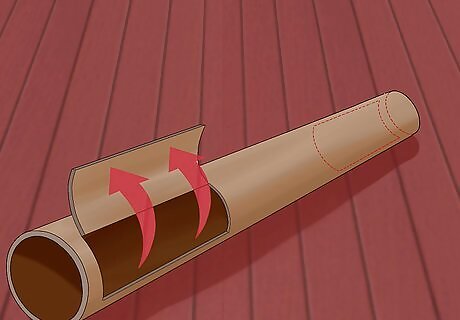
Cut another rectangle from the opposite end. Hold the tube in front of you with the hole from the first rectangle pointing up. Rotate the tube 90 degrees clockwise (counter-clockwise if you’re left-handed) and draw a second rectangle (of the same size) at the opposite end of the tube. Make this rectangle 1 inch (2.5 cm) from the end as well, but only cut three of the four sides out. Leave one of the long sides intact. This will create a flap at the end. In the finished product, this flap will act as the cartridge ejector for a bottle after you have launched the cap.
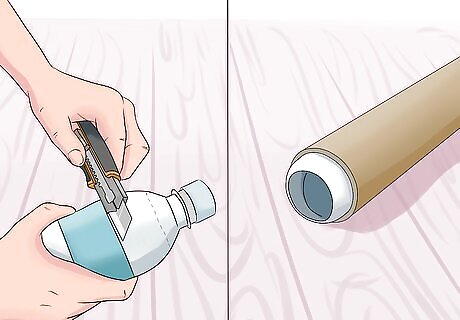
Attach a barrel tip. Take a larger bottle such as a two-liter bottle and cut off the neck. From there, cut the spout off the bottle as well. Use your duct tape to secure the piece over the end of the larger tube at the same end as the cartridge ejector flap. You basically want to make a funnel where the tapered end is large enough so that the mouth of a water bottle will fit through but not the entire bottle. The piece may have a slight dome shape like the lid of a Slurpee cup after you’ve made the cuts. In the finished product, this piece will stop each water bottle from being able to fall out of the tube entirely while still leaving a big enough hole for the cap to emerge before being fired.
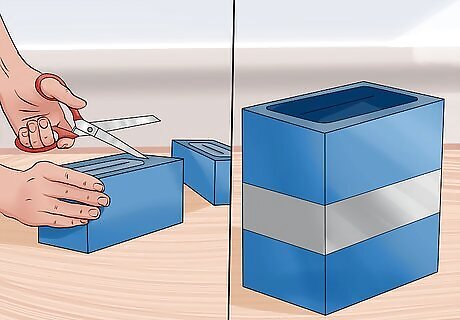
Cut the tops and one of the bottoms out of the two facial tissue boxes. Use scissors to cut the tops off both of the tissue boxes, but only cut the bottom out of one of them. Stack the box with both removed onto the one with just the top removed and tape them together. The finished product will look like one extra-deep tissue box.
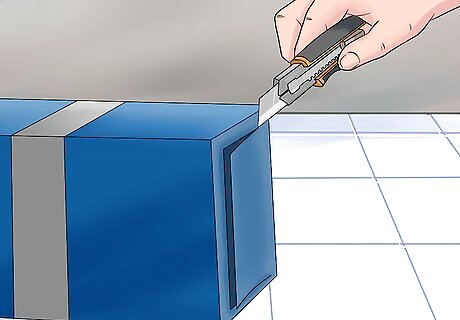
Cut a flap into the bottom of the tissue box. Just as you did with the flap on the larger tube, cut three sides of the bottom of the now-larger tissue box to create a flap. Leave one of the two longer sides intact. This is where you will feed additional ammo into the magazine.
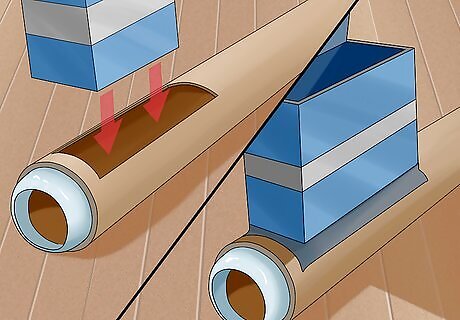
Tape or glue the tissue boxes over the earlier, fully removed rectangle in the larger tube. Secure the fully removed opening (not the flap part) in the tissues boxes over the fully removed rectangle (again, not the flap one) of the larger tube. You can use either glue or more duct tape for this.
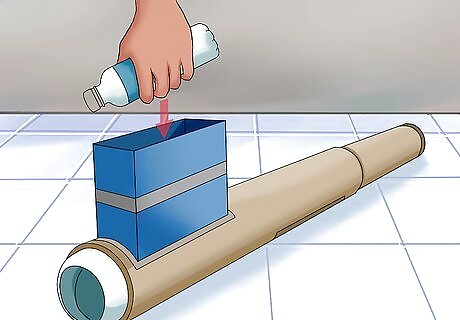
Load the magazine. With the water bottle ammo you made earlier, load the launcher magazine by opening the flap and putting one or more bottles inside with the caps all facing toward the funnel barrel tip. Notice how only one round (bottle) actually falls through the hole into the tube.
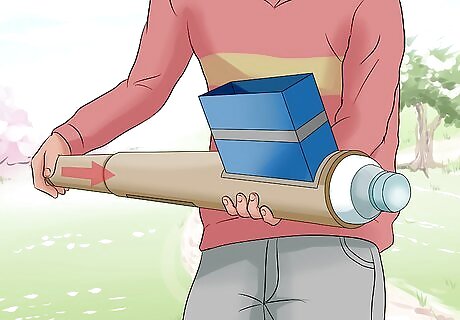
Secure the round with the smaller tube. Use the sealed end of the smaller tube as a ramrod to push the round down the barrel. You want to push the smaller tube until it’s holding the round in place with the cap sticking out of the funnel barrel. Don’t shove too hard since you will likely end up separating the funnel barrel from the larger tube where you attached it.
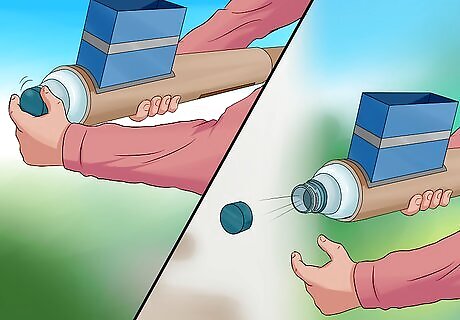
Fire the round. Hold the launcher under one arm with that hand on the barrel, which leaves your other arm free to loosen and spin the cap to fire the round in the same steps mentioned in Part 1.
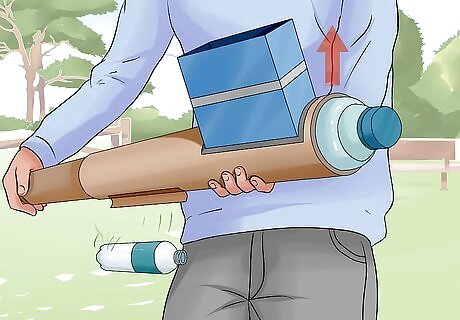
Eject the spent cartridge. By lifting the cartridge ejector flap you cut into the front side of the barrel, you can simply tilt the launcher slightly, and the spent cartridge will easily fall out.
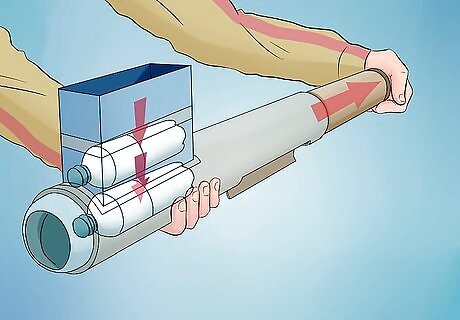
Reload the launcher. Pull the ramrod tube back from the end of the barrel tube just far enough to clear the magazine feed, and your next round in the magazine will fall into place. Push the ramrod tube forward again until the new round is set against the funnel barrel tip, and you are locked and loaded to shoot again.
Making an Underslung Nerf Launcher
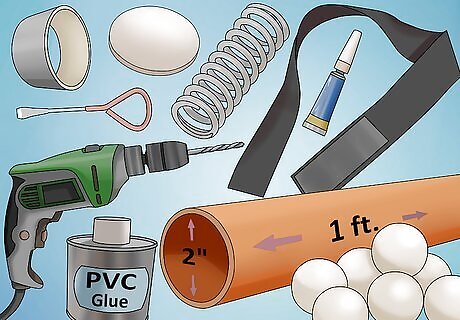
Gather materials. This design calls for a one-foot section of two-inch diameter PVC tubing, an end cap for the two-inch PVC, PVC glue, superglue, velcro, a spring, plastic discs, a paint can opener, a drill, a ruler, and plenty of ammunition.
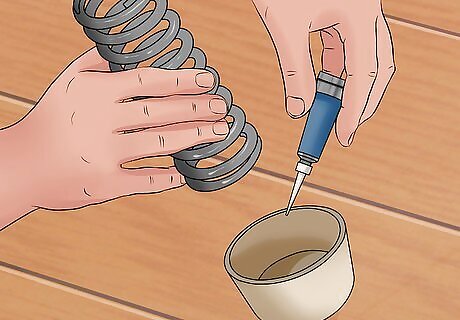
Superglue the spring to the inside of the PVC end cap. The best springs for this design are long, medium coil tension springs such as those found on the inside of the “snakes” in practical joke canisters that spring out when opened. Superglue this spring directly to the center of the PVC end cap.
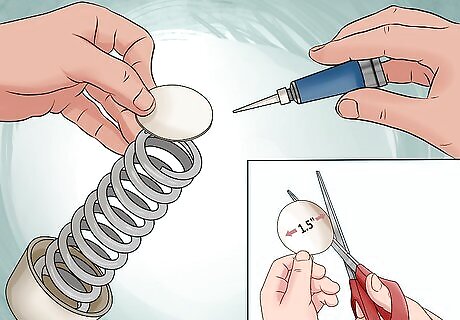
Superglue a plastic disc to the other end of the spring. You can easily cut this plastic disc out of something household such as an empty laundry detergent bottle. Most importantly, cut the disc with a 1.5” diameter so that it can easily fit flat down the PVC tube. Center this disc on the opposite end of the spring and attach it with more superglue.
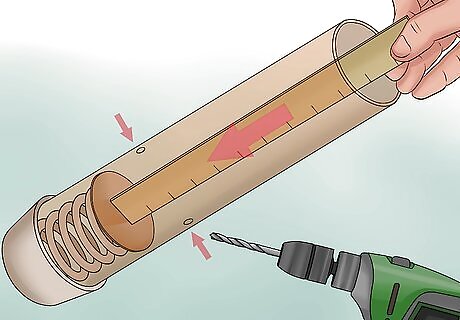
Drill two holes in the PVC tube. You want to test how deep you can coil the spring into the tube before drilling the first hole, so fit the end cap onto the tube without gluing it and push the plastic disc all the way down with a ruler. Use that to gauge how far the spring coils down the tube, and drill the first hole in the tube one-half inch more shallow than the depressed disc. Drill the second hole at the opposite end of the tube about one inch from the end. each hole perforate both sides of the tube in a perfectly straight line. Use a drill bit large enough so that you can insert the paint can opener through the holes.
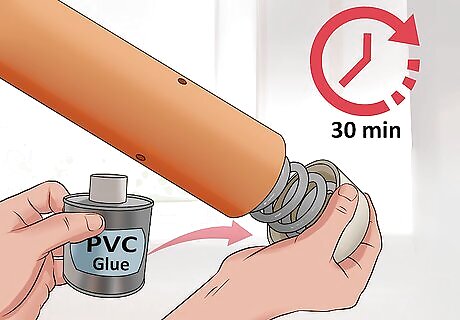
Use the PVC glue to glue the end cap onto the tube. Once you have your holes drilled, you can glue the end cap holding the spring into place on the tube. You’ll want to give the glue thirty minutes to dry before testing the launcher.
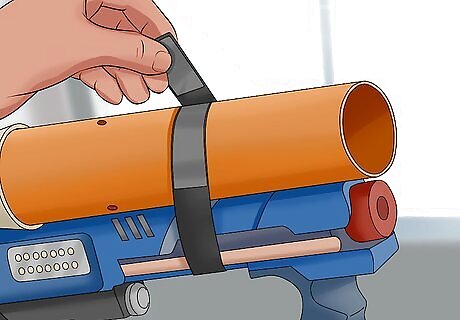
Attach the launcher to your favorite Nerf gun with velcro. To make this launcher resemble an M203 grenade launcher, you can attach it under the barrel of a carbine-style Nerf or Airsoft gun with velcro. Simply peel the plastic backing off a velcro strip and place one end on the tube and the other on the gun. You can use the wall-safe velcro types, which will even allow you to remove the velcro easily when you want. For select Nerf models such as the Recon, you can use the sight that attaches to the gun and slides off instead. Attach this piece to the tube, and you can clip the launcher to the gun where that slides and locks into place. You can just as easily use this design without it being attached to anything else as well.

Prime the launcher. Push the spring all the way down, then insert the painter can opener key into the hole drilled into the bottom of the tube. This will hold the spring coiled while you load the launcher.
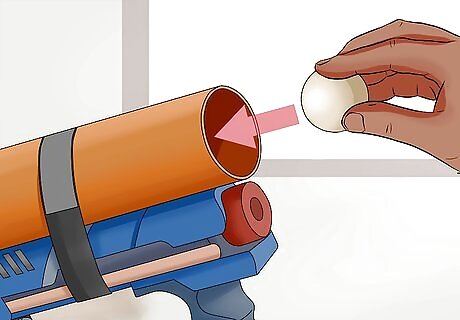
Load the launcher. This design can hold a ton of Nerf darts. Insert the darts in sets of five or six to keep them straight as they drop down the tube. You can place about three of these layers to fill the tube. Once you have loaded the tube, place a second plastic disc with the same diameter as the first one you cut into the tube on top of the ammo load. Hold this disc down while you remove the paint can opener from the bottom set of holes and insert it back into the top set of holes in the top of the barrel. If you still have some of the old Nerf ball-type ammunition, these fit in the tube and fire effectively as well.
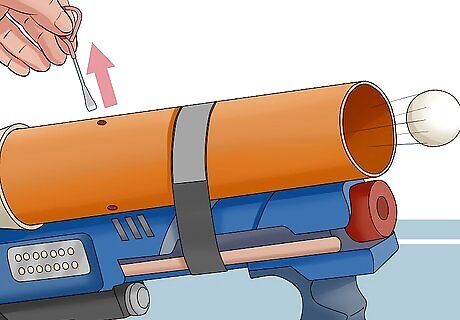
Fire the launcher. Now you simply have to aim the launcher and pull the paint can opener back out as though it were a firing pin. The high load of ammunition may not explode on impact (obviously), but the spread of the ammunition gives you a much more effective idea of a blast radius. Just like an M203, the angle of the launcher is how you aim. Practice firing it several times to get a feel for the trajectory of the launch, and then you will be able to aim proficiently in no time.





Comments
0 comment