
Creating a Terraced Fairy Garden from a Broken Pot

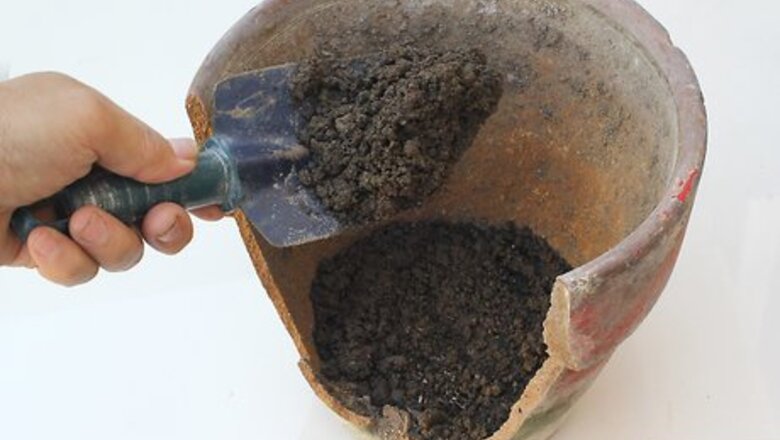
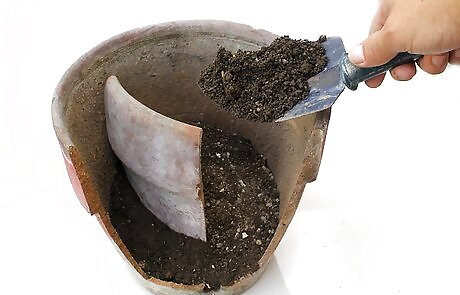
Fill your broken pot with soil. Your pot should have a somewhat large gap in it from the broken section of the pot. However, the base of the pot should be intact. Fill the pot a quarter of the way with soil, with the soil sloping upwards away from the broken section of the pot. Depending on the size of your pot and its broken section, you may need to use more or less soil. The goal at this point is to put enough soil in your pot so that you can nest your large potsherd in it. A general potting soil, which is sometimes called potting or container mix, should work well for the plants in your fairy garden.

Nest a large potsherd in the soil. If both the upper corners of your large potsherd are still attached, put on safety glasses and use a hammer to break off a corner. If you've broken the right corner, nest the large potsherd in the soil inside the pot so its left side touches the left side of the pot, or vice versa. The gap in the corner will allow a space for you to use smaller potsherds, stacked on sloping soil, to create a potsherd stairway.
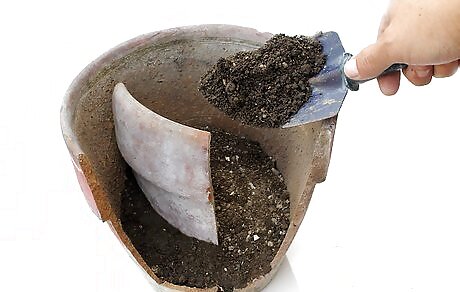
Add more soil to the pot. With your hands or a hand spade, add more soil to your pot. Fill it about ¾ of the way full, and arrange the dirt so it holds the large potsherd in place. Your dirt should slope upwards away from the broken segment of the pot, with the greater portion of the soil in the main part of the pot, behind the large potsherd. The shape of your large potsherd or the size of your pot might require you to adjust the amount of dirt you add at this point in the project.
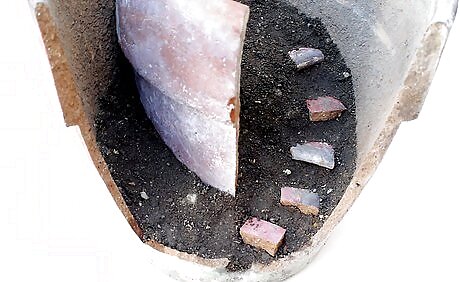
Build a staircase with smaller potsherds. If you don't have small potsherds, take your hammer and break the corner you removed from your large potsherd into pieces. If you already have small pieces of potsherd: Layer the small pieces of potsherd on the sloping dirt in an ascending fashion. These should spiral up the sloping dirt to the gap in one of the corners of the large potsherd. Press the potsherds into the soil or add a little soil to firmly fix the smaller potsherds in place.
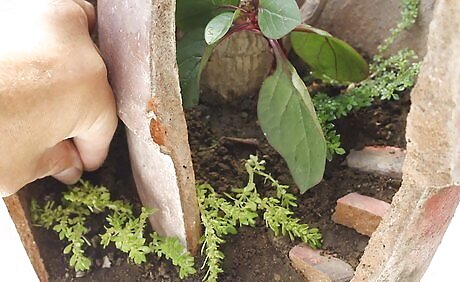
Decorate the pot with suitable plants. Now that your potsherds are in place, you can add plants. Choose those that look like normal, everyday plants (like trees, shrubs, and so on), but miniature. This will give your garden the atmosphere that it was cultivated by little fairies. Succulents, bonsai plants, and moss are well suited for creating this kind of atmosphere, but feel free to experiment. Tiny flowering plants will make your fairy garden appear to be a miniature flower garden tended by little fairies. Try plants like Baby's Breath, Alsike Clover (Trifolium hybridum), Black Swallow Wort (Cynanchum nigrum), Blue Curls (Trichostema dichotomum), and more.
Building a Fairy Village in your Broken Pot Fairy Garden
Fill your pot with soil and potsherds. Fill your broken pot with soil that slopes upwards and away from the broken section of the pot. Arrange your potsherds in the soil to create terraces or to section off the inside of your pot in interesting ways. When arranging your potsherds, you may want to first add a small amount of soil to the pot, then insert the potsherds, then add more soil to hold potsherds in place. Small potsherds can be pushed into the sides of sloping soil to form stairways in your broken pot fairy village. You might also use small pieces of wood to simulate the same effect.
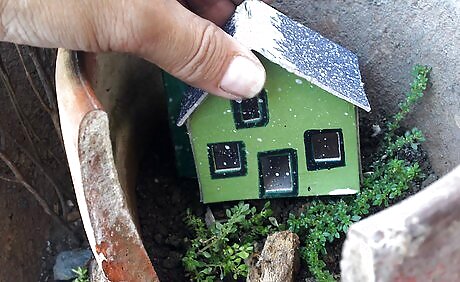
Position your buildings. You can find miniature buildings, decorations, and so on at craft stores, hobby shops, or even at stores that sell aquarium decorations. Nest these in the soil according to your preference. Once you have your buildings places, you can add other features and greenery for your fairy garden. Don't be afraid to add models and decorations you've made yourself. These can make your fairy village look even more authentic. For example, you could add a popsicle model house, a model castle, or even a fairy house.
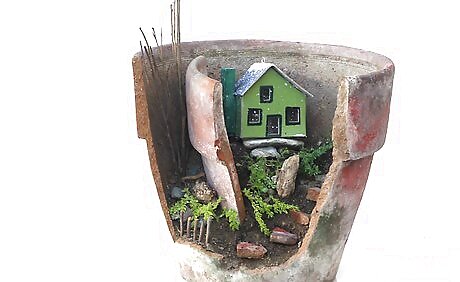
Add other decorations. The more details you add, the more it will seem like your fairy village is actually occupied by these tiny, mystical creatures. Think about adding features a fairy might use, were it living in your village. Some examples include: A miniature bus stop for fairies. Tiny mail boxes outside of fairy houses and buildings. Benches where fairies can sit. Small birdhouses.
Breaking a Pot for a Fairy Garden

Fill a bucket or container with water. You'll need this container to be large enough so that when it is filled with water your terra cotta pot will be completely submerged. Soaking the pot in water will make it less brittle, and allow you to shape the breaks in it with greater precision. Depending on your pot, your soak time will vary. Thicker pots may need to be soaked for a few hours. Thinner pots will likely only need a 30 minutes to an hour soak.
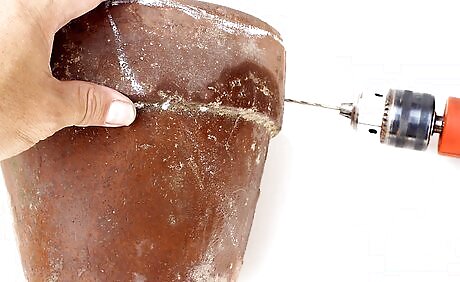
Drill guide holes in the outline of your break. Remove your pot from the water filled container. Much like perforated paper is easier to tear cleanly, you'll be drilling holes to guide where your pot will break. Use your craft or power drill and a drill bit to drill holes ½-inch apart along your planned break-line. You may want to use a piece of chalk to outline where you plan on breaking your pot. This way, you can follow the outline when drilling. For terra cotta that's especially thick or sturdy, you may want to drill your holes with only ¼-inch separating each hole. You can create breaks in your terra cotta pot in any shape you desire. For example, you might make a V-shaped break from the mouth of your pot down to the bottom, or you might try to make a diamond shape.
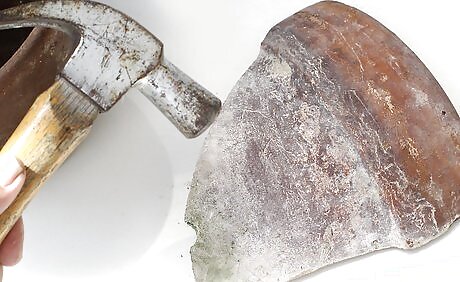
Break the pot with your hammer. Before breaking your pot, put on safety glasses to protect your eyes. Hit your terra cotta pot to the inside of your break-line with your hammer. Use firm, medium force strikes. Your pot should break along the break-line. Try to break your pot so that you have at least one large potsherd. Try to create few smaller pieces of potsherd along with the large one. Smaller pieces, stacked ascending on sloping soil, will give the appearance of tiny stairways, with each small potsherd forming a single step. If your pot broke so that there is only one big piece, take your drill and drill holes to create a break-line to remove the upper left or right corner from your largest potsherd. Hit the potsherd with your hammer so that it breaks the corner piece off. It is not necessary to remove a corner piece from your largest potsherd. However, doing so will allow you to stack small potsherds on soil sloping up to the corner gap. This will create a "stairway" up through the gap that leads to the central, unbroken part of the pot.


Comments
0 comment