views
- Create Ubuntu installation media on a writable DVD or a USB flash drive.
- When you dual-boot Ubuntu, you can choose which operating system to start when you boot up your computer.
- If you're installing Ubuntu on a PC, you may need to change the boot device order in the BIOS to boot from the Ubuntu DVD or flash drive.
Getting Ready
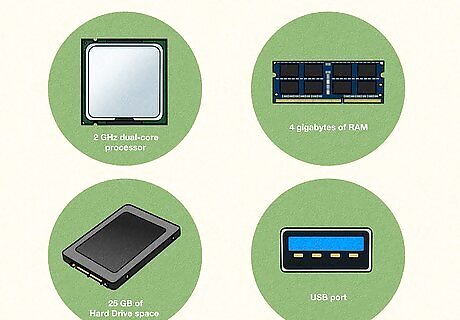
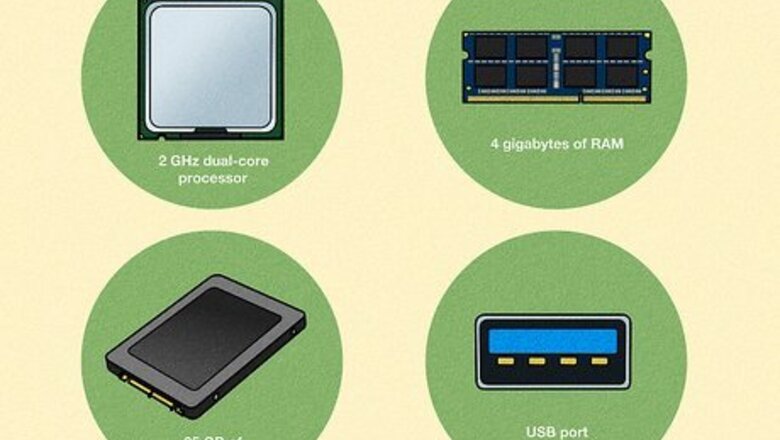
Make sure that your computer can run Linux. Your computer must meet the following system requirements: 2 GHz dual-core processor 4 gigabytes of RAM (system memory) 25 gigabytes of hard drive space A USB port or DVD drive.
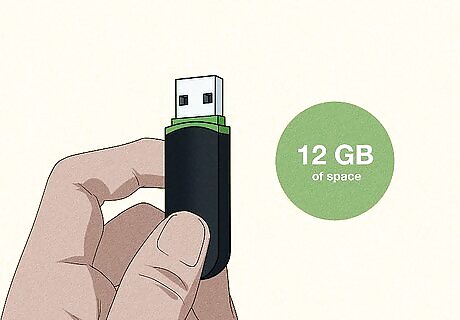
Get a USB flash drive or a writable DVD. You will need to create a bootable disk or USB drive to install Linux on a PC or Mac. You can use a writeable DVD or a USB drive. If you are using a USB drive, make sure it has at least 12 gigabytes of hard drive space or higher.
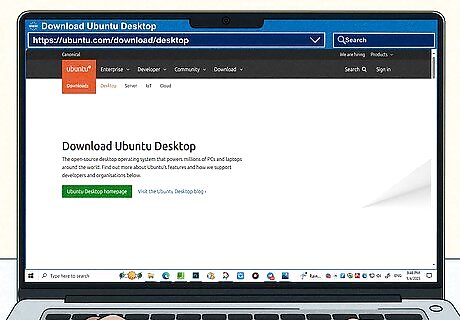
Go to https://www.ubuntu.com/download/desktop. This is where you can download the ISO file needed to install Ubuntu.
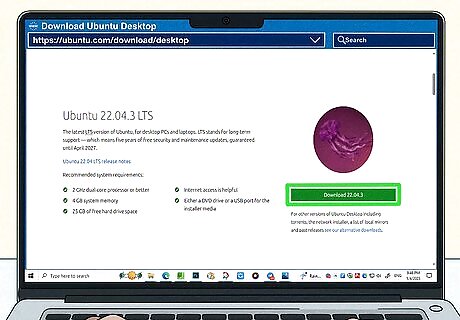
Scroll down and click Download [version number]. It's one of the green buttons to the right. There are many versions of Ubuntu available. The latest LTS release is 20.04.3. You will be routed to the download page where the download will start automatically. If the download does not start automatically, click Download Now at the top of the page.
Creating a Bootable Flash Drive
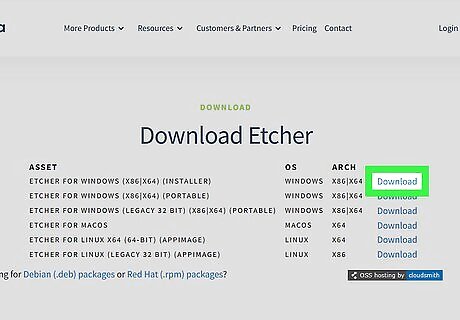
Download Balena Etcher. Balena Etcher is a free program used to create bootable flash drives, which you will need to dual-boot Ubuntu Linux with Windows or macOS. Alternatively, you can use UNetbootin or Rufus on Windows. To install Balena Etcher: Go to https://etcher.balena.io/ in a web browser. Scroll down and click Download next to your operating system. Open the Balena-etcher setup file in your Downloads folder or web browser. Follow the instructions to complete the installation.
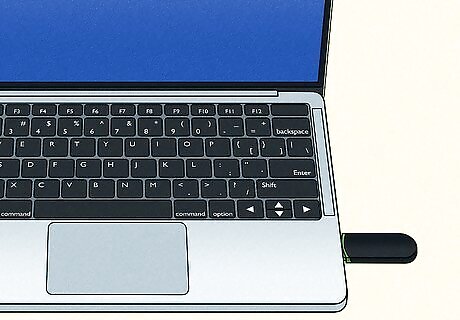
Insert your flash drive and open Balena Etcher. Make sure you use a flash drive with at least 12 gigabytes of space. Once inserted, click the Balena Etcher icon in the Windows Start menu or your Mac's Applications folder. This will overwrite everything on your flash drive. If there are any files you want to keep, be sure to back them up before continuing. If you are using a writable DVD instead of a flash drive, insert the DVD into your DVD drive, right-click the Ubuntu ISO file, and click Burn disk image to burn the ISO file to a DVD.
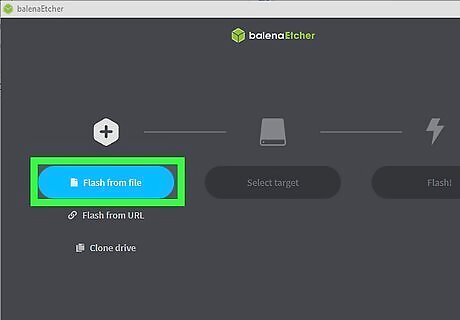
Click File from Flash. It's the blue button on the left side of Balena Etcher.
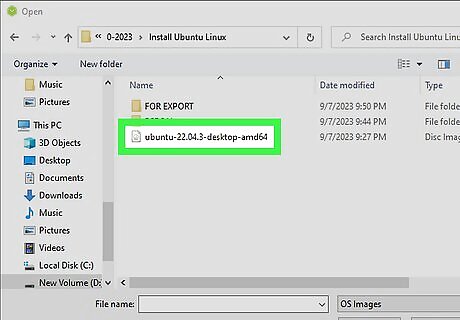
Select the Ubuntu ISO file. Navigate to the location of the Ubuntu ISO file you downloaded. Click it to select it and click Open. By default, your downloaded file can be found in your Downloads folder. Your USB drive should be listed in the middle. If it is not, click Change and select your USB drive.
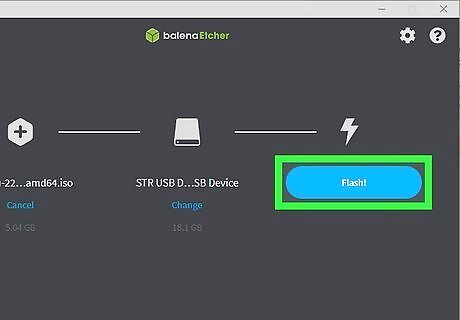
Click Flash. It's the blue button on the right. This will write the ISO file to your Flash drive as a bootable drive.
Partitioning Your Drive (Windows)
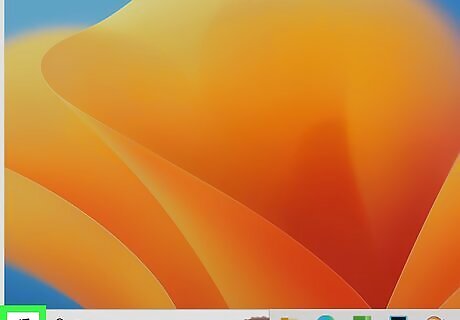
Right-click the Windows Start menu. Before you install Ubuntu, you will want to partition your drive so that you have a location to install Ubuntu.
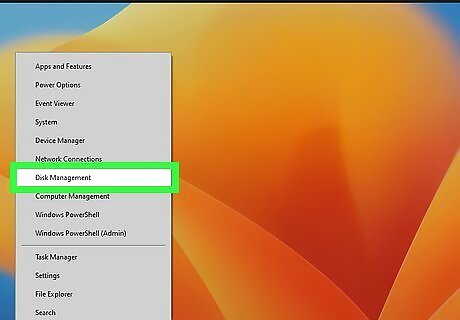
Click Disk Management. This will open the Disk Management utility.
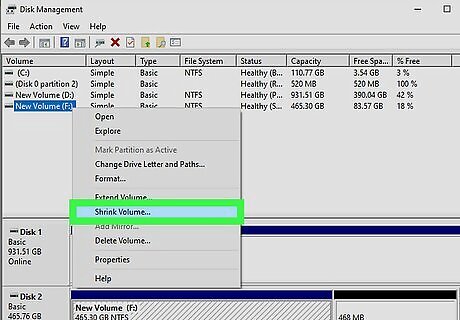
Right-click the drive you want to partition for and click Shrink Volume. This displays a window you can use to partition your drive.
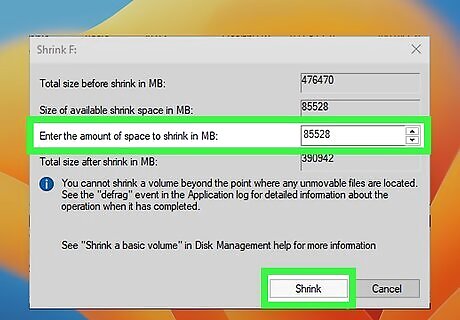
Enter the space you want to allocate and click Shrink. Enter the amount you'd like to allocate to Ubuntu in megabytes (1,000 megabytes equals 1 gigabyte) next to "Enter the amount of space you want to shrink in MB." Make sure you allocate at least 30 gigabytes (30,000 megabytes) for Ubuntu. This will create new unallocated space in the graph at the bottom of the window.
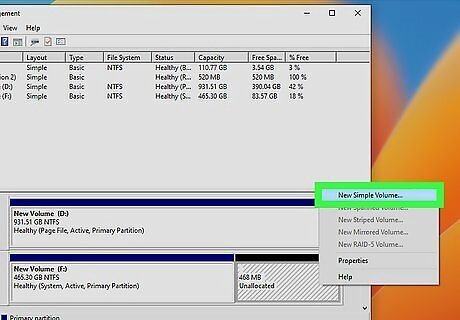
Right-click the unallocated space and click New Simple Volume. This allows you to allocate the space.
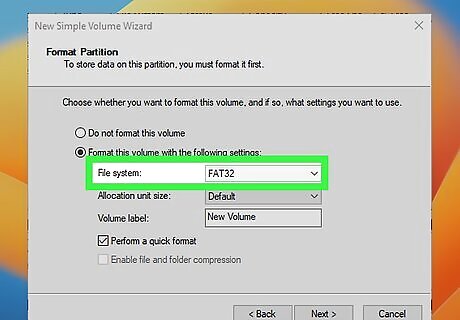
Select "FAT32" or "NTFS" as the file system. Use the drop-down menu next to "File System" to select "FAT32" or "NTFS."
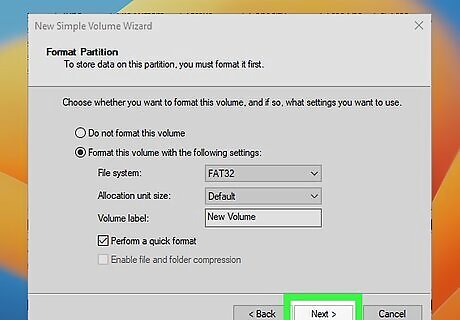
Enter a name for the drive and click Next. Enter a name for the drive (i.e., "Linux," "Ubuntu") next to "Volume Label." This allocates the new partition space.
Partitioning Your Drive (Mac)
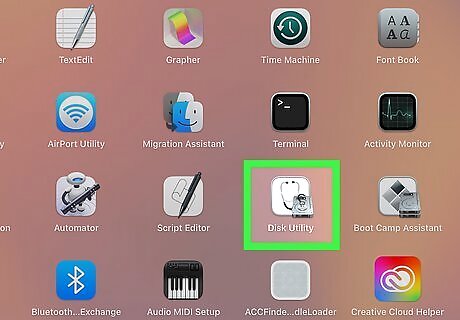
Open Disk Utility. Click the magnifying glass icon in the upper-right corner of your desktop, type Disk Utility, and click Disk Utility in the search results. You'll need to partition your hard drive to install Ubuntu as a dual-boot on a Mac.
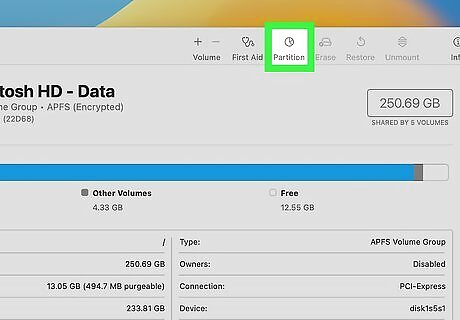
Select your primary hard drive and click Partition. It will most likely be labeled "Apple SSD" or something similar in the menu bar to the side. Click your main hard drive and then click Partition at the top of the page.
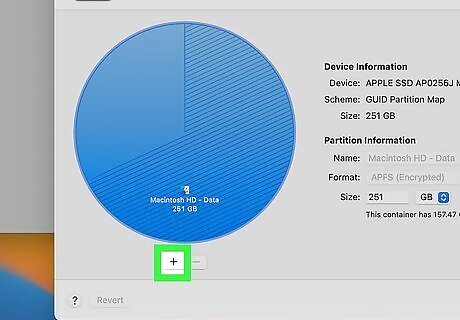
Click the + button. It's below the pie chart on the left side.
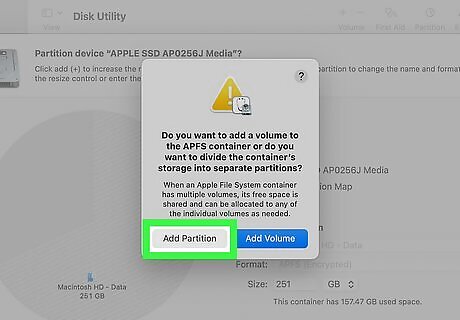
Click Add Partition. It's the grey button on the left side of the pop-up.
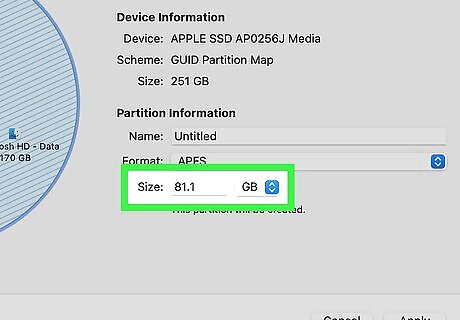
Enter how much space you want to partition for Ubuntu. Enter the space you want to allocate for Ubuntu next to "Size." Alternatively, you can click and drag the slider in the pie chart. Make sure you allocate at least 30 gigabytes of hard drive space for Ubuntu.
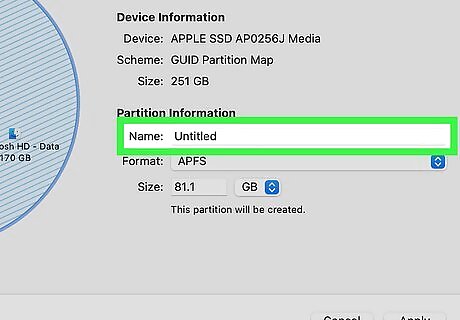
Enter a name for the new partition. Enter a recognizable name (i.e., "Linux," "Ubuntu") in the field next to "Name."
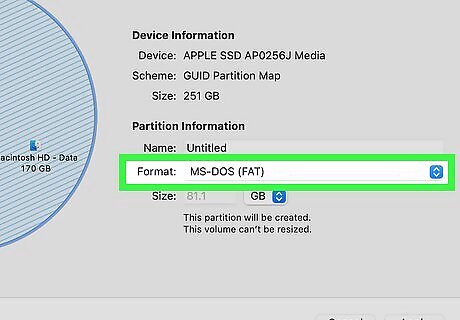
Select "MS-DOS (FAT)" as the format. Use the drop-down menu next to "Format" to select "MS-DOS (FAT)" format.
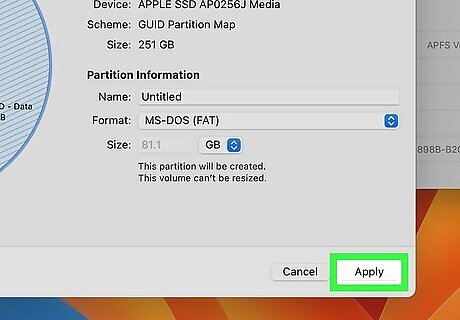
Click Apply. It's in the lower-right corner.
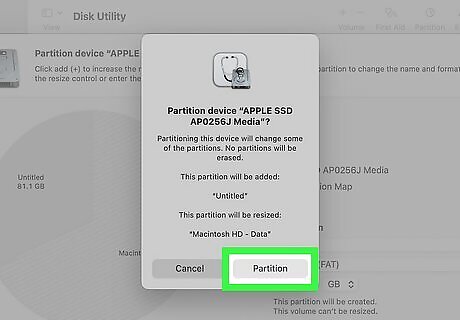
Click Partition. It's in the pop-up that sums up the changes you are about to make.
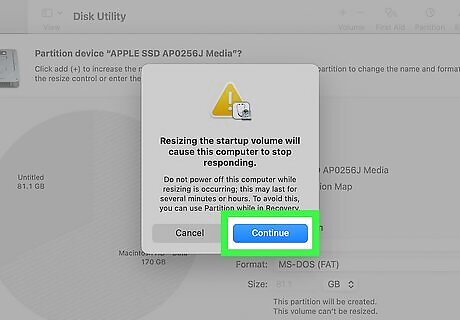
Click Continue. It's in the pop-up that appears. Do not turn off, unplug, or restart your Mac until the partition is completed.
Booting from Ubuntu Media (Windows)
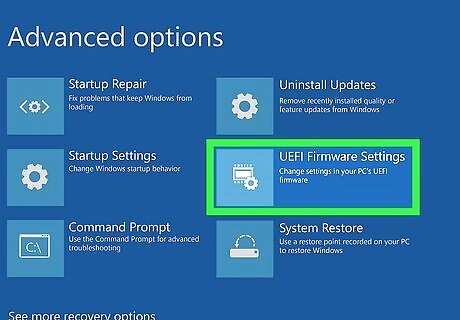
Boot into your BIOS or UEFI. If you are using a PC, you may need to change your computer's boot order so that your computer boots from a USB drive or DVD before you can install Ubuntu. To do so, you will need to boot into your computer's BIOS menu and change the boot order. You can boot into the BIOS from within Windows. Use the following steps to do so: Click the Windows Start icon. Click the Settings Click System (Windows 11) or Update & Security (Windows 10). Click Recovery Click Restart Now. Click Troubleshoot. Click Advanced Options. Click UEFI Firmware Settings. Click Restart. Once your PC reboots, it will boot into the BIOS menu.
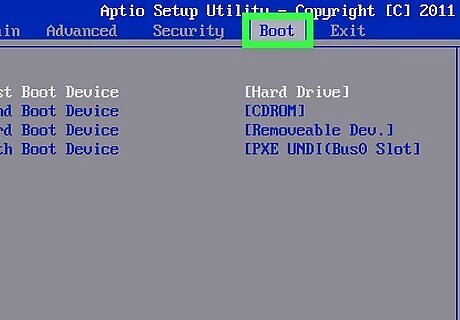
Look for the option to change the boot order. The BIOS menu is going to be different for each computer's make or model. Look for an option called "Boot Order" or something similar. Select this option.
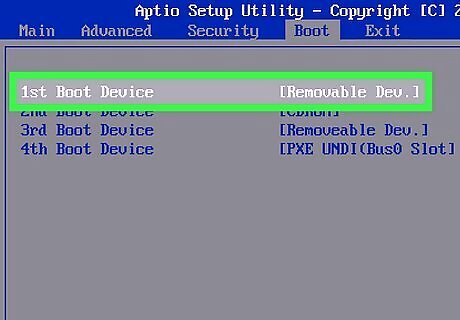
Place the USB drive and/or DVD drive first in the boot order. If your hard drive is before the USB drive or DVD drive, change the boot order so the computer boots from the USB drive or DVD drive first.
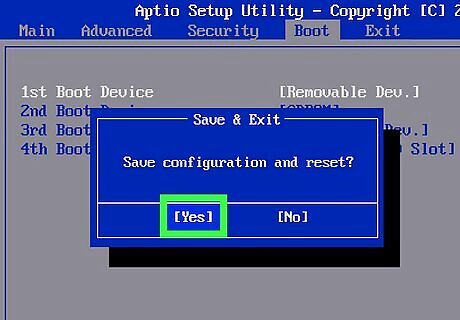
Save and exit the BIOS. Once you change your boot order, look for the option to save your change and exit the BIOS menu. Your computer will reboot. If a DVD or USB drive is inserted into your computer, your computer will attempt to boot from the DVD or USB drive before booting from the hard drive.
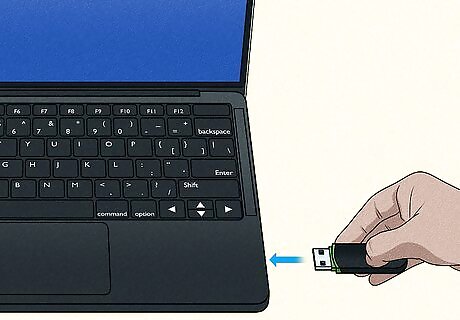
Insert the Ubuntu USB drive or DVD and reboot. If you haven't already done so, go ahead and insert the USB drive or DVD with the Ubuntu ISO file into your disk drive or a USB slot. Then, follow these steps to reboot: Click the Windows Start menu. Click the Power icon. Click Restart.
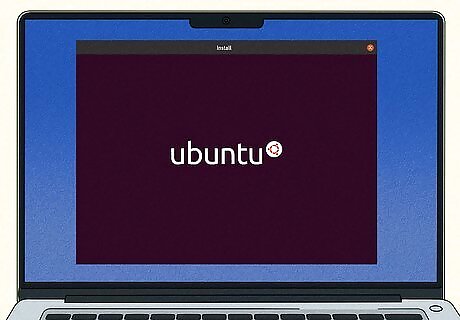
Wait for the Linux installation window to appear. Once your computer finishes restarting and you're back at the desktop, you should see the installation window appear. This will usually happen within a few minutes.
Booting from Ubuntu Media (Mac)
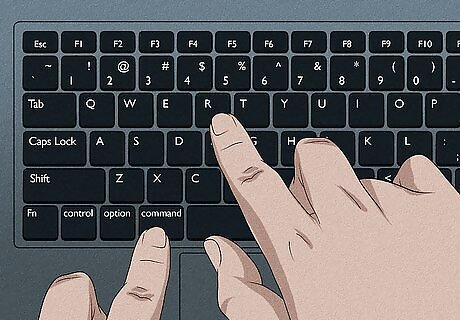
Allow booting from external media (if needed). This won't be necessary on every Mac. However, Macs with a T2 Security Chip have a startup security utility that prevents you from booting from an external hard drive. You will need to disable this to install Ubuntu from a disk. Use the following steps to do so: Restart your Mac. Press and hold Command + R as soon as you see the Apple logo to enter Recovery Mode. Log in to an administrative account. Click Utilities. Click Startup Security Utility. Click the radio option next to "Allow booting from external or removable media."
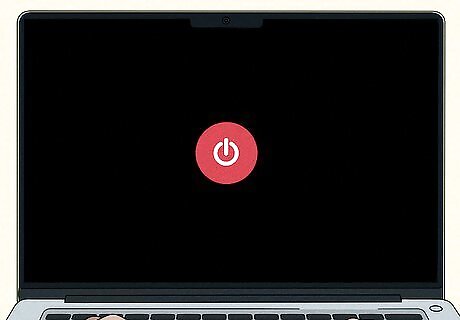
Power your Mac off. Use the following steps to do so: Click the Apple icon in the upper-left corner. Click Shut down.
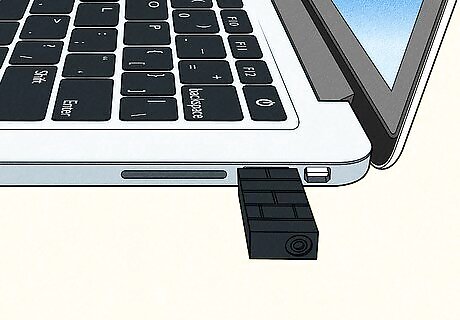
Insert your Ubuntu USB drive or DVD and power on your Mac. If you are using a USB drive, insert it in a free USB port. If you are using a DVD, insert the DVD into the DVD reader. Then, press the Power button to boot your Mac back up.
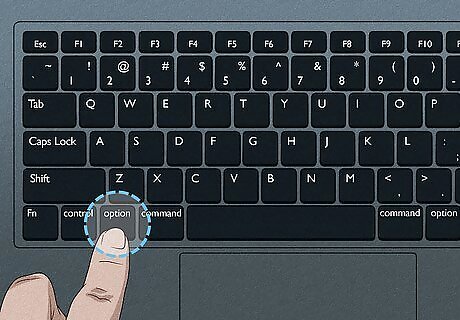
Immediately press the button to display the boot options. If you are using a Mac with an Apple Silicon processor, continue holding the Power button. If you are using a Mac with an Intel processor, press and hold the Option key. This will display the boot options.
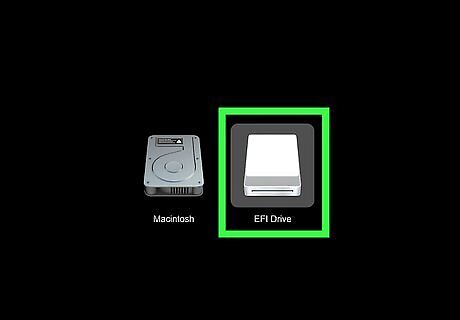
Select the bootable drive. It's the one that has an orange-colored drive. It will be labeled "EFI Drive". Use the arrow keys to highlight the bootable drive and press Enter.
Installing Ubuntu
Select Try or Install Ubuntu. It's the first option in the menu. Use the arrow keys to highlight this option and press Enter.
Select a language, then click Continue. Click the language you want to use for Ubuntu, then click Continue in the bottom-right corner.
Click Install Ubuntu. It's on the right side of the window. If you want to try Ubuntu before installing it, you can click Try Ubuntu. This will allow you to sample Ubuntu without installing it. When you are ready to install Ubuntu. Click the option to install Ubuntu on the desktop.
Check both boxes on the "Preparing to install Ubuntu" page. Check the "Download updates while installing Ubuntu" box and the "Install third-party software for graphics..." box.
Select the option to install Ubuntu alongside your operating system and click Next. It's the second option in the menu. If using a Mac, select "Manual Partitioning" and click Next.
Select the drive you want to install Ubuntu on and click Install Now. Use the drop-down menu at the top to select the drive you want to install Ubuntu on. Then click Install Now in the lower-right corner. Be careful which drive you choose. Check the amount of space the drive has and the drive label to make sure you select the right drive. You can also use the slider to partition the drive even further. Since you already partitioned the drive, you can install Ubuntu on the entire partition.
Click Install. This page displays the changes that will be made to your hard drive. If you are ready to install Ubuntu, click Install.
Select your time zone and click Next. If you are connected to the internet, this information will be detected automatically. If it is not detected automatically, enter the name of your city in the box at the top.
Enter your user information and click Next. Fill out the following fields and click Next: Your name — Your first and last name. Your computer's name — The name that you want your computer to use. Make sure that this isn't too complicated. Pick a username — Type in a username you'd like to use for your Ubuntu profile. Choose a password — Enter a password. This is what you'll use to sign into your computer. Confirm your password — Re-enter the password. Require my password to log in — Toggle this switch on if you want to require your password to log in to Ubuntu.
Select light or dark mode and click Next. Click the light or dark mode box to select whichever appearance you prefer. Then click Next.
Wait for the installation to finish. It may take a few minutes for the installation to finish.
Click Restart Now when prompted. Doing so will bring up a screen on which you can select your preferred operating system (e.g., Ubuntu or Windows). Be sure to remove your USB or DVD drive so your computer does not attempt to boot from the disk again.
Select Ubuntu and press ↵ Enter. This will boot your computer into Ubuntu Linux rather than opening Windows or macOS again. You now have Linux installed on your Windows computer.


Comments
0 comment