
Picking a Type of Boxwood Shrub
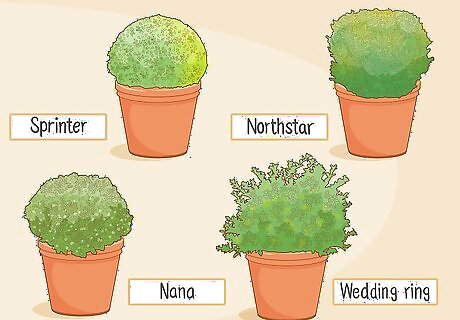
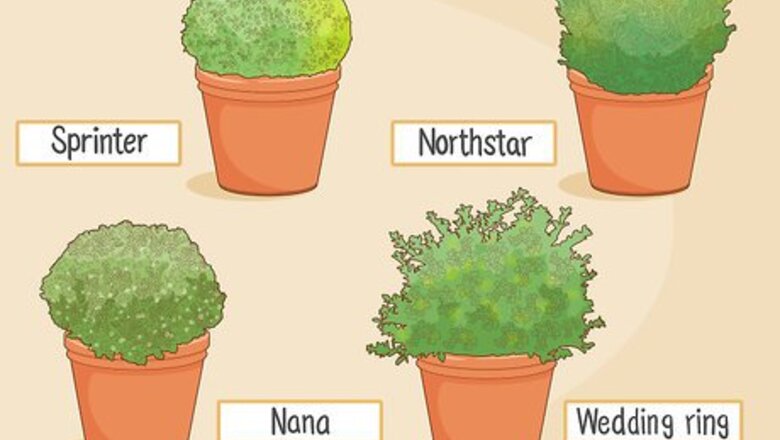
Choose the dwarf boxwood for a shrub that looks great as a border plant. Dwarf boxwoods are also often called “low-growing” shrubs. These types of plants are fast-growing, but you won’t have to worry about them getting too tall. They generally reach 2 to 3 feet (24 to 36 in) within 1 to 2 years. You can plant them in the ground, or use them in pots to create nice accents around your yard. Some of the more common varieties are: Sprinter Northstar Wedding Ring Nana
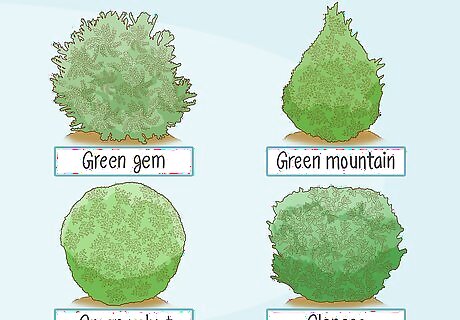
Pick a cold-resistant boxwood if you live in an area with cooler seasons. Harsh winds, excessive snow, or ice storms can be really damaging to any kind of plant, and the boxwood shrub is included in that. Luckily, there are some varieties that fare a little better in the colder months. Look for: Green Velvet Green Mountain Green Gem GlencoeTip: If you live in an area that experiences harsh winters, you could plan on using burlap or plastic to cover your plants or to create a barrier against the wind to help protect the shrubs during the colder months.
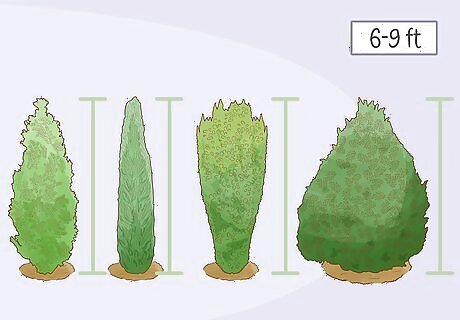
Opt for upright boxwoods to form hedges or topiaries. Upright boxwoods will grow to be between 6 to 9 feet (72 to 108 in) tall. They’re great to use for a privacy hedge around your yard. You can also trim them into fun shapes, like giraffes or people, to make topiaries. Look for these classes of boxwoods: Fastigiata Graham Blandy Dee Runk John Baldwin
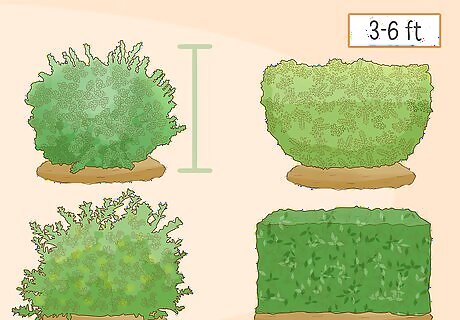
Get a rounded boxwood for a fast-growing, easy-to-shape shrub. These boxwoods grow to be between 3 to 6 feet (36 to 72 in) tall. They’ll need to be trimmed more often to keep their shape, but they’re really nice additions to a yard that needs some coverage quickly. Look for these: Winter Gem Golden Dream Green Beauty Green Mound
Choosing a Location

Decide what kind of design you’d like to implement with your shrubs. You may already know what you want to do with your boxwood shrubs, but maybe you’re looking for some inspiration. Here are some of the more common uses for these types of shrubs: Accent shrubs: Placed strategically around your yard to add color and balance. These can be planted in the ground, but also look nice in decorative pots. Hedges: Planted in a row to create a “fence” made of shrubs. These can be used for privacy or simply for style, like if you wanted to make a hedge maze. Topiaries: Trimmed and shaped shrubs made to resemble an animal, person, or thing.Did You Know? Boxwood Shrubs are deer-resistant, so they are super popular in areas with a high deer population. You won’t have to worry about your beautiful plants getting nibbled away overnight!
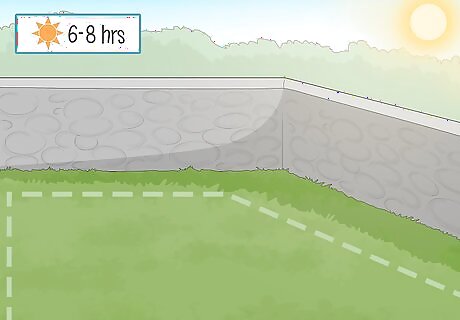
Choose a location that gets 6-8 hours of sunlight every day. Full sun or partial shade that allows at a minimum 4-6 hours of direct sunlight are the best options for boxwood shrubs. Avoid planting them somewhere that is shaded for most of the day, as they won’t grow well there. In the northern hemisphere, the side of your home that faces south will get the most sunlight.
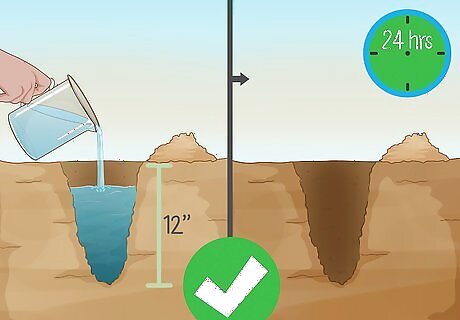
Pick a spot that has well-draining soil so your shrubs don’t get root rot. If the soil doesn’t drain well, the roots of the plant will get too wet. Test the soil’s drainage capabilities by digging a small 1 foot (12 in) hole and filling it with water. If the water is still visible after 24 hours, the soil doesn’t drain well. If you don’t have other options for the boxwood shrubs, you could try to fix the drainage problem.
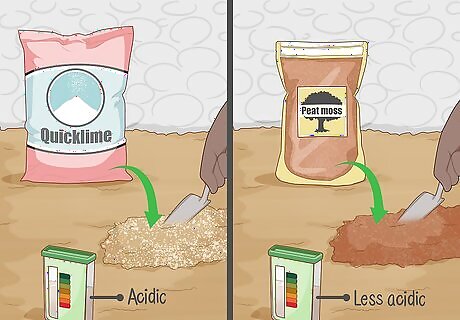
Test the soil’s pH level and adjust it if it isn’t in a 6.5-7.2 range. Use a test probe or a paper test strip to test the pH level. If the soil is too acidic, you could add quick lime to it. If the soil needs to be less acidic, add pine needles or peat moss to it. After applying whichever solution was necessary, wait one month and then test the pH level again. Once it’s in the right range, you can wait 2-3 years before you need to test it and treat it again.
Planting the Shrubs
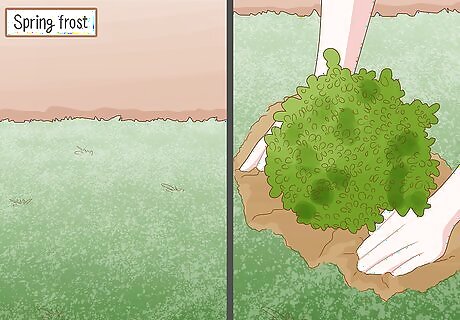
Wait to plant your shrubs until after the last spring frost. Late spring is the best time to put your boxwood shrubs into the ground. You can buy your plants at your local garden center or nursery. Look for 1 gallon (3.8 L) plants, or opt for the 2 gallons (7.6 L) containers if you have more ground to cover. If you buy your plants before the cold weather is over, keep them in a garage, shed, or indoors until you can plant them. Just make sure to water them every week while you’re waiting.
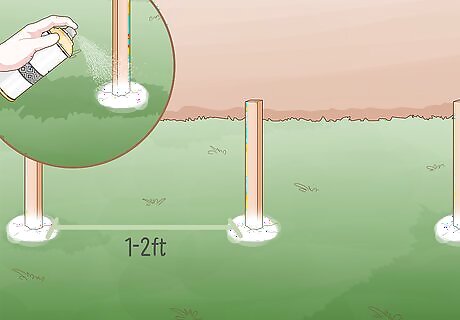
Space your plants about 1 to 2 feet (12 to 24 in) apart from each other. Most shrubs grow to be about 2 to 3 feet (24 to 36 in) wide, so they need a good amount of space to grow into. To easily mark where you need to plant each shrub, put stakes into the ground along where you want to plant. Measure out the distance in increments from one stake to the other and put a marker at each planting location. When you’re done measuring, take down the stakes. For the marker, you could use spray paint, a piece of colored fabric, or colored rocks. Just make sure it’s something that’s easy to see and that won’t blow away in the wind.
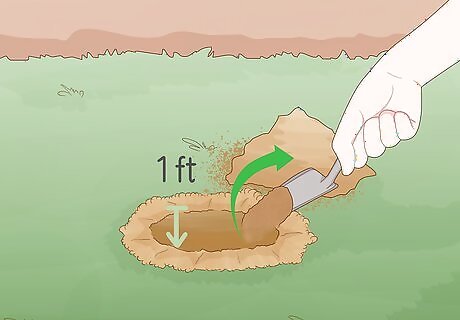
Dig a hole for each plant that is as deep as the root ball. The root ball is the part of the shrub that contains all the roots, and it most often is completely contained within the container the shrub was sold in, though it might be a little smaller than the container itself. Most often, you’ll need to dig about 1 foot (12 in) down into the soil. When the shrub is actually planted, the soil should be even with the top of the root ball.
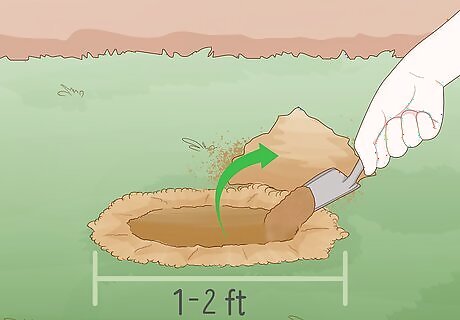
Make the hole 1 to 2 feet (12 to 24 in) wide for each shrub. Use your spade or a small shovel to unearth the ground surrounding each hole. Set the dirt off to the side, as it’ll get replaced after the shrub has been planted. It’s important that the roots have somewhere to grow, and loosening the soil around each plant will make it easier for the roots to spread.
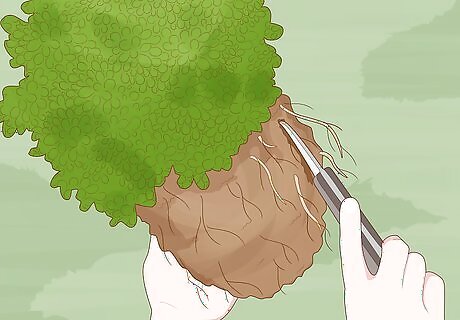
Break open or cut the root ball so the roots can spread more easily. Remove the shrub from its container. Use a razor blade or some other sharp instrument and cut into the root ball multiple times around each side. This simply loosens the root ball so that it’ll be easier for the actual roots to spread out. Depending on how loose the soil is in the root ball, you may also be able to just use your hands to loosen the soil so that some of the roots are hanging free.
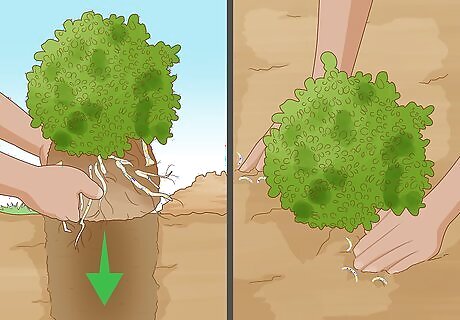
Tamp the soil around each plant so that the root ball gets set into the ground. Set each shrub into its designated hole and fill in the space around it with the previously removed dirt. Position the plant so that the top of the root ball is even with the surface of the ground. Once the plants are all in place, use your spade to firmly press down on the soil all around each plant. Tamping helps secure the soil so it isn’t loose around the root ball, which means it’ll be less likely to blow away in the wind or get washed away when you water the shrubs.
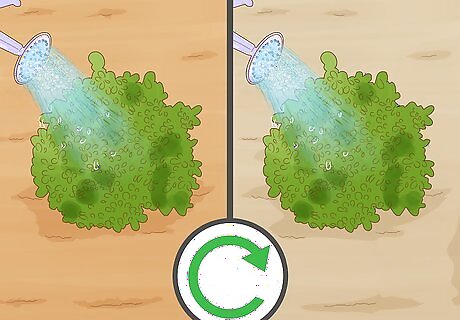
Water the plants thoroughly after planting them so they can grow strong. Give each shrub enough water that the topsoil is completely saturated. This water will seep down through the soil and the root ball and help them join together even more, encouraging the roots to spread out and start growing in the ground. For the next week, keep an eye on the soil and give the shrubs more water if the soil looks dry.
Caring for Your Boxwood Shrubs

Water your plants every 2 weeks if there hasn’t been regular rainfall. Especially within the first 2 years, it’s important to keep the soil around the plant moist. This will help it develop really strong roots and grow well. If there is regular rainfall, you most likely won’t need to give your shrubs any additional water. If you notice brown or yellow leaves, that means you need to water the plant more often. Check the soil by sticking a finger into it about 2 to 3 inches (5.1 to 7.6 cm). If the soil is dry, water the plants. If the soil is damp, you can wait a few more days.
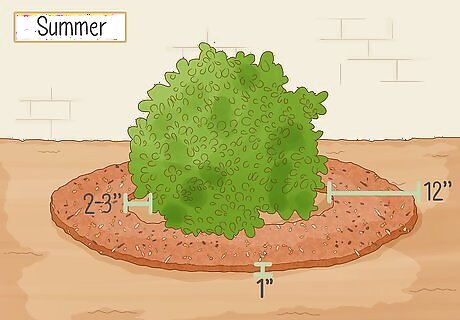
Give your shrubs about 1 inch (2.5 cm) of mulch each summer. Start the mulch about 2 to 3 inches (5.1 to 7.6 cm) from the root, as you don’t want to cover the actual root with mulch. Spread it out about 12 inches (30 cm) around each shrub. The mulch helps to keep the roots cool during the warmer summer months.Tip: For the best results, use a fine-textured mulch for your shrubs. Look for one that contains peat moss, grass clippings, and sawdust.
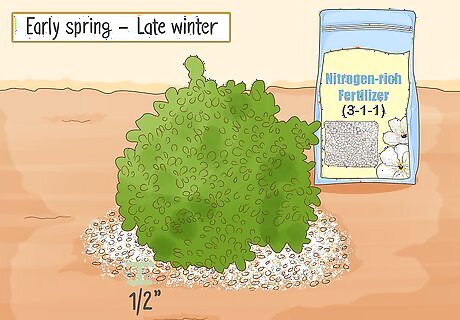
Fertilize your shrubs in the early spring and late winter. Apply the fertilizer to just the ground around the roots of the plant so it’s about ⁄2 in (1.3 cm) thick. Take care that it doesn’t come into contact with the leaves. After the shrub has been fertilized, water it thoroughly. Use a nitrogen-rich fertilizer. Look for one with an N-P-K (nitrogen to phosphorus to potassium) ratio of 4-1-1, 3-1-1, or 3-1-2. You can find fertilizer at your local garden center or nursery.
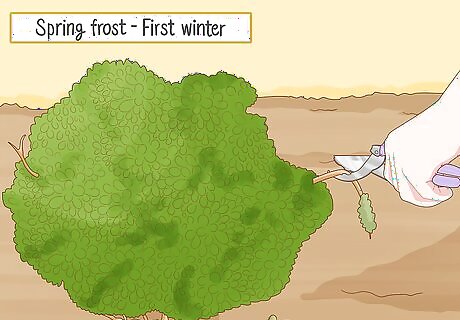
Prune your boxwood shrubs between the last spring frost and the first winter frost. Use sharp, clean shears to trim away dead or leggy branches. Cut away any branches that are growing down toward the ground to help the shrub keeps its shape. You can also prune the shrubs during the growing season, especially if it is growing a lot and getting out of shape. Hand pruning is the most effective way to trim shrubs.
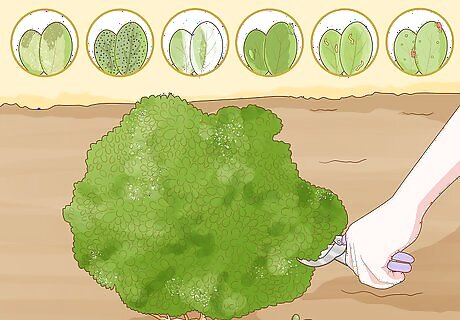
Treat diseases and drive away pests to keep your shrubs healthy. If you notice branches with brown or mildew-covered spots, cut them away. Depending on what’s wrong with your shrub, you may be able to use a fungicide or pesticide to help clear up the problem. When in doubt, ask a professional at your local garden center for help. Some of the more common diseases and pests you might encounter are: Boxwood blight Leaf spot Powdery mildew Boxwood psyllid Leafminers Spider mites


Comments
0 comment