views
Performing a Clapping Push Up
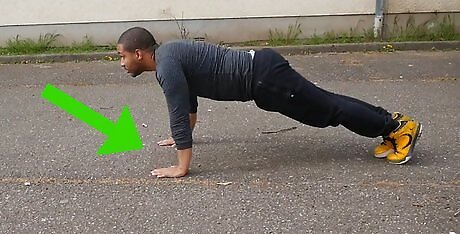
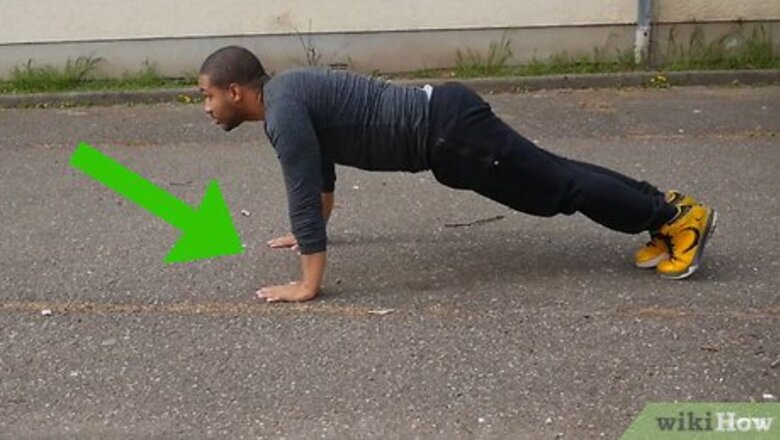
Start in a standard push up position. Get into an arm-supported position with your hands positioned beneath your shoulders and fingers spread slightly, ready to push. Engage the muscles of the core and lower back by tensing the abdominals to keep your body in one rigid line. Poise on the toes or balls of your feet to maintain balance throughout the movement. In push up position, the body should be firmly locked into place, but not tense. It can help to keep the neck straight and the legs in line under the hips as if you were standing.
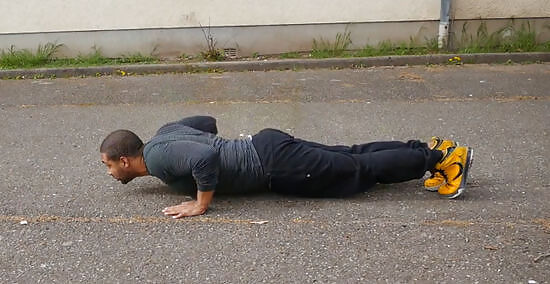
Lower yourself until your chest is just above the floor. Bend the elbows to initiate the first part of the push up. Keep the elbows close the body and lower your weight in a smooth, controlled manner. The lowering portion of the push up should take between half a second to a full second; any longer will be using up strength and stability. Stop lowering yourself when your chest touches the floor, or just above it.
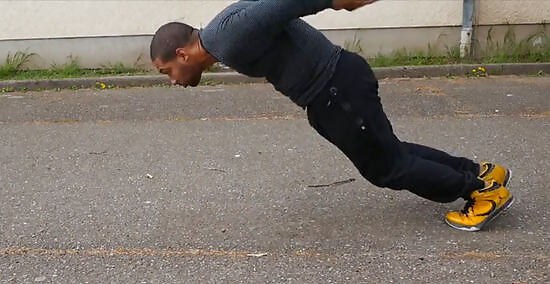
Push! Reverse the motion by pushing hard through the palms. Again, focus on speed here. Imagine that you’re attempting to push yourself all the way up to a standing position. Keep your force consistent through every part of the push up.
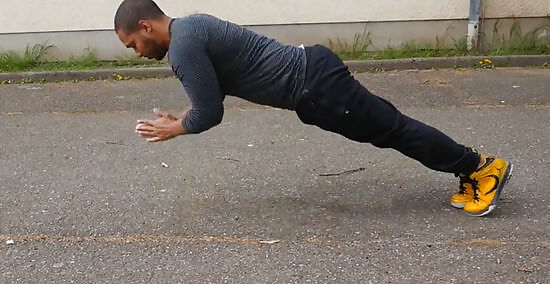
Let your hands leave the floor. Just as your arms reach full extension, pull your hands up off the floor. Timing of this part of the movement is crucial: if you time it right, you should feel like you’re floating for a brief moment. This is the interval during which you will perform the clap. If you find that you’re having trouble with your timing, continue feeling out the final part of the movement using the plyo push up. If you lift the hands too soon or too late, you’ll lose the benefit of momentum and all height.
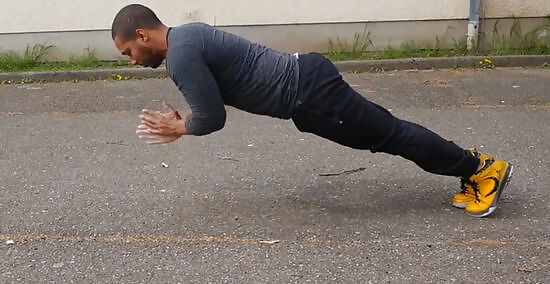
Quickly clap and reposition your hands. Once you’ve pushed your body up and your hands are off the floor, bring them together in one quick motion in front of the chest. Ideally, you should clap the hands together while hovering in the highest position of the “jump,” and be ready to plant them back down by the time you begin descending. Separate the hands and place them back underneath your shoulders, catching yourself as you fall. It’s okay to catch yourself somewhat low as you descend. This might make it tricky to begin the next clapping push up if you’re performing them in sequence, but it’s safer to land on bent, expectant arms. Landing in full extension may jar the elbows.
Building Strength with the Standard Push Up
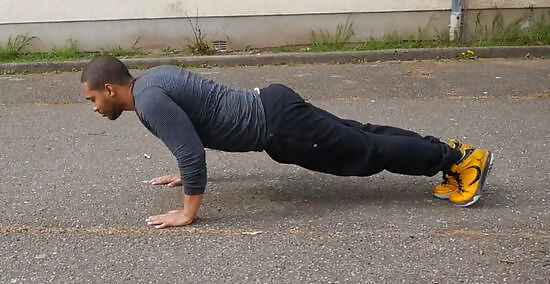
Know the right technique. A proper push up starts in a position in which your body is in perfect alignment from the top of your head to your feet, and your weight is supported by your toes and extended arms. The core should be kept tight to keep the lower back from arching or sagging. From here, lower your weight in a smooth, controlled motion until your chest just touches the ground, then reverse the motion by pressing with the chest, deltoid and tricep muscles until you’re back in the position from which you started. When doing a push up, keep your elbows tucked close to your sides at about 45 degree angle instead of letting them flare out perpendicularly to your body. This will put you in a more natural position to utilize muscular leverage and prevent your shoulder joints from moving through angles that may strain them. Your elbows should track outward and slightly behind you, so that if viewed from above the position of your body would form the shape of an arrow rather than a “T.”
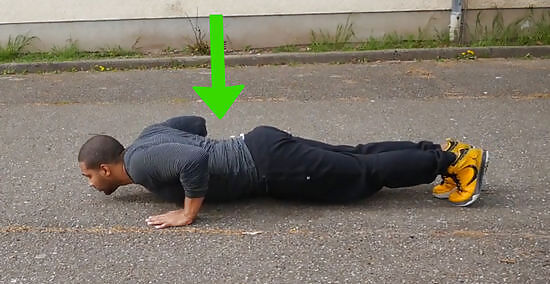
Use a full range of motion. From a fully extended position, lower yourself until the movement of your body is stopped by the ground, then push back up. This is what is known as full range of motion, the distance through which your muscles and joints are able to move in a given exercise. Using full range of motion ensures that you build strength through each individual portion of the movement—at the bottom, where your leverage is weakest, in the middle “sticking point” where your triceps take over and at the top to lock out your arms. Because our bodies are all different, range of motion will be slightly different for everybody. Some may not have the shoulder mobility necessary to descend all the way to the floor, while past injuries might make certain positions too painful to get into. Keep this in mind when training the clapping push up and don’t put yourself at any unnecessary risk. Go as deep as you can in the movement until you experience discomfort (or hit the floor). Don’t actually lock out your elbows at the top. “Lock out” only means full extension, not over-extension. The arm should be in a straight line and held firm, with another inch or so of movement in the elbow. If there’s no room for movement in the elbow, you’re overextending.
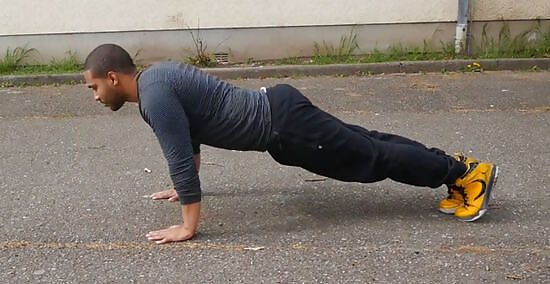
Build up your work capacity. Practice the standard push up until you can do 5-10 consecutively. At this point, add multiple sets into your workout. Try to stay one or two repetitions shy of as many as you can do to save some energy for the next set. Begin a training regimen to work on your push up strength and work capacity several times a week. Always take time off to rest every couple of days to give the body time to recover.
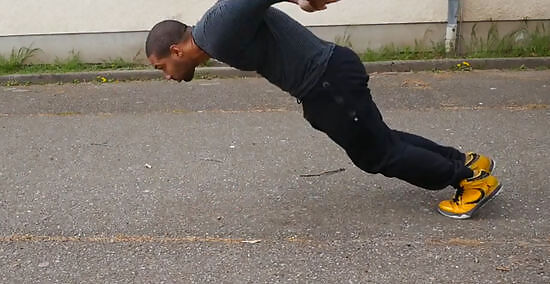
Focus on speed. Concentrate on the concentric portion of the push up (the actual pushing part) and try to lift your weight from the floor as rapidly as you can. The clapping push up is a plyometric maneuver, which essentially means that it relies on explosive strength to overcome resistance and move the body. Similar to jumping, the faster you’re able to get into a position of leverage and push, the more power you’ll be able to generate and the higher you’ll go. Power = force X velocity. Put simply: push fast! Bottoms-up and plyo push ups are great ways to train force output. Bottoms-up push ups start from the floor rather than full arm extension and focus on building strength in the most disadvantaged position of the push up; plyo push ups are just like standard push ups, but rather than stopping at lockout, continue pushing so that the hands leave the floor in a quick “jump.” These also serve as a sensible precursor to clapping push ups. Once you're able to do multiple standard push ups with strict technique and explosive speed, you're ready to add the clap to the movement.
Intensifying the Movement
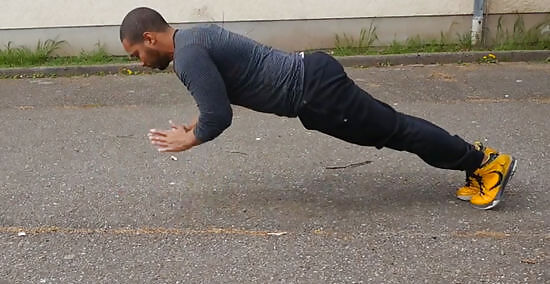
Perform multiple clapping push ups. Once you’ve trained to the point that clapping push ups become easy for you, add difficulty to the movement and continue building strength by linking together multiple clapping push ups. Rather than doing a set of regular push ups, try making them clapping push ups, aiming for about half the number you can do in a normal set. Performing consecutive clapping push ups is also a bit of a challenge in terms of rhythm, timing and stabilization strength, as it requires you to catch yourself and begin the next push up in a disadvantaged position. There’s a lot of force passing through the shoulder joint during the push and the landing. If you’re not careful, injury can occur.
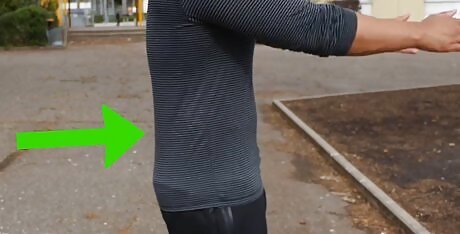
Add resistance. Strap on a weighted vest or place a light weight plate in a secure position on your lower back and perform 1-5 clapping push ups this way. Increasing the resistance of the push up forces you to press through the movement harder and faster, which translates to major increases in strength. Keep the number of reps in each set relatively low; because the clapping push up is an explosive plyometric exercise requiring short, intense bursts of strength, your force output and work capacity will drop off rather quickly, eventually putting you at risk of exhaustion or injury.
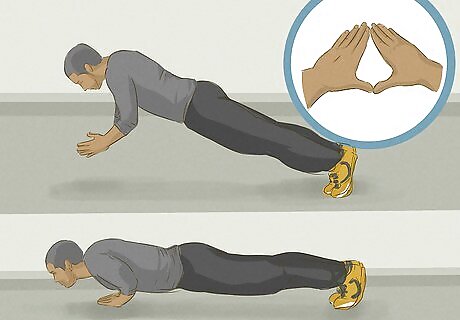
Try clapping push ups from a diamond position. Regular push ups target the chest, shoulders and, to a lesser degree, the triceps. Shift emphasis to the triceps by placing the hands closer together under the body in the starting planche position, touching the forefinger and thumbs of both hands together to loosely form a “diamond.” Proceed to push up in the same manner, making sure to keep the elbows from flaring straight out. Diamond clapping push ups will add strength and mass to your triceps, which will in turn strengthen the upper portion of the push up. Balance will play more of a role in the clapping diamond push up. Because the hands are in a much more narrow stance beneath the body, you will have to actively work to maintain balance as you descend, push and catch. Having the hands so close together in the starting position can make it hard to get a good clap. Some people prefer to bring the hands around and clap behind the back, instead, but this is a very advanced variant of the diamond clapping push up.
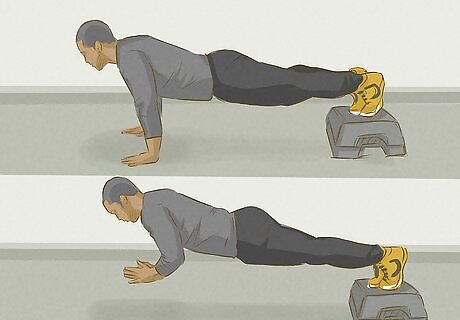
Elevate your feet. Find an object 8”-12” in height and rest the feet on top of it before performing clapping push ups. As the angle of the body is raised, leverage is taken away from the pectorals, which forces the muscles of the shoulder to compensate. The frontal deltoids will get a very intense workout. Elevate the feet as high as you like. Theoretically, there’s no limit to how high you can raise the angle of your body, as long as you stay in alignment and the shoulders are strong enough to bear and manipulate your weight. At a vertical limit, the exercise basically becomes a clapping handstand push up.
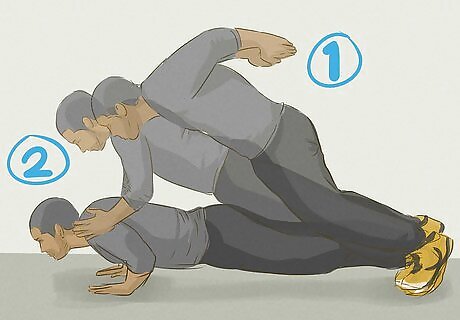
Clap more than once. For the ultimate test of clapping push up strength, continue training the exercise until you can clap twice consecutively in a single push up. To do this, you’ll need to be able to achieve an impressive amount of height and hang-time from the push, which means having extremely well-developed pushing power. If you can clap more than 3 or 4 times after one push up, you may be in world record contention! Don't cheat; make each clap distinct.




Comments
0 comment