
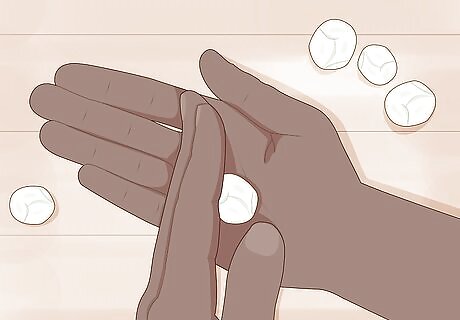
- Knead your clay until it is smooth and pliable. Then, roll it into a ball.
- Then, brush the clay with cornstarch or water to prevent your object from sticking to the clay. Push your object into the clay and then remove it.
- Place your clay on a baking sheet and bake it in the oven at 275 F (135 C) for 20-40 minutes. Just let it cool all the way before you use it.
Making a mold from polymer clay
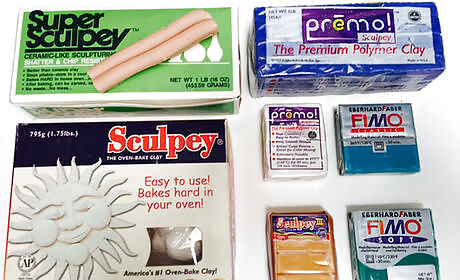
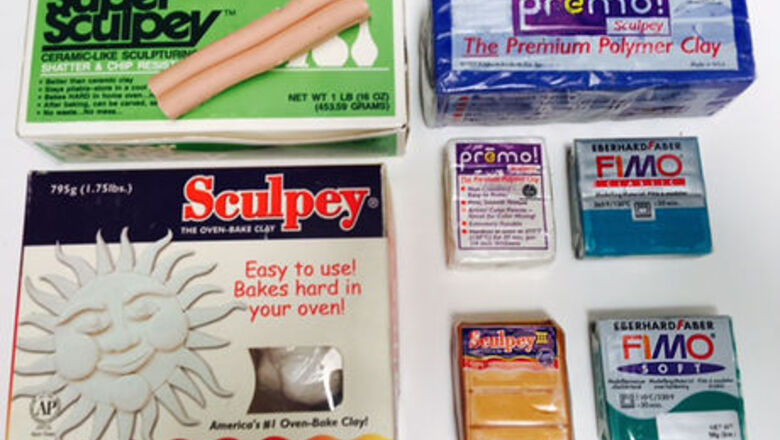
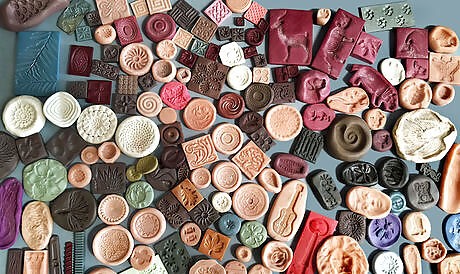
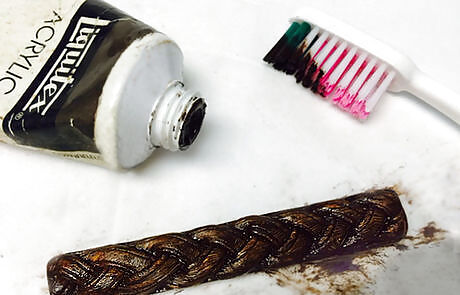
Condition any polymer clay until it's smooth and pliable. Most will require at least some kneading and warming. The firmest brands and lines of polymer clay will make molds with the highest detail (Kato Polyclay, Fimo Classic, Premo, etc) but any brand or line can be used with good results. (Image doesn't show Kato Polyclay, Cernit, Souffle or Craftsmart, or other doll and flesh-colored clays.)

Roll the clay into a smooth ball between palms after conditioning. Then form the ball into another shape if needed (perhaps a teardrop or log).

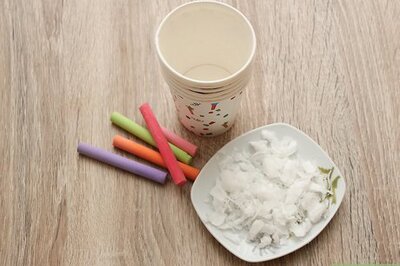
Put a release on the clay and/or the item to be molded if needed. No release will be necessary for mold materials that won't easily stick to polymer clay. When a release is needed, several materials can work although water and cornstarch are the most frequently used: Cornstarch (or baby powders made from 100% cornstarch) - Apply cornstarch onto the clay and/or into the mold with the tips of a soft fluffy brush or perhaps a homemade pounce bag (a pounce bag is a piece of fabric, like muslin, that's gathered around the cornstarch, so the powder can be applied evenly and thinly or thickly according to need). Brush or blow until no pockets of cornstarch remain in crevices. Cornstarch will rinse off the casts later if necessary. Water - Mist or wipe the mold lightly with water. (It's best not to use water when using certain brands of raw clay such as Fimo and Cernit since one of their fillers may absorb water causing stickiness.) Other powders - Apply metallic-colored powders, colored chalk powders, etc, to the clay with a soft brush. Metallic leaf - Apply to the clay, making sure to adhere the leaf well. (Note that metallic leaf and the colored powders will change the color of the clay's surface.) Oils - Mineral oil, etc, can also work though may make the clay slippery. ArmorAll spray is effective too but the silicone in it may prevent paints and clear finishes used after baking from adhering to the clay.
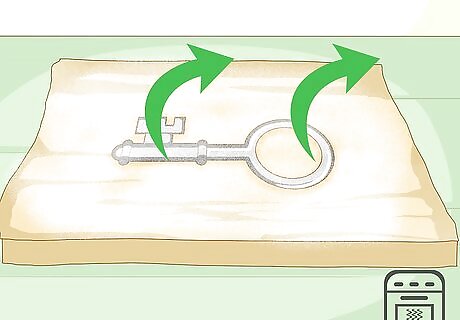
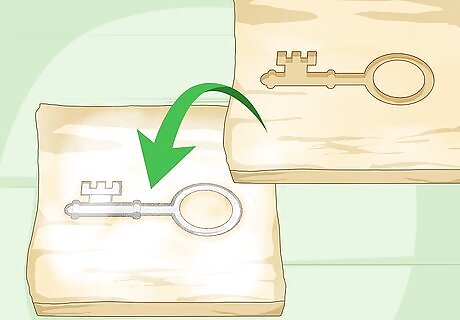
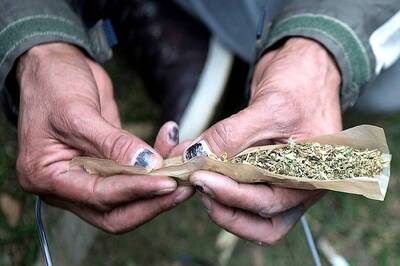
Push the item being used to create the mold into a ball or a slab of raw clay. Or instead press the clay onto or partly-around the item, whichever works best to create the mold.
Gently remove the item from the clay. (Sometimes removing the item from the clay is not necessary if it's able take the baking temperatures of polymer clay and also won't swell, stick, etc in the mold while baking, but usually clay molds are baked alone.)
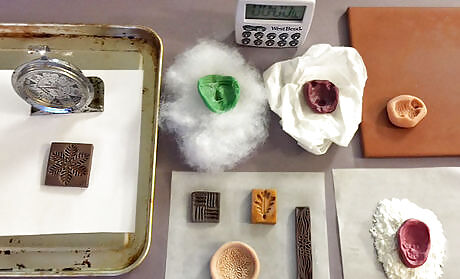
Place the raw clay mold on a metal baking tray or on another oven-safe carrier. Use a carrier that's rigid so it will be easy to move in and out of the oven without disturbing the clay and one that won't warp in the heat. Position the raw clay mold on the carrier on any of its flat sides. If the mold is not flat or thick, place it instead on a wad of tissues or stuffing or in a pile of baking soda or cornstarch-- all are heat safe at polymer clay temperatures. If the raw clay mold is thin in any area, first lightly stuff its interior with tissues, polyester stuffing, etc (or just re-make the mold so it's thicker). Polymer clay softens slightly with heat. As it may droop where it is thin, stuffing can help by adding support. If desired, avoid the shiny spots that show up on polymer clay after it's been heated in direct contact with very smooth surfaces like metal baking sheets, aluminum foil, glass or ceramic dishes, etc. To do that (or any time polymer clay is baked), place another material on the carrier before adding the clay. A flat material like a sheet of ordinary blank paper, patty paper (for separating hamburger patties), parchment paper or deli paper work well; or a non-flat material may sometimes be wanted like a sheet or wad of tissues, bit of polyester stuffing, pile of baking soda or pile of cornstarch, etc. Bare *unglazed* tiles work well too and are their own rigid carriers. None of those materials will change the natural texture of cured polymer clay which is similar to ordinary paper. (When making molds, shiny spots may not be a problem though.)
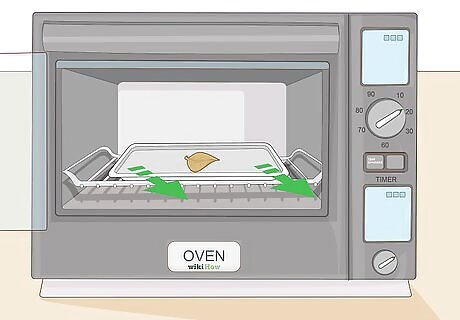
Bake the clay in a preheated oven. Use an oven thermometer if possible, and bake at 275 F (135 C) for most polymer clays, or at 265-325º F (130-160º C) depending on the brand or line of polymer clay. Some polymer clays will darken at those higher temperatures, but darkening isn't important when making molds. There are other ways to cure polymer clay, too, but using a regular oven or toaster oven is the most common. Always read the manufacturer instructions for your polymer clay regarding specific temperature and time guidelines.
Set a timer for 20 to 45 minutes depending on the thickness of the mold and the brand/line of clay used. Allow enough time for the clay to polymerize throughout, but polymer clay just becomes stronger the longer it's heated. Bake the clay in the center of an oven or a toaster oven.
Remove the hardened mold from the oven on its carrier and allow it to cool. Or leave it in the oven until cool.
Make as many molds as you want once you've gotten the hang of it.
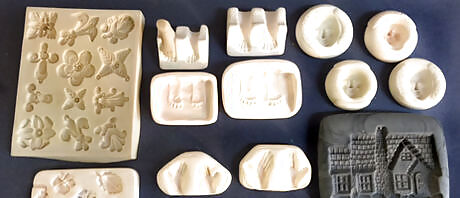
Purchase rigid or silicone molds readymade, if desired. They will be molds "for polymer clay" or molds made for other purposes (candy molds, etc). The molds may be faces, body parts, geometrics, flowers, trims, etc; most are small molds but some may be large.
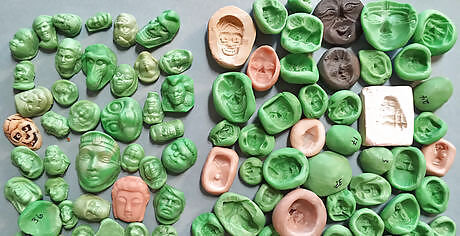
If you want, make casts from your molds with scrap clay then number the matching molds ("innies") and casts ("outies") on their back sides to keep matching molds and casts straight. This can be very helpful for faces in particular.
Making a polymer clay cast from a mold
Roll the clay into a smooth ball as described in the previous method. Form into a teardrop or log or any shape that will best fit into the mold. If needed, use a release on the clay or in the mold or both. Firmly press the clay ball into the mold, especially in the center to make sure all crevices will be filled (if there's a particularly deep and narrow depression inside the mold, put the tip of a clay teardrop in that spot first). To create a flat-backed mold, press on the back of the clay in the mold with an acrylic block or anything hard and flat.
Remove the cast from the mold. It may come out easily and without distortion or it may not depending on the shape of the mold, the stickiness and warmth of the clay used, etc. If there is excess clay on the back side, grab it like a handle and pull. If not, pull gently with your fingers from one edge or all around the outer edges till the cast is free. Another method is to use a wad of soft raw clay, press it onto the back of the cast, then roll it over the cast with an upward pull. Allowing the clay to cool in the mold will stiffen it and make removal easier as well (leave out overnight, or put into a freezer or refrigerator a few minutes).
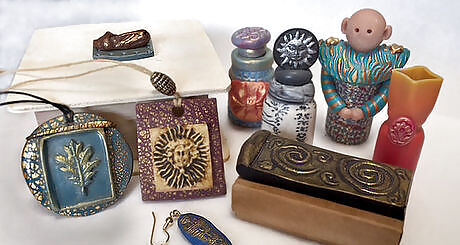
If you want, highlight or antique the casts. Or do both. Polymer clay items created in molds (or texture sheets) are often "antiqued" or "highlighted" since both techniques will give molded clay pieces much more visual dimensionality and bring out their textural detail. Antiquing involves coloring only the lower areas of a dimensional surface; highlighting involves coloring only the upper areas. Antiquing is often done with brown (or any color) acrylic paint, and after baking. Highlighting is often done with metallic powders (mica or real-metal powders), and usually before baking. To apply powders, touch a middle or index finger into the powder then tamp into the cap or onto another surface; rub the powder lightly in circles on the topmost parts of the clay. Permanent paints won't require sealing. Mica powders won't require sealing if they're rubbed in well, but some real-metal powders can oxidize and require sealing. Molds_highantiq sep lf wH2.jpg Molds_highantiq sep rt wH DianeBlack.jpg Metallic leaf can also be used for antiquing using a special technique, or for completely covering the item with leaf. (If a clay surface is not oily enough to grab the leaf in all spots, it can probably be coated very lightly with polyurethane or even thinned white glue which is allowed to tack up before the leaf is applied or raw or baked clay). Most leaf will need to be sealed against later oxidation so polyurethane or other sealers can be added before baking and then again after baking, or after baking then baking again and recoating. Many colorants and materials can be used on polymer clay surfaces in addition to powders, paint and leaf. For more information on highlighting and antiquing, etc, see a concise summary here: http://glassattic.com/polymer/stamping.htm, under Basic Techniques (scroll down to Raw Clay). And for more on leaf, see http://glassattic.com/polymer/leaf.htmMolds_high antiq whDianeBlack.jpg
Using hardened or unhardened polymer clay casts
Use the casts in many ways (including casts from texture molds). More and more ideas will come to mind once you begin using them. Casts may be already baked or still raw when they're used depending on the situation (raw ones will require baking at some point). Just a few examples of uses would be: onlays and embellishment - placing onto (raw or baked) clay surfaces and items, or onto non-clay ones like wood/metal/cardboard boxes, Altoid tins, glass votives/jars, phone cases (decoden), Christmas ball ornaments, lids, cabinet knobs, light switch covers, bow centers, or almost anywhere. beads, jewelry, buttons - making cabochons or beads of any kind, pendants, earrings and other jewelry; using as onlays on clay jewelry parts; making buttons (wire shanks if wanted, can be pressed into the backs of buttons while still in molds) clay faces or body parts - using for dolls and other human or animal figures including amulet figures, Halloween or Christmas figures, diorama figures, etc; or face casts can be used alone on more clay or other surfaces then be embellished with different kinds of hair, headgear, scarves, collars, bodices, etc. (for more details, see http://glassattic.com/polymer/heads_masks.htm > Faces Used Alone) duplicates - making identical casts any time many copies of the same thing are needed (saves time and creates accuracy) replacements - making molds, and then casts from them to use as replacement parts (polymer clay will be quite strong if it's not thin and doesn't have projecting parts)

If desired, cut the clay cast into another shape before baking. Various kinds of flexible or stiff blades and shape cutters can be used (e.g., the cast could be cut into a square, disk, curved and/or irregular rectangle, etc). Or if the clay used in a mold extends beyond the mold's edges, the extending clay can create an interesting frame effect around the cast.
Making a texture mold
Follow the instructions for making regular molds as in the above method, but start with a flat sheet of clay for most texture molds. The thickness of the sheet will depend on the thickness of the texturing item being used and personal preference. It will be best to place a sheet of paper or deli wrap, etc, under the clay sheet before continuing so the clay won't stick to the work surface later. This will help with separation of clay and texture sheet as well.
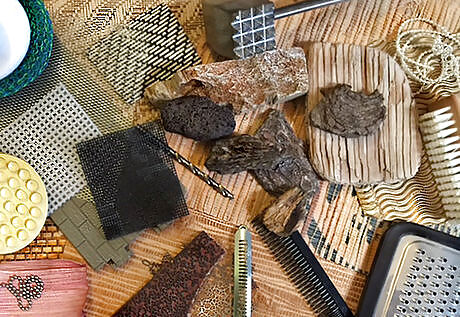
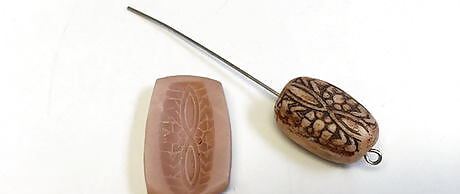
Use a release, then press anything shallow but dimensional and at least somewhat firm into the clay sheet. Or rock it into the clay if it's not flat. If the texturing material is flat, roll over it with a roller or jar to create a deeper or more consistent impression in the clay; thin texture materials and clay can even be put through the rollers of a pasta machine together. Just a few examples of texturing materials found around the house would be plastic canvas, areas of textured plastic from packaging or from anything, wire mesh, rough sandpaper, tree bark, the skin of cantaloupe or other veggies/fruits, salt, fabrics, lace, string, backs of leaves, stiff bristles, brick or stucco, textured wallpaper, etc. Texturing materials can also be created by making impressions all over a sheet of clay with "stamps" of any kind, including wads of aluminum foil, ends of ball point pens, bits of bark, stiff bristles, etc, or they can be made from hardened clays, paints, and more. Pointed tools, combs, tracing wheels, etc, can also be dragged or rolled across clay sheets to create texturing materials. (Note that most texturing materials can also be used to texture polymer clay directly without being used as molds or stamps.)Molds_texturing materials2wh DianeBlack.jpg Texturing materials can also be purchased in as thin flexible sheets of plastic, or various textured plastics can be found around the house or purchased (e.g, from the scrap bin of Tap Plastics, as cutting boards, etc).Plastic texture sheets DianeBlack1wH.jpg
Carefully separate the clay and texture material. (Having put a sheet of paper, deli wrap or plastic wrap under the clay when pressing earlier can help with separation now by allowing the clay and paper to bend so they can more easily be peeled apart without distortion.)
Use part or all of the raw textured sheet in some way for a final piece and bake later. Or bake the textured sheet now, and use it later as a texture mold/sheet for new raw clay. To use the new textured clay sheet while it's still raw, cut parts of it into one or more rectangular, circular, etc, flat shapes with a blade or a shape cutter, or shape cut parts any way you want (e.g., roll into a cylinder to make a bead, etc). Embellish the cut piece with more clay or non-clay items, or use it with other textured pieces of clay, or use larger pieces to cover whole lids or box sides, etc. Then bake. To make the raw textured sheet into a hardened texture mold/sheet, bake, then use it later to texture new raw clay (that will create a reversed pattern). (If you want a very flat texture sheet/mold, be sure to use a flat rigid baking surface in the oven.) Textured clay can be used as backgrounds for other clay or as focal elements, can be attached to the lids of boxes or wrapped around bottles, and more. Molds and texture sheets can also be used directly on raw clay to cover fingerprints in the clay, create animal skins, texture background areas or beads and other jewelry items, etc.
Making reverse molds with polymer clay (stamps, etc.)
Make and bake a mold or a texture sheet.
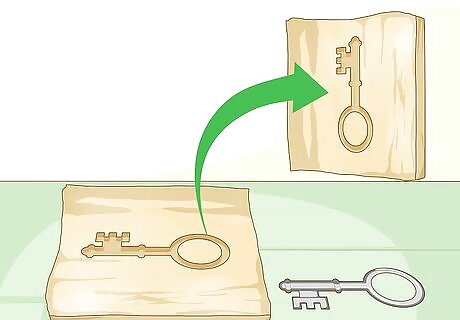
Press new raw clay into or onto that mold to create its opposite.
Separate the hardened clay from the raw clay, and bake the new clay. Many of these can be considered to be "stamps" (a convex pattern, or "outie") rather than "molds" (a concave/depressed pattern, or "innie"); the distinction can become fuzzy.
Making a two-part mold with polymer clay
Cut two thick slabs of clay. Make each one at least twice as thick as one-half of the thickness of the item used to make the mold.
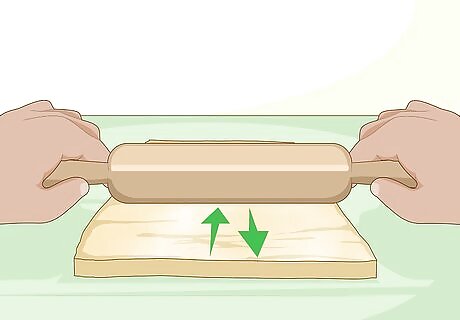
Roll over one wide side of each slab with a roller or jar to make it very flat.
Dust the rolled-over side of one slab well with cornstarch or baby powder using a fluffy brush.

Press the item down into that side of the slab until it is about halfway into the clay. Add "registration" marks, if you want, which will help the two hardened sides fit together exactly when used later. That can be done, for example, by pressing a hole/etc. into the dusted side near each corner with the end of a paintbrush, or by pressing something hard and bakeable into the clay near the corners and leaving in place permanently.
Bake the first half of the mold. If the item cannot be heated to 275 F or if it would bond with the clay during heating, remove the item from the first slab; then bake the slab. (That will be the first half of the final mold.) Otherwise leave the item in place for baking. If you have to remove the item, it should fit when placed back in the baked mold before using the second slab; be sure wiggle it around in this first slab before removing, to make a slightly larger impression.
Heavily dust one side of the second slab (especially since polymer clay will bond to other polymer clay when heated if it's bare), then carefully press it down onto the first slab and snug all around the item as much as possible. If using a non-bakeable item, carefully remove the item and the bake second half separately.
Cool, then separate the halves of the final mold and remove the item.
Experiment to find the right amount of raw clay for the mold. Try various approaches until you get just enough to fill, but not enough to overfill, and to determine the best shape of clay to use. (Try a vertical egg shape or a teardrop.) Dust the surfaces and press the clay into one half of mold, then press the other half of mold on top being careful to align the registration marks. Open, remove the newly molded clay item, then bake it separately. (If excess clay called flashing has squeezed out between the mold halves, trim it off with a blade or just smooth it down if possible.)
Do everything as above but instead of using two slabs, wrap a wad of clay (flat or any shape that works) halfway around the item. Leave the upper edges of the wad uneven or adding registration marks.
Use a second wad of clay as above rather than a second slab. The resulting two-part mold can be any shape you choose to create around the item, and can save clay because it will conform more closely to the shape of the item being molded.


Comments
0 comment