views
Blender is a free, open source 3D creation suite. Read this article to get started with Blender, or go to www.blender.org to download the latest version.
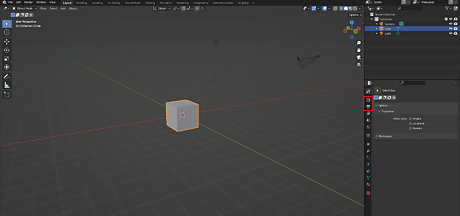
Navigate to the render settings and output menus. These are (by default) the camera and printer icons in the properties menu towards the right of the screen.
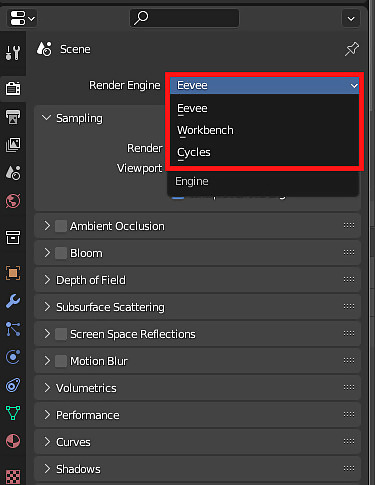
Choose a rendering engine. Pick from Cycles, Eevee and Workbench. Each engine has a different feature set for different applications: Cycles is a raytracing render engine. This means it uses real physics laws to calculate light when rendering a scene. It provides a highly realistic and physically accurate render, although this drastically increases render times.Cycles is the most common render engine chosen in Blender. Eevee is a real-time rendering engine. This means it is not physically accurate, as each ray of light is not individually traced (unlike Cycles), but this massively reduces the rendering time, meaning Eevee can render a scene in 'real-time', and the renders take little to no time at all. Eevee can be used for stylised, cartoonish scenes and is more commonly used as a game engine. If you're working on an old or low-end system, you may consider using Eevee as it is much less taxing on the computer compared to Cycles. Workbench is rarely used for final renders. This is basically the same as the 3D viewport, and doesn't calculate light. It's most commonly used for prototype renders, and previews before textures, lighting and detail is added. You'll most likely disregard Workbench when choosing a rendering engine.
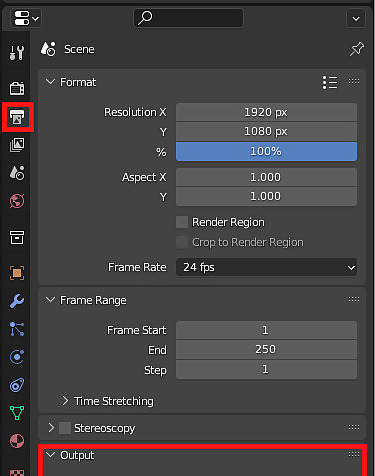
Choose an output directory. This will be where your render is saved, and is by default set to your system's 'temp' folder. You can also choose a file type.
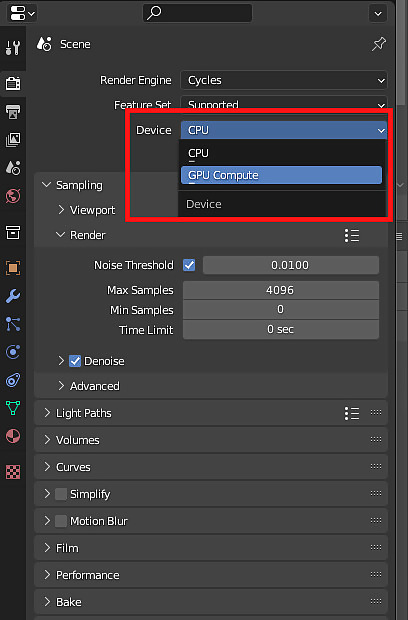
Choose your rendering device, if you're using cycles. By default, this will be set to 'CPU', meaning your scene will render on your computer's processor. If you have a graphics card, it's best to switch this to GPU Computer, as rendering on your GPU is almost always faster than rendering on your CPU.
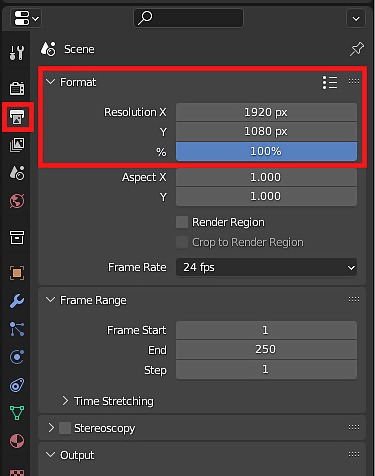
Choose a resolution. 1920x1080px is the default, but you might want to change it. Also, below it, try using a smaller (proportional) size. 100% is the size you specified at the right. 50% will cut rendering time to about 1/4 or more, so use that for previewing.
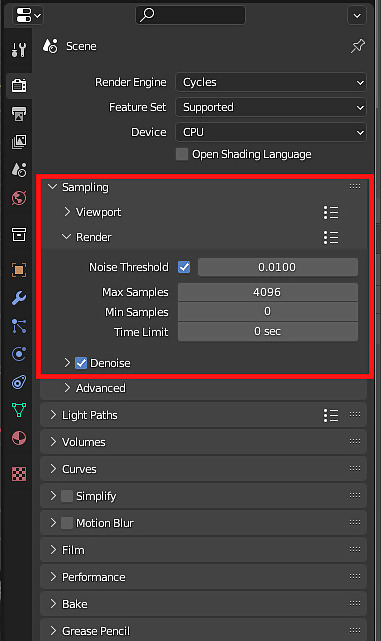
Choose your samples. The more samples you set for your image, the less noise the final render will have, but this also means your render times will increase.The default settings are usually fine, although you may like to tweak them as it's best to have the lowest number of samples possible (to have the shortest render time) while maintaining an acceptable amount of noise in your render. Cycles now has adaptive sampling enabled by default, meaning it will adjust the number of samples for each portion of your render depending on how many samples are needed there, allowing it to spend more time on high-noise areas and less on clearer parts.
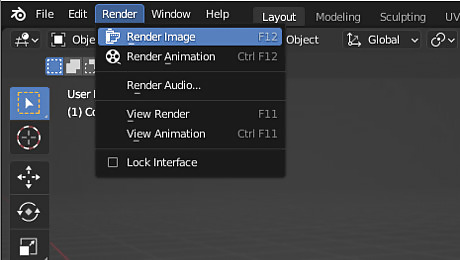
Hit render! F12 or the Render Image or Animation button. Once your image is done rendering, you can either right-click on it and select Save as, or navigate to your 'tmp' folder and move it from there.




Comments
0 comment