views
X
Expert Source
Joseph HarwoodBeauty, DEI & Social Media Expert
Expert Interview. 16 March 2022.
You can also change your eye color completely for a day with tinted contact lenses. Surgery is also available, but at the time of writing this article, it is still mostly in its testing stages. This article will show you a few ways to tweak your eye color, and give you information on colored contacts and surgery.
Using Eyeshadow to Brighten Eye Color
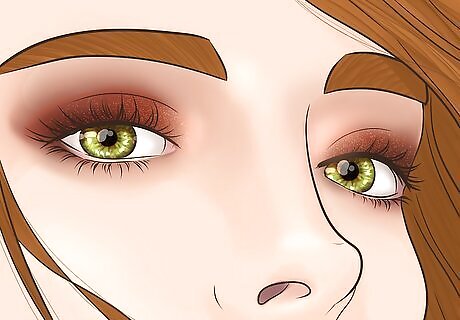
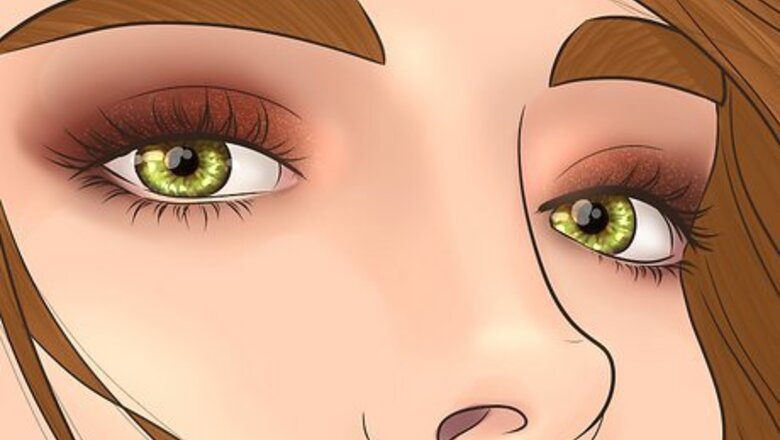
Understand how makeup can alter eye color. You cannot use eyeshadow to make blue eyes look brown, and vice versa. You can, however, use eyeshadow to enhance the color you already have. Depending on the eyeshadow color you use, you may be able to make your eyes appear brighter, duller, or more pale in color. Some eye colors, such as hazel and grey, may be able to pick up tints from certain eyeshadow colors. This section will show you how to use eyeshadow to alter your eye color. Use the saturation principle to your advantage when applying eye makeup! The idea behind the saturation principle is that when you put something very light next to something very intense in color, it creates a bigger contrast.
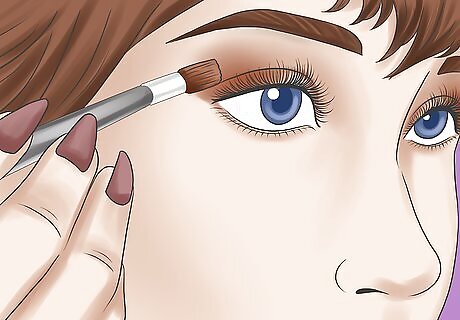
Intensify blue eyes by wearing warm-colored eyeshadow. Orange-tinted colors, such as coral and champagne, work especially well on blue eyes. They will make your eyes appear brighter and bluer than they actually are. Eyeshadow that is already blue may make your eyes appear lighter or paler. Here are some more color combinations for you to try: For daily, casual wear, try neutral tones, such as: brown, taupe, terra-cotta, or anything orange-tinted. For a special night out, try some metallics, such as gold, copper, or bronze. Avoid anything too dark, especially if you have fair skin. When choosing eyeliner, go for brown or dark brown instead. It will be less harsh than black.
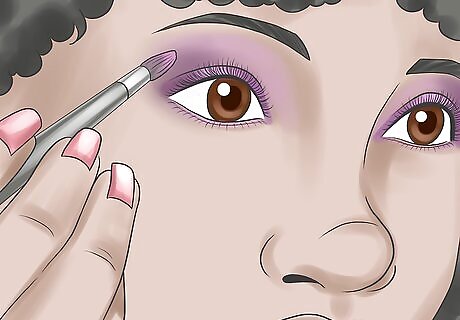
Make brown eyes appear brighter with cool colors. People with brown eyes can wear almost any color, but cool colors, such as purple and blue, will really help brighten brown eyes. Here are some options for you to try: For casual days, stick with browns. To make your eyes really stand out, try a silvery-brown or a peachy brown. If you are feeling more adventurous, try wearing blues, grays, greens, or purples. For a special night out, you can try metallics, such as: bronze, copper, or gold. A green-tinted gold will also work well. If you have dark brown or black eyes, try some jewel shades instead, such as bright blue or violet. You can also get away with silver and chocolate. If you have brown and hazel eyes, you could use some dark blue eyeshadow to bring out the orange-hazel tone in the center of the eye.
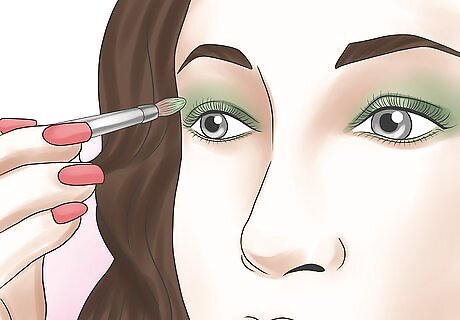
Bring out the blues or greens in gray eyes by wearing blue or green eye shadow. Gray eyes tend to pick up whatever color is around them. This means that you can use eyeshadow to give your gray eyes a blueish or greenish tint. If you want to bring out the gray tones that are already there, stick with sooty, smoky shades, like silver, charcoal, or black. Here are some tips on how to bring out the blues and greens in your eyes: To bring out the blues, stick with eyeshadow in these colors: copper, melon, neutral brown, orange, peach, or salmon. You can help bring the blue out further by adding a touch of blue to the inner corner of your eye. To bring out the greens, try eyeshadow in these colors: maroon, pink, plum, purple, red-brown, or wine.
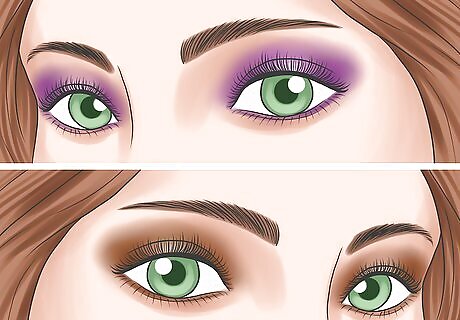
Wear purples or browns to make green eyes more intense. These are the best go-to colors for green eyes. They contrast with the green pigment in your eyes, making them appear brighter and more vibrant. For example, you can were purple eyeshadow on a special night out, and shimmery brown or taupe during the day. Here are some more colors for you to try: Any shade of purple will look great on you. If you don't like purple, try some pinks instead. If you are hesitant about wearing purple, you could try wearing taupe eyeshadow over the eyelid, and use a dash of purple close to the lash line. Black eyeliners are too harsh for green eyes. Try using charcoal, silver, or deep purple instead.
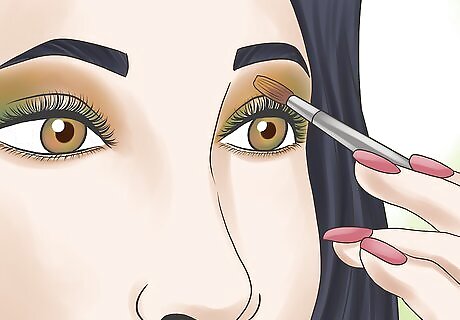
Take advantage of the green and gold flecks if you have hazel eyes. Hazel eyes contain flecks of green and gold. This means that you can use different colors of eyeshadow to bring out these flecks. Here are some more options for you to try: Avoid using heavy, smoky colors. They tend to hide the hints of green and gold in hazel eyes, and make them appear murky instead. To bring out the greens and golds in your eyes, try using eyeshadow in bronze, dusty pink, or eggplant. Army-green especially will bring out the green flecks. If you want to make your eyes look more brown, then use eyeshadow in gold or green.
Temporarily Changing Eye Color with Contacts

Visit an eye doctor to get a prescription. Even if you have perfect vision, you will need to have your eyes fitted for contacts. There are different eyeball shapes, and wearing contacts with the wrong shape can be painful. Sometimes, your eyes might not be compatible with contacts. Other times, the doctor may prescribe a special type of contacts for you, especially if you have dry eyes.
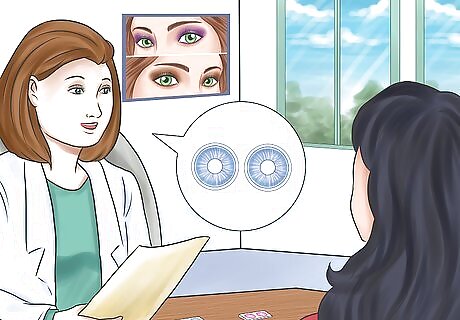
Purchase your contact lenses from a legitimate lens retailer. You get what you pay for, especially when it comes to contacts. In this case, it might be better to spend more on a pair of contacts and be safe, rather than buy a cheaper pair and be sorry later. Eyes are delicate, and a badly-made product can permanently damage them. The best place to get contacts is at an eye glass shop or from an optometrist. Tinted prescription lenses are also available for those who have poor eyesight.

Decide how often you will be wearing the contacts. Some contacts can only be worn once, while others can be worn several times. Because tinted lenses tend to be more expensive than regular ones, this is something you should keep in mind. Here are the different types of lenses that you can get: Disposable lenses can be expensive. Some can only be worn once. If you plan on wearing the contacts for just one or two occasions, keep these in mind. Daily wear lenses need to be taken out at night. How often you replace them will depend on the manufacturer. Some need to be replaced once a week, while others can last for up to a month, if not longer. Extended wear lenses can be worn even while you sleep, although this is not recommended. The longer you keep your contacts in, the more likely you are to get an infection. Like daily wear lenses, extended wear lenses need to be replaced depending on the manufacturer. Some can last for only a week while others much longer.
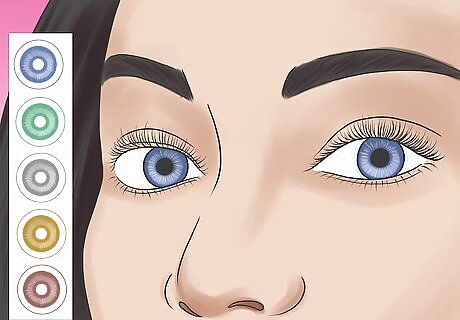
Get enhancement-tint lenses if you have light eyes and want a subtle change. You can also get these if you just want to enhance your natural eye color (even if you have dark eyes). Because these lenses are translucent, they are not recommended for those who have dark-colored eyes. The color simply won't show.
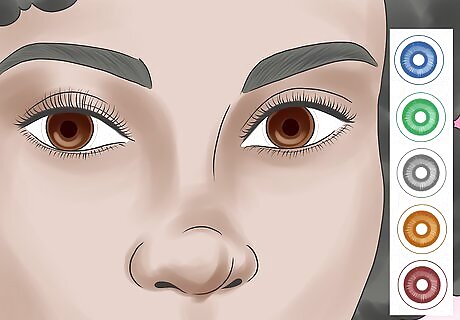
Get opaque-tint lenses if you want a drastic change, or if you have dark eyes. Like the name implies, these contact lenses are opaque, and can completely change your eye color. You can get them in natural colors, such as brown, blue, gray, green, and hazel. You can also get them in unnatural colors, such as white, red, cat-eye, and purple. Some places also offer custom colors and tinting.
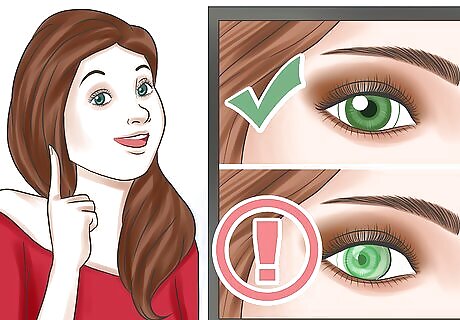
Be aware of the cosmetic drawbacks. You will be putting lenses on your eyes, which can slide around when you blink. This means that if the lens moves a little on your eye, your natural iris will be visible. People will know right away that you are wearing contact lenses. This will be most obvious on opaque lenses and less on enhancement lenses.

Be aware of the visual drawbacks. Your iris and pupil change sizes naturally as you enter different light conditions. Contact lenses do not change size. This means that when you step into a dark room, and your pupils dilate, part of your vision will be blocked by the colored part of the contact lens. If you step into bright sunlight, your pupils will become smaller, and part of your natural eye color may peek through the clear portion of the contact lens.
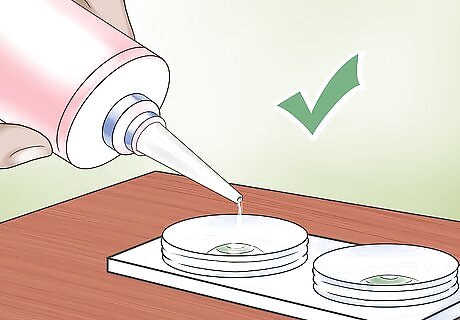
Keep your contacts clean. If you do not clean your lenses regularly or properly, you may get an infection. Some eye infections are very serious, and can lead to blindness. You should always keep your contacts in their case whenever you are not wearing them. You should also clean them with the saline solution before you put them back into the case. Be sure to refill the case with fresh saline solution before you put the contacts back in. Always wash your hands before touching your contacts. Never use your saliva to moisten the contacts. The human mouth is filled with germs. Never share contacts with anyone, even if you disinfect them.
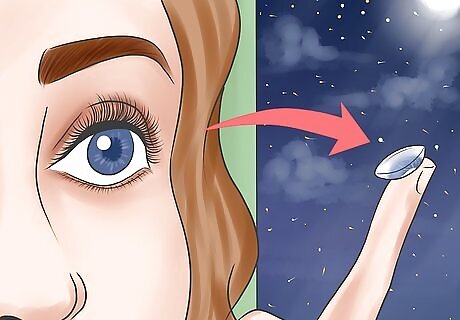
Never wear contacts longer than recommended, and take them out when necessary. This means that you should always take your contacts out of your eyes before you go to sleep. This includes the extended-wear lenses. Even though extended-wear contacts can be worn overnight, leaving them in for so long makes it more likely for you to get an eye infection. You should also take out contacts before you take a bath or shower, or go swimming. Some contacts can be worn several times while others can only be worn once. Never use contacts for longer than the recommended time. Saline solution can also expire. Never use saline solution past its expiration date. To prevent bacteria buildup, contact lens cases should be replaced every three to six months.
Changing Eye Color Using Photoshop
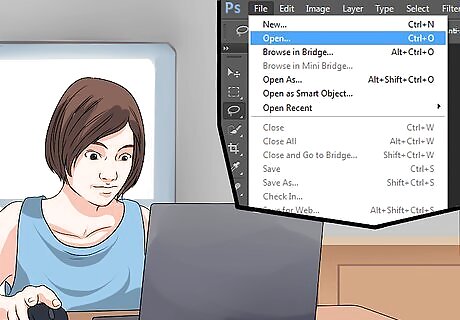
Start up Photoshop and open the image you want to edit. Any image will do, but clear images with high resolutions will work better. To open the image, simply click on "File" from the top bar, and select "Open" from the drop-down menu.
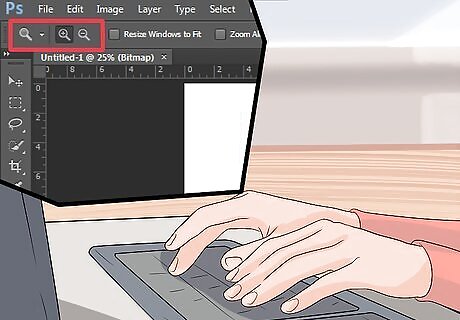
Zoom in on the eyes. You can do this by clicking on the little magnifying glass icon. It is located on the narrow side bar on the left hand side of your screen, towards the bottom. If you can't find it, hit the "Z" button on your keyboard. You can now zoom in on the eyes in two ways: Click on the eyes with your left mouse button. The image will become larger. Keep doing this until you can see the eyes clearly. Click on a spot that is above and to the left of the eyes. Drag your pointer down to the bottom right of the eyes. A box will form. If you let go, what ever was in the box will fill your window.
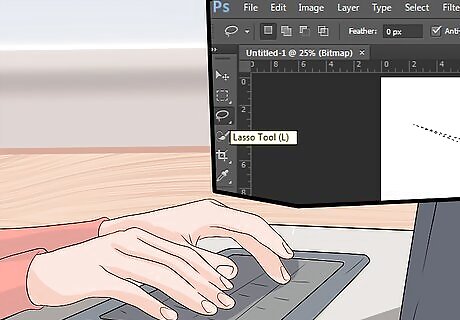
Use the basic lasso tool to select the iris. If you cannot find the lasso tool, you might have one of the other lasso tools selected. Click and hold on the current lasso tool (usually the third icon down), and select the one that looks like a lasso from the drop down menu. Once you have the tool selected, trace around the iris. Don't worry about it being too neat; you will clean it up later. To select the other eye, press and hold the Shift key. Draw around the other iris just as you did with the first.
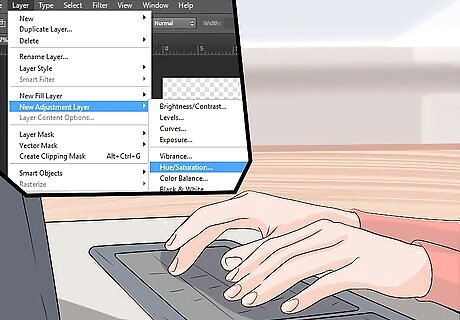
Create a new adjustment layer. You can do this by clicking on "Layer" tab from the top menu, and selecting "New Adjustment Layer" from the drop-down menu. When you hover your pointer over "New Adjustment Layer," you will get an expanding side menu with a list of options. Select "Hue/Saturation" from the list.
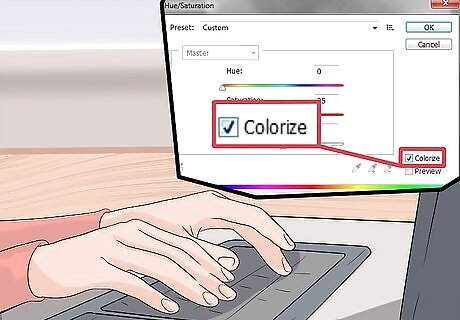
Go to the Adjustments window and make sure that "Colorize" is selected. The adjustments window is on the same side as your other windows, including the one with the layers and color swatches. Click on it and make sure that the box next to the word "Colorize" is checked. You will see the irises change color. The pupil may also change color. Don't worry, you will fix this later.
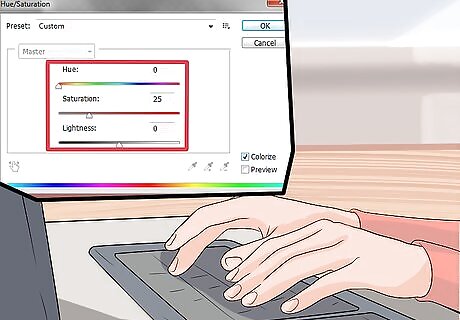
Move the Hue, Saturation, and Lightness sliders until you get the color you want. The Hue slider will change the actual color. The Saturation slider will make the color brighter or more gray. The Lightness slider can make the color lighter or darker. The color may look a little unnatural. Don't worry, you can fix this later on.
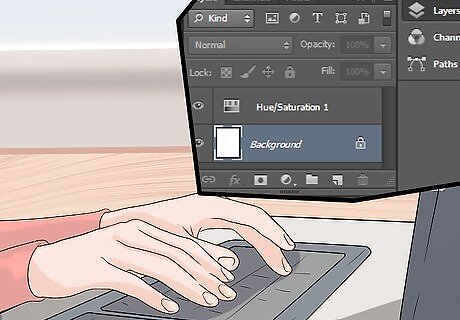
Make sure that you are in the adjustment layer. Click on the Layers window. You will see two different layers: Background and Hue/Saturation. Make sure that Hue/Saturation is highlighter. You will be making all fixes in this layer. The Background layer is your original image.

Use the Eraser tool to reveal the pupil and clean up the area around the iris. Click on the Eraser tool from the side menu. Adjust the size, if needed. You can do this by going towards the top menu bar and clicking on the little dot and number that appears next to the word "Brush." Once you have the size you want, carefully erase the pupil area. When you are done, erase the area around the iris as well. If you need to, erase any highlights as well. When you are done, the eye should look very much like the original, except that it is a different color.
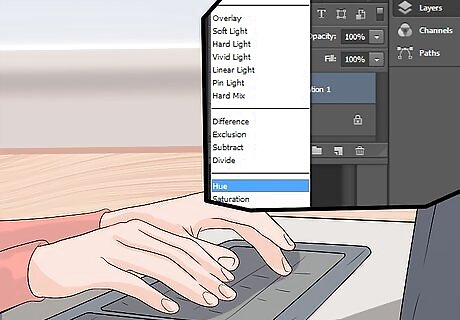
Change the layer blending, if necessary. Go to the Layer window again, and click on the drop-down menu. You will see options like: Normal, Dissolve, Darken, and Multiply. Try selecting "Hue" or "Color" from the bottom of the menu. The original texture of the eye will show through much better.
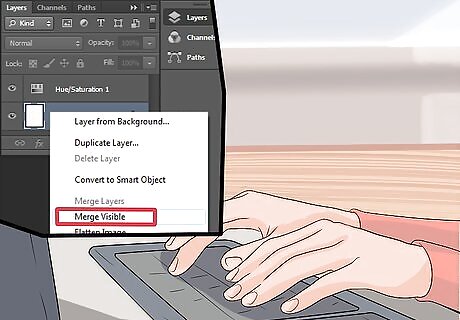
Merge layers when you are happy with the result. Right click on the layer that says "Background" and select "Merge Visible" from the menu that pops up.
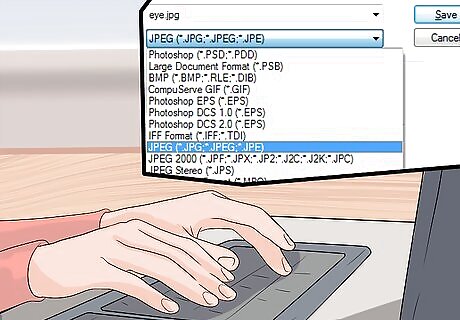
Save your image. You can save your image as any file type you want. Photoshop will want to save it as a Photoshop file by default. Unfortunately, this will make it more difficult to share your file on the internet. Try saving your file as a JPEG file; it is the standard image file used on the internet.
Getting Surgery to Change Eye Color
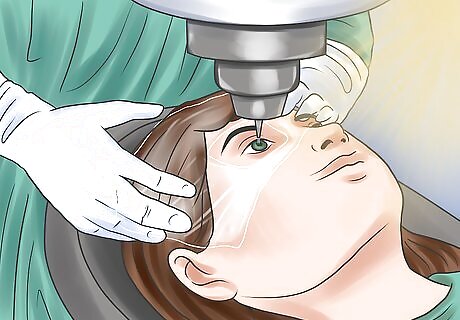
Get laser surgery to turn brown eyes blue. The surgery lasts about 20 seconds. It removes the outer layer of the brown iris and reveals the blue color underneath. Over the course of two to four weeks, the body will remove the rest of the layers. During this time, the eye will become more blue.

Know the drawbacks of brown-to-blue eye color surgery. At the time of writing this article, this surgery is still in its testing stages, so the long-term effects are not yet known. It is also not commercially available in the United States. It is also very expensive, and currently costs about $5000. The surgery only works for changing brown eyes to blue and is permanent. Like many eye surgeries, it may also result in blindness.
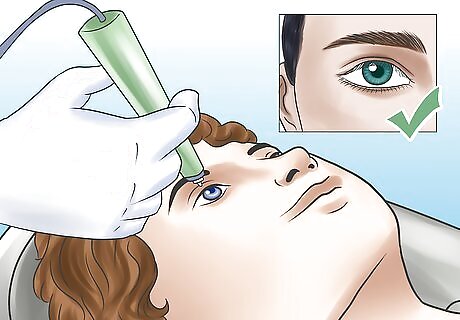
Get colored irises surgically inserted into your eye. This surgery takes 15 minutes per eye, and is performed using local anesthesia. A flexible, colored iris is inserted into the eye, right over the natural iris. It is not permanent. The implant can be removed using a similar surgery. The recovery time is two weeks. During this time, your vision may be blurry, and your eyes may be red. You cannot drive after the surgery. If this is something you are considering, make sure that you have someone to take you home.

Know the risks of getting irises surgically implanted. Like many surgeries, getting iris implanted into your eyes comes with many risks. Your vision may worsen as a result. In some cases, you may lose your vision altogether. Here are some other complications you may expect: The fake iris will increase the pressure in your eye. This can lead to glaucoma, which can lead to blindness. The surgery can lead to cataracts. Cataracts are when the eye's lenses become clouded. The cornea may become damaged during the surgery. You may need a corneal transplant to fix this. The natural iris and the surrounding area may get inflamed. Not only could this be very painful, but your vision may become blurred as a result.


Comments
0 comment