
Planning the Job

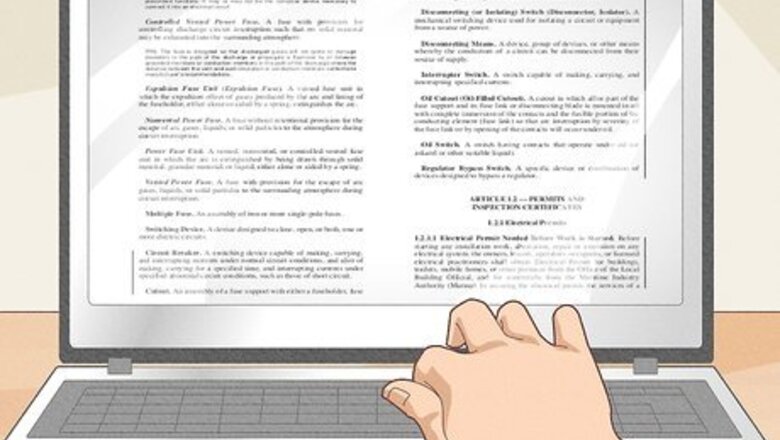
Find out if you need a permit or professional installation. Depending on where you live, you may need a permit to add an electrical outlet in your home. In some places, you may need to hire a professional to do any electrical work. Check with your local code office to find out if either of these pertains to your area.
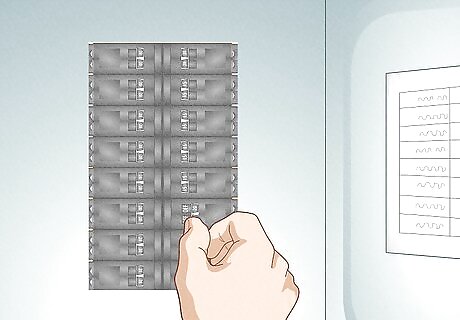
Turn off the circuit breaker. Locate the breaker box in your home, which is usually in a basement, garage, or hallway. Open the box and locate the power switch for the area where you’re working. Flip the switch to the Off position to cut power to the area. Use a non-contact voltage tester to check the circuit before moving forward.
Assemble the necessary tools and materials. To install a new electrical outlet and make the connections safely, you'll need a few basic electricians' tools. Make sure you have access to the following: Wire strippers Keyhole saw Drywall knife Drill with a wood drill bit Lineman’s pliers Needle-nose pliers Screwdriver, finishing and Philip’s head Non-contact voltage tester A fish tape
Determine the best location for the outlet. Measure the distance off the floor to the other outlets in the building. Measure from the center of the existing box location to the center of the desired new box location. Turn off the power in the outlet. Take off the cover plate held on by the single screw in the middle of the outlet and measure to the hole cut in the wall.
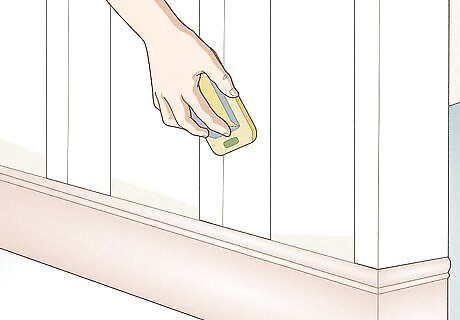
Find an opening in the wall. In most homes, there are 2 in × 4 in (5.1 cm × 10.2 cm) or 2 in × 6 in (5.1 cm × 15.2 cm) studs typically at 16 or 24 in (41 or 61 cm) increments along any wall. Outlets must always be attached to a stud for security and safety. Mark a space at the appropriate height, at a location between 2 studs. The easiest way to locate studs if to use a "stud finder" available at many hardware stores. You can also try tapping the wall lightly with a hammer and moving slowly across the wall and listening closely. The wall will sound hollow for most of the taps and then sound "solid" when you have reached a stud.

Confirm there are no other mechanical or plumbing items in the wall. Check for plumbing from sinks showers or toilets on the opposite side of the wall. Be aware of any HVAC air returns or ducts. If there is a grill high up or at the bottom of the wall where you want the outlet, you can't do it with the air return in the same wall space. Explore with a nail hole and hanger. Poke a hole and use something like a wire hanger to "feel" around inside the wall cavity to check.

Find out where you can get power. There are 2 basic ways to install a new electrical outlet, running electrical wiring from a circuit breaker to the new location, or from another outlet in the same room. Depending on where you're installing a new outlet–living space, basement, or outdoor area–access to power may vary. Find the closest and most convenient place to connect to make the job easy on yourself. Be sure to consider the existing electrical load and what the new load will add to the existing branch circuit. Calculate the load to ensure it is safe. The most convenient source of power may not be the safest! In general, the load for the existing outlet has already been calculated for the circuit, and running a new outlet is likely to overload that circuit. It's typically best to take new wire from the panel and install a new outlet if you need it.
Running Wire
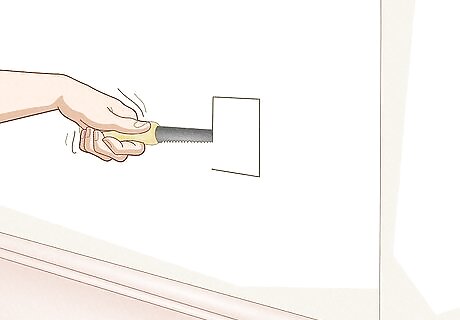
Cut a hole for the new outlet. Trace the outlet box on the wall where you want it to go. Then, use a keyhole saw (or strong utility knife) and make small and firm incisions over and over until you have cut through the wall material. Walls made with plaster may require you to drill holes into the corners and cut the hole with a Sawzall.

Run the wire from the power source to the new outlet. It’s best to avoid making additional holes in the wall if at all possible. Look for ways to extend the branch circuit wiring vertically from the source of power, such as through an attic or basement. Or, use an external method such as conduit or wire mold, or run a fish tape through the hole for the new outlet to run the conductors. If you can’t find a way to run the wire, you may have to cut a hole in the wall near the existing power source.
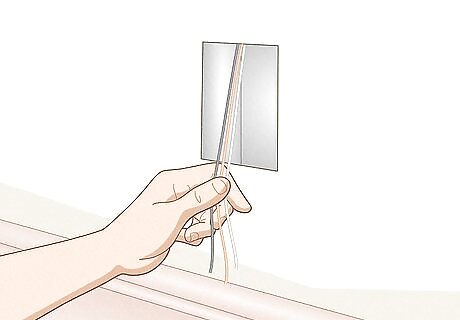
Pull the appropriate kind of wire between the 2 locations. Once you have access to the locations, get your Romex non-metallic wire. Give yourself 12 to 18 inches (30 to 46 cm) of wire sticking out on both ends. Wire the new receptacle first and then go back and connect the new wire to the existing circuit. Cut sheathing off Romex about 8 inches (20.3 cm) long. Your home may use 12- or 14-gauge wires. Check the circuit breaker to determine the correct amperage. Note that #14/2+g is 15-amp rated wire and uses a 15-amp circuit breaker, while #12/2+g is 20-amp rated wire and uses a 20-amp circuit breaker. You should use wire that is proper for the power rating of that circuit and of the same size as the wire you are connecting to. Take a sample of the existing wire with you when you go to purchase the new wire.
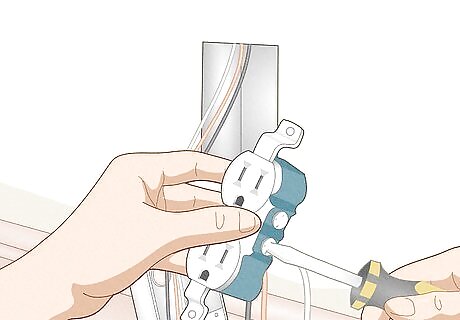
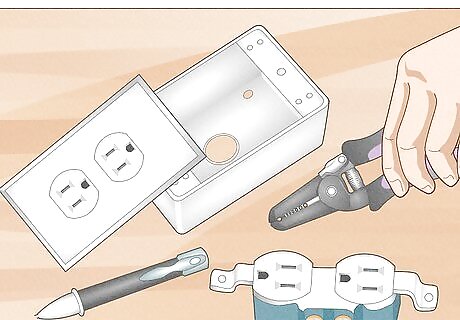
Install the outlet receptacle at the new end. Purchase the outlet and wires from a hardware or home improvement store and connect the wires to the receptacle. Inside the electrical cable, there are 3 conductor wires, typically black, white, and copper wire with no insulation. On the receptacle itself, there are 2 brass screws where the un-grounded or hot conductors attach, 2 silver screws for the grounded conductor or neutral conductors, and 1 green screw for the equipment ground conductor. Hook the bare copper wire around the ground wire screw and tighten the screw down. Strip the insulation ⁄4 inch (1.9 cm) off the end of the white wire. Be sure to set your wire stripper to the appropriate size for the wire that you're using. Bend a hook on the end of the wire using pliers, then put the hook around 1 of silver screws and tighten the screw in a clockwise direction. The other silver screw isn’t used. The black wire goes to the brass screw. Do the same thing: strip the wire, make a hook, and tighten the screw down. Wrap the wire and connections with electrical tape to keep everything from touching.
Install the cut-in outlet box with the fasteners supplied. The outlet box should be firm on the wall and not be able to be wiggled around. This is used to house the loose wires and keep them wrapped and secure for safety purposes. These are available at all home repair outlets.

Install the wires at the starting outlet. Go back to the starting outlet and connect the wires. Take the existing receptacle and remove it from the wires, then match up the black wires with black, white with white, and ground with ground. Cut an 8 in (20 cm) pigtail (stubby piece of wire) and strip off both ends ⁄4 inch (1.9 cm). Take all 3 black wires together so the ends are matched up. The end of the new wire should meet the end of the old wire, and one end of the pigtail. The pigtail wire is the one that will be reconnected to the receptacle. Get a wire nut (plastic cone) that just screws onto the wire to connect them. Use lineman’s pliers to twist the 3 black wires together, then twist on an appropriately-sized wire nut. The same goes for white and ground wires, respectively. Take the other end of the pigtail and attach it to the screws the same way as before: green goes to green, white goes silver, black goes to bronze. Older houses might have different types of wires, so you may need to consult an electrician if yours don’t match up.
Finishing the Job
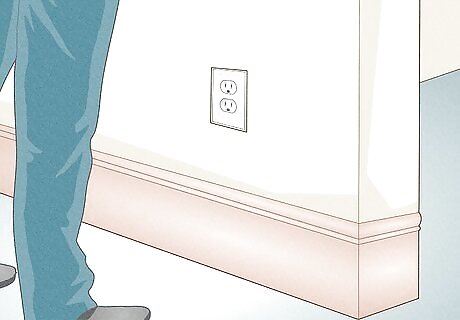
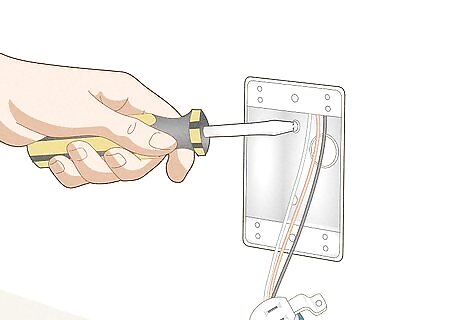
Put everything in the wall and install wall plates. You'll need 2 machine-threaded screws to screw directly into the box. The outlet itself should then be screwed directly onto the box with the screws included. Once you put the device in, fasten the wall plate using a screw and put all the wires into the receptacle to tidy up the job. Screw the cover plate onto the wall and repair any holes you made in drywall, if necessary. Avoid using wood or drywall screws as they are not up to code and will not properly secure the device. Using them instead of machine-threaded screws can cause you to fail an inspection.

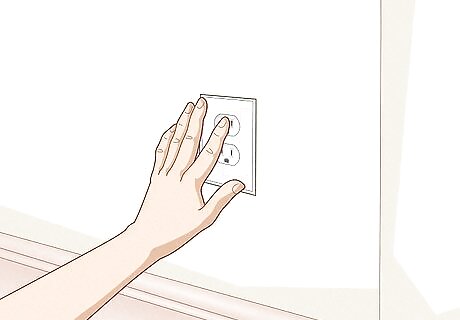
Turn the power on to test your work. The circuit should remain on and the fuse should not pop if you've installed the wires correctly. Test the outlet with a lamp, or some other low voltage device. If the fuse does pop, or the power doesn't work, turn the power back off and pull the connections back out to check them. It's likely a wire or two came loose in the maneuvering process and should be reattached accordingly. Be very careful that you turn the power back off before you check if there's some kind of problem. If the circuit's on, there should be power, which means that you've got to be very careful.
Test the outlet with a multimeter. Set the multimeter to measure AC voltage. Put the red terminal into the shorter slot on the outlet, which should be hot, and the black terminal into the longer terminal, which should be negative. If the outlet is working properly, the multimeter will show a reading between 110 and 120 volts.

Get an electrician to inspect your work. Even if your region doesn’t require the work to be done by a certified electrician, you should still hire one to inspect the job. This could prevent issues down the line, including potential hazards like fire due to improper installation.


Comments
0 comment