
How much does an automatic gate installation cost?
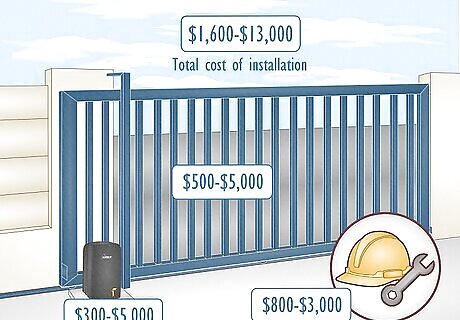
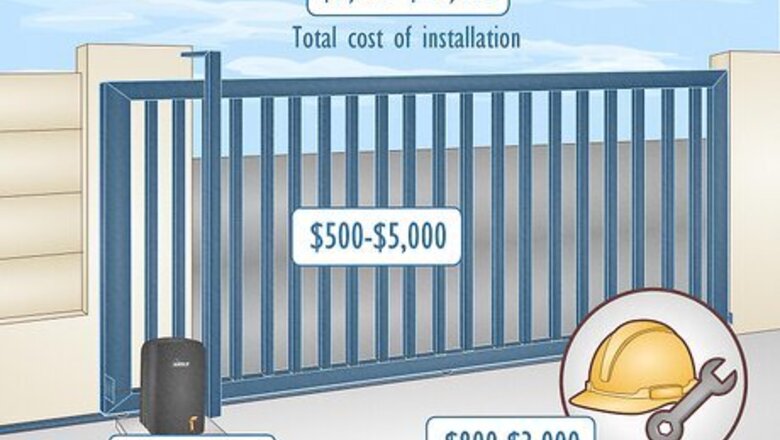
Installation can cost $1,600 to $13,000, with most people spending around $7,000. Electric or automatic gate installation prices vary widely based on the type and size of gate, the cost of the gate opener, and labor (more on this later). Here’s a quick breakdown of the expenses: Electric gate: $500 to $5,000 Gate opener: $300 to $5,000+ Installation labor: $800 to $3,000 Total cost of installation: $1,600 to $13,000 If you’re looking to automate an existing gate, it’ll cost $400 to $5,500 for materials and installation.
Motorized Gate Installation Cost Factors
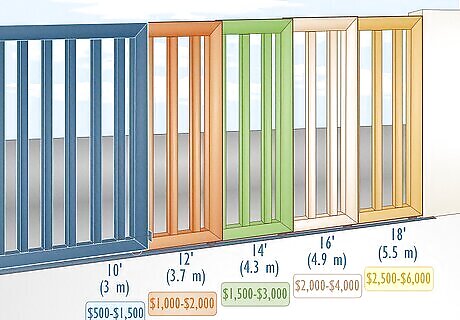
Gate size Standard residential driveway gates typically range from 10 to 18 feet (3 to 5.5 meters) wide and 4 to 10 feet (1.2 to 3 meters) tall. The bigger the gate, the more expensive it is: 10 feet (3 meters): $500 to $1,500 12 feet (3.7 meters): $1,000 to $2,000 14 feet (4.3 meters): $1,500 to $3,000 16 feet (4.9 meters): $2,000 to $4,000 18 feet (5.5 meters): $2,500 to $6,000 (recommended size for RVs and boats) Note: Gates with a flat top are generally less expensive than arched-top gates.
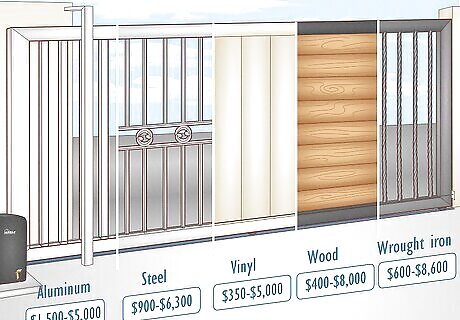
Gate material Most gates are made from one of 5 materials: aluminum (lightweight and rust-resistant), steel (heavy, but low-maintenance), vinyl (the most affordable and durable, but with limited design potential), wood (great for privacy, but high-maintenance and prone to cracking), or wrought iron (the most expensive, high-maintenance, and difficult to install, but has great design flexibility). Aluminum: $1,500 to $5,000 Steel: $900 to $6,300 Vinyl: $350 to $5,000 Wood: $400 to $8,000 Wrought iron: $600 to $8,600
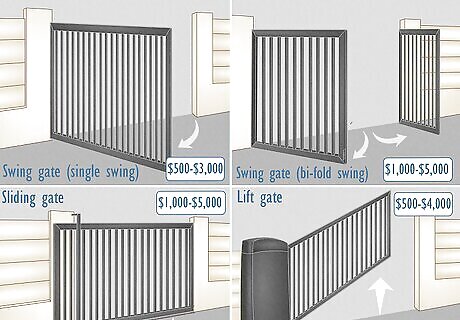
Gate opening mechanism Motorized gates come in 3 basic styles: a swing gate (one or 2 panels that swing open on hinges), a sliding gate (horizontal panels that slide open or closed on a track), and a lift gate (gates that raise vertically from the ground). Swing gates are often the cheapest and lowest maintenance, while sliding gates tend to be the most expensive. Lift gates are most frequently used in non-residential, tight spaces. Swing gate (single swing): $500 to $3,000+ Swing gate (bi-fold swing): $1,000 to $5,000+ Sliding gate: $1,000 to $5,000+ Lift gate: $500 to $4,000+
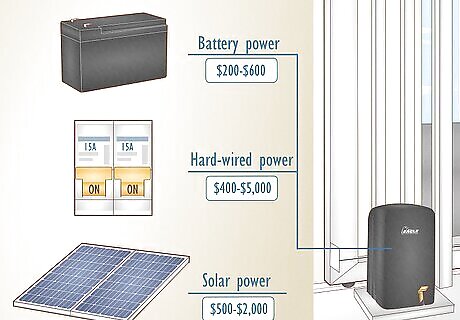
Power source Motorized gates typically use one of 3 power sources: battery power (often used as a complementary or backup power source), hard-wired power (a common power source good for medium- or heavy-duty gates), or solar power (a common source good for light-duty gates). Battery power: $200 to $600 Hard-wired power: $400 to $5,000 Solar power: $500 to $2,000+ Note that batteries need to be replaced every few years and can cost $20 to $85 each. Will you see a big increase in your power bill? Fortunately, no! Motorized gates are relatively low-maintenance and may only add $1 to $5 to your monthly utility bill.
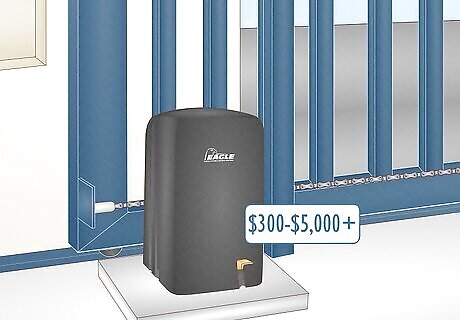
Opener cost The motorized opener that controls the gate is a separate expense from the gate itself. Most openers will add $300 to $5,000+ (before installation) to your cost, depending on the gate’s opening style, power source, and weight (for example, a heavy, solar-powered gate would fall somewhere in the high end of the range). Opener cost: $300 to $5,000+ Looking for affordable opener options? The Eagle-1000 FR sliding gate opener can handle any residential gate for only $1,699!
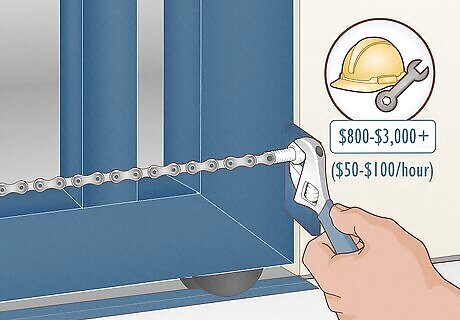
Labor cost Labor for automatic gate installation can run from $800 to $3,000+, depending on the scope of the project and how long it takes to complete (most professionals charge $50 to $100 per hour). Heavy and/or large gates with added features cost more than lighter, simpler gates, with double swinging or sliding panels being the most complex (and therefore expensive) to install. Labor cost: $800 to $3,000+ ($50 to $100 per hour) Can you install an automatic gate yourself? It’s possible if you’ve got some experience and the right tools, but it’s usually best if the pros do it. An incorrectly installed gate can be dangerous, drag or scrape along the ground, and could possibly void the manufacturer’s warranty. However, a DIY installation can save you money. Automated gate and opener kits cost $2,800 to $3,500 on average (minus tools and additional materials), meaning you can potentially save hundreds or even thousands of dollars.
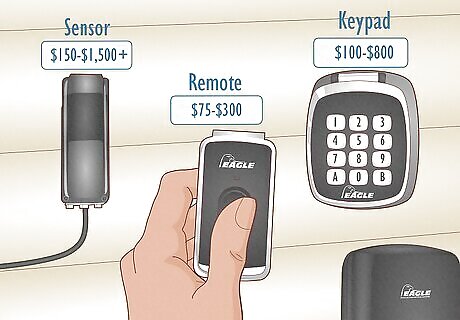
Popular add-ons Motorized gates are highly customizable! Depending on which extra bells and whistles you opt to add, your cost may go up by: Remote: $75 to $300 each (lets you open or close the gate from your house or car) Camera: $500 to $2,000 (allows you to see who is at the gate) Automatic closer: $200 to $600 (closes the gate after opening for security and convenience) Sensor: $150 to $1,500+ (detects motion and/or pressure changes) Keypad: $100 to $800 (requires a code to open the gate) Intercom: $500 to $4,500+ (lets you speak to the person at your gate)
Explore Gate Openers from Eagle Operators, LLC
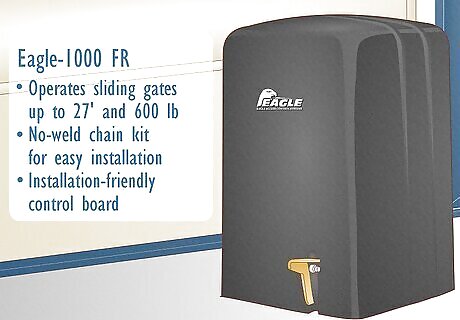
The Eagle-1000 FR sliding gate motor Designed for residential or light commercial use, the Eagle-1000 FR can operate sliding gates up to 27 feet (8.2 meters) long and 600 pounds (272 kilograms). It’s also very user-friendly! The operator is equipped with 20 feet (6.1 meters) of nickel-plated chain with a no-weld chain kit for easy installation, and the Eagle Diamond Control Board is the most installer-friendly control board in the industry, including features like open/close delay, motor brake, anti-tailgating, partial open, stop-reverse, and auto close timer. What’s included? Eagle-1000-FR Slide Gate Operator, 20-foot (6.1-meter) nickel-plated chain, wireless remote receivers, two EG642 transmitters, and the Eagle Monitor Photo Eye. 5-year limited warranty for residential use. Interested in installing the Eagle-1000 FR operator yourself? Continue on to the next section to learn how!
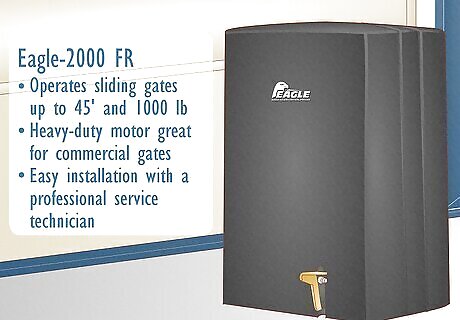
The Eagle-2000 FR sliding gate motor Looking for a heavy-duty motor for a commercial gate? The Eagle-2000 FR motor can handle sliding gates up to 45 feet (13.7 meters) long and 1,000 pounds (454 kilograms) smoothly and quietly. Designed for easy installation with a professional service technician, the operator features no-weld chain brackets and pre-wired receiver terminals. The motor comes with the Eagle Diamond Board—the most advanced and user-friendly control board on the market—and includes features like anti-tailgating, partial open, and auto close timers. What’s included? Eagle-2000 FR Motor Operator, two 10-foot (3-meter) nickel-plated chains, 2 wireless visor transmitters, 1 long-range receiver, and 1 reflective photo eye. Five-Year limited warranty. Need an even heavier-duty motor?* The Eagle-2000-FR-1HP has twice the horsepower of the Eagle-2000 FR and can operate sliding gates up to 45 feet (13.7 meters) long and 2,000 pounds (907.2 kilograms)!
Eagle-1000 FR Gate Opener Installation Overview
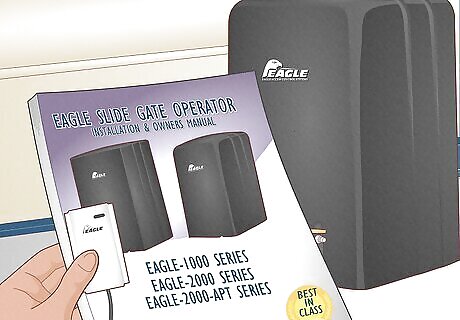
Installation manual and opener kit materials In most cases, it’s recommended to hire a professional to install automatic gate motors, but installer-friendly motors like the Eagle-1000 FR may be installed yourself if you have electrical and/or mechanical experience. Read on for an overview of the installation process to see if this is a DIY-able project for you. Read the Eagle Slide Gate Operator Installation and Owner’s Manual for detailed instructions, diagrams, safety requirements, and more. What’s in the box? Gate operator (pre-wired with EG650 receiver and a Wi-Fi receiver), 20 feet (6.1 meters) of #41 chain, chain bolt kit, safety photo-eye, 2 warning signs
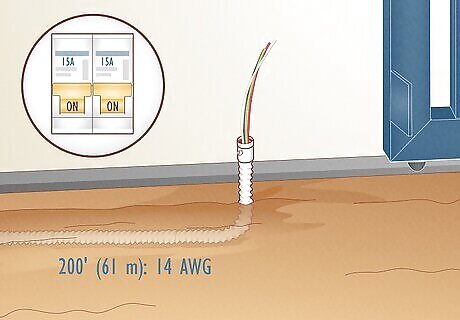
Electrical requirements Before installation, contact your local utility company to ensure it’s safe to dig near your gate. Disconnect all electrical power to the gate from the circuit breaker before beginning any installation, repair, or maintenance. Note that the operator must be connected to an earth grounding rod 36 inches (0.9 meters) away. All wiring must go to a dedicated circuit with the location of the power disconnect clearly visible and labeled. All connections must be made by a qualified individual according to local code. Dedicated fuse: 15A Wiring requirements: 200 feet (61 meters): 14 AWG 400 feet (122 meters): 12 AWG 650 feet (198 meters): 10 AWG 1,000 feet (305 meters): 8 AWG 2,000 feet (610 meters): 4 AWG
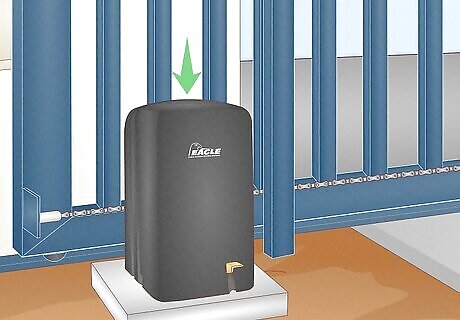
Positioning the gate operator For a front position (standard), place the operator directly next to the gate opening. The drive chain will be connected directly to the gate on both ends, and the operator will pull the gate side to side. For a rear position, place the operator at the rear of the gate’s opening (the end of the track where the gate stops in an open position). You’ll need an additional mounted idler pulley, like the Eagle Part NO. E651 Idler Pulley Assembly, when the operator is positioned in the rear (the chain will be routed differently, requiring an additional pulley to guide the chain while the motor pulls the gate from behind).
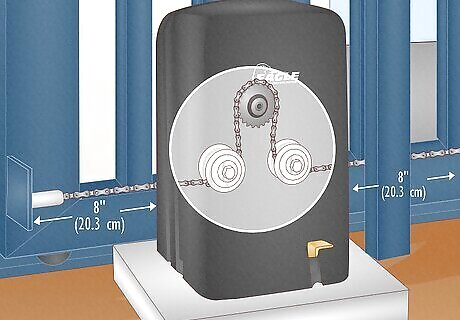
Mounting the gate operator Ensure both the motor operator and the drive chain are positioned exactly parallel to the gate to limit wear and tear. When the gate is fully open and fully closed, the chain should be level with the idler wheels inside the motor case for at least 8 inches (20.3 cm) in either direction.
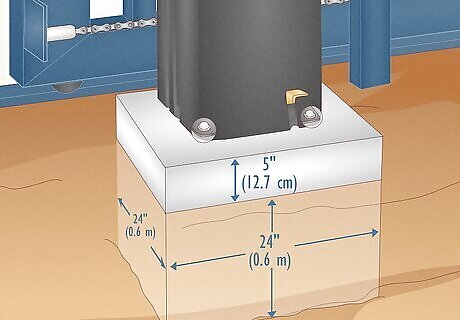
Preparing the concrete pad The operator will sit on top of a square concrete pad measuring at least 24 inches (0.6 meters) wide and 24 inches (0.6 meters) tall underground, with an additional 5 inches (12.7 cm) rising above ground. The minimum distance from the center of the gate to the edge of the operator chassis is 5⅛ inches (13 cm), and the minimum height of the gate chain from the bottom of the operator chassis is 5¼ inches (13.3 cm). Attach the operator to the pad with four ½” by 3½” wedge anchors. Consult local codes for actual requirements in your area. Your pad size may vary due to local building codes, site-specific issues, and the distance between the center of the gate and the gate operator. It’s recommended to have at least 2 inches (5 cm) of concrete on all sides of the gate operator cover.
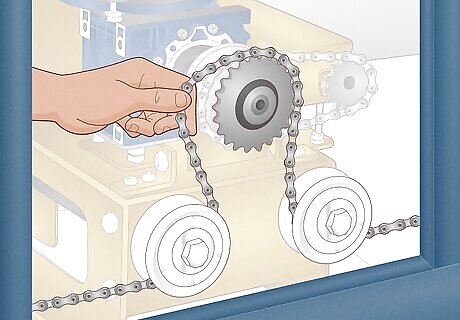
Connecting the chain For a front position operator, connect the gate chain to the front and rear of the gate using the supplied chain kit, threading the gate chain over the drive sprocket inside the motor. It’s optional but recommended to weld the chain connections to the gate. For a rear position operator: Connect both chain brackets to the rear of the gate (welding optional but recommended). Thread the chain over the drive sprocket inside the motor as well as over the extra idler wheel. How much slack can there be in the chain? When finished, there should be about ¾ inches (1.9 cm) of slack for every 10 feet (3 meters) of gate length.
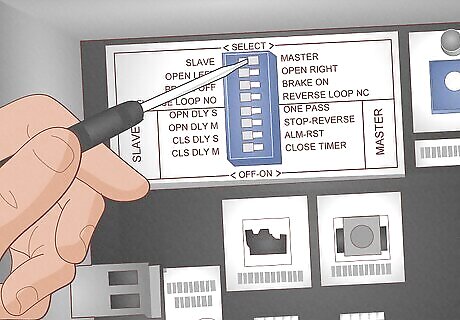
Setting up the operator The Eagle Diamond Control Board has 8 switches that allow you to customize your gate settings. Turn off the power when changing the switches and use a screwdriver to move between the Off and On positions: Switch 1 (Single or Dual Gate Systems): Turn to ON for single gate operation or if Primary Operator (Master) in M/S System. Switch 2 (Direction of Travel): Switch OFF to open left or ON to open right. Switch 3 (Motor Brake for Heavy Gates): Switch ON to make the motor instantly reverse, applying a braking action when the gate reaches the open or closed limit. Switch 4 (Selectable Reverse Loop): Switch ON to set the Reverse Loop input to a Normally Closed (NC) circuit. Switch 5 (One-Pass for Anti-Tailgating): Switch ON to make the gate begin closing (without reaching the opening limit) as soon as a vehicle passes through. Switch 6 (Stop-Reverse for Convenience): Switch ON to create a 3-button station for partial opening (1 click to open, 1 click to stop, 1 click to close). Switch 7 (Alarm Reset): Switch ON to make the operator reset after a 5-minute shutdown period (after which any input will be accepted). Switch 8 (Automatic Close Timer): Switch ON to activate the close timer. Adjust the time-to-close from 1-60 seconds.
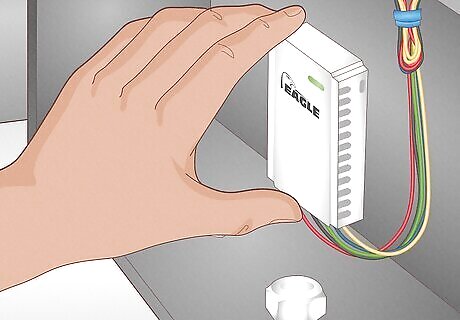
Connecting accessories Eagle Operators motors are compatible with all receivers and have a pre-wired terminal strip that can connect to 3-wire or 4-wire receivers. Install the receiver according to your product’s instructions. To install the photo-eye detector, connect it to the Reverse Loop Input. The Reverse Loop Input is selectable as NO (Normally Open) or NC (Normally Closed), depending on the sensor’s instructions.
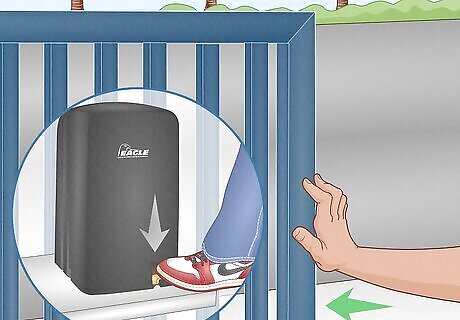
Opening the gate manually In the event of a power outage, depress the emergency foot pedal to disengage the operator motor from the gate. This allows you to push the gate open or closed manually.
Additional Costs & Considerations
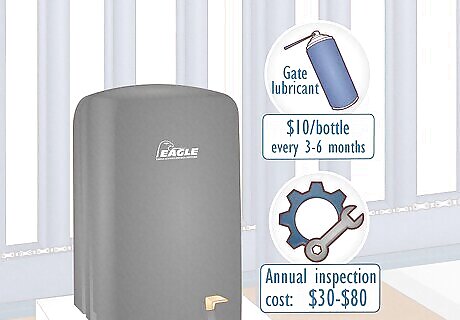
Maintenance costs Thankfully, motorized gates are fairly low-maintenance. It’s recommended to lubricate the gate every 6 months (or every 3 months if it’s used heavily), with the only associated expense being the cost of the lubricant (typically a white lithium grease or silicone-based lubricant, depending on your gate manufacturer’s instructions). It’s also recommended to have your gate inspected annually. The installation company may offer this service, but any electric gate installer can do this (typically for $30 to $80 per hour). Electric gate lubricant cost: Typically under $10 per bottle Annual inspection cost: $30 to $80 per hour You may also have to remove plant overgrowth, pest nests, or debris from the area around the gate as needed, too.
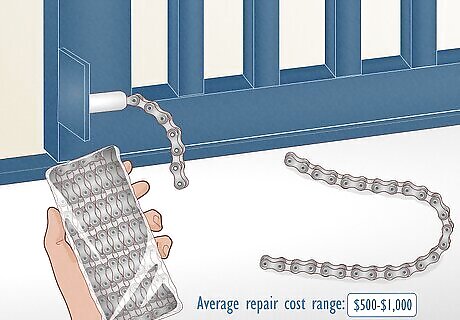
Repair costs Like all repairs, the ultimate cost depends on the extent or type of damage, with costs ranging anywhere from $25 to $4,000. An aluminum gate that gets dented will likely be on the lower end of this range, for example, while repairs involving wiring or expensive replacement parts could potentially cost thousands. Average repair cost range: $500 to $1,000 Repair cost full range: $25 to $4,000 (depending on the severity of damage)
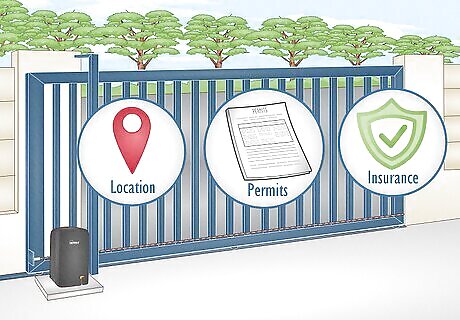
More considerations and potential costs Your specific needs and circumstances, from the climate where you live to the condition of your driveway, can impact the ultimate final cost of installing a motorized gate. Here are some common and important ideas to consider when you’re finalizing your project budget: Your location: Average installation costs can vary by region or city. Permits: In some areas, you may need a permit to install a driveway gate. These can cost $100 to $300. Insurance: Your home insurance rates may go down slightly with a gate since they help prevent robbery, and your insurance may cover part of the gate’s repairs (permitted work only). Wind resistance: Areas with lots of wind and/or storms require heavy-duty gates that can withstand potential damage, making them more expensive. Underground gate automation: An underground motor makes your gate look sleeker and protects the motor from the elements, but is more expensive to install. Gate lifespan: With proper maintenance, most automatic gates can last 10 to 15 years in good working condition before needing significant repairs or replacement. Driveway repairs: If your driveway needs resurfacing or sealing before you install a gate, you may have to pay $1 to $3 per square foot. Automatic bollards: If a full gate is too expensive, some opt for bollards that rise up and down to control traffic and entry. These can cost $800 to $1,500.
Pros & Cons of Installing an Electric Gate
Pros: Security, durability, and curb appeal. Automatic gates make your home more secure and private, and they look great from the street (especially if you live in a neighborhood where gated driveways are common). They can also potentially increase the value of your home and reduce your insurance premiums. Plus, electric gates are convenient and durable, making them a helpful addition to your home.
Cons: Expensive installation, risk of malfunction, potential safety risks. Of course, electric gates have a high upfront cost that can be a big financial undertaking, and they require more maintenance than a manual gate (they’re also slower to open and close). Plus, there’s the risk of malfunction if the motor breaks down or you lose power and don’t have a backup battery power source. There is also a minor safety concern with automatic gates. People or objects can get injured if they’re caught in the gate and there’s no working sensor to stop it from opening or closing. And, if you’re doing DIY repairs, there’s a small risk of electric shock.
Frequently Asked Questions
Can electric gates be opened manually? Yes. All electric gates (and garage doors) must have at least 2 devices installed to let law enforcement and emergency personnel bypass the motorized entry under the UL 325 Standard for Safety. These are often included in installation. These devices allow others to reverse or open the gate manually in the event of a power outage or a person being trapped under or inside the gate. Alternatively, you can install your own access system for $25 to $500.
How much electricity does a gate motor use? Most gates only use 100 watts a day (on average) when they aren’t being opened or closed. When the gate operates, the wattage increases to about 700 watts for up to a minute. Ultimately, this only costs pennies per day in most areas.
How do you increase the gate’s remote control range? First, change the batteries to ensure the remote is running on full power. If the range still seems small, there may be branches or lights interfering with the signal (even dirt on the remote or signal receiver can cause interference). If these fixes don’t work, you may need to install a range extender.
Does an electric gate increase your home value? Yes. A high-quality electric driveway gate increases your home’s value by enhancing its curb appeal, accessibility, and safety. The return on investment (ROI) is fairly high at around 50%. For example, if you spent $6,000 on installation, you could expect to recoup around $3,000 over the lifetime of the gate.


Comments
0 comment