
If you’re wondering how to sew an invisible zipper, check out our article here!
Sewing a Basic Zipper
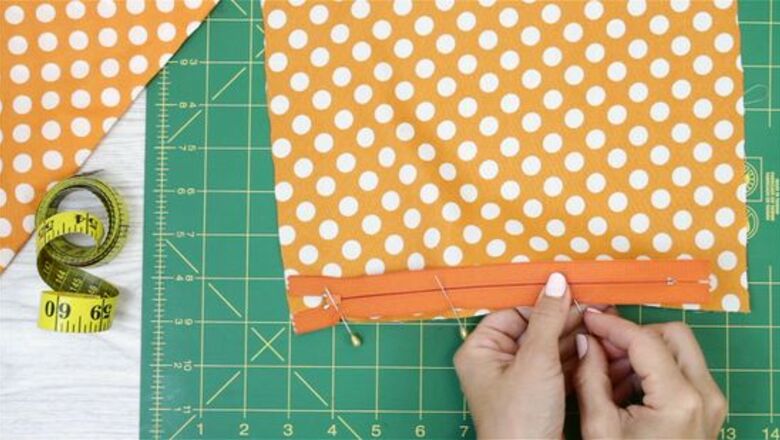
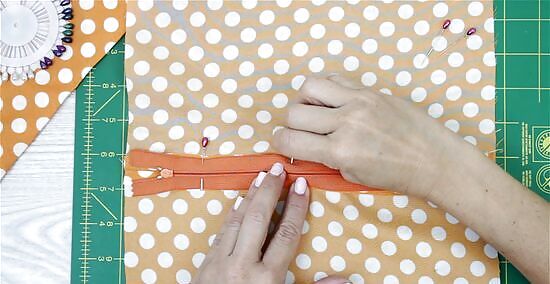
Pin one side of the zipper face-down to the edge of a fabric piece. Lay the piece of fabric down flat so the good side with the full-color pattern is face-up. Place the zipper face-down on the fabric so the right edge aligns with the fabric. Stick pins through the zipper and fabric every few inches to hold it in place. Use a zipper that’s the same length as the fabric’s edge if possible. If you can’t find a zipper that’s the perfect length, get one that’s slightly longer than what you need. Move the zipper pull halfway down the teeth before you start so you don’t bump it with your needle when you start sewing.
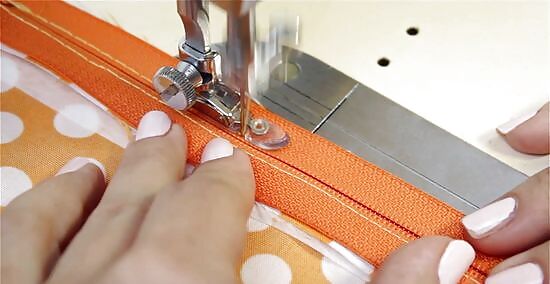
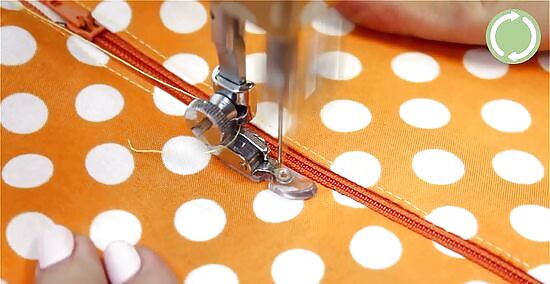
Stitch alongside the zipper teeth with a sewing machine with a zipper foot. Disconnect the presser foot (the square metal piece at the bottom of the needle) from the sewing machine and clip on the zipper foot. Start the needle at the top of the zipper fabric so it’s about ⁄8 in (1.6 cm) from the edge. Use your sewing machine by pressing on the pedal and adding a few basic straight stitches. Backstitch back to the start to secure the thread, and then slowly work down the length of the zipper. A zipper foot slides from left to right and lets you stitch closer to the teeth without the sewing machine getting stuck or caught. If the zipper pull gets in the way while you’re working, lower the needle and carefully move the pull out of the needle’s way. As you sew down the length of the zipper, pull out the pins before the foot crosses over them.
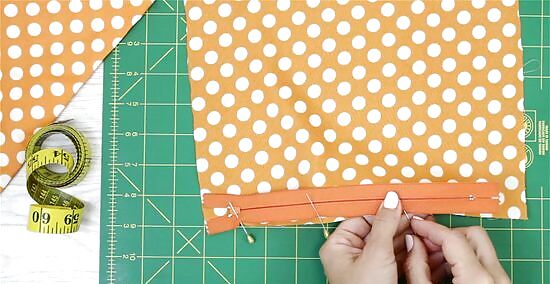
Pin the other side of the zipper to the second piece of fabric. Lay the second piece of fabric face-up on a flat surface. Lay the unsewn side of the zipper face-down along the right edge of the second fabric piece, just like how you did with the first one. Secure the zipper with pins so it doesn’t shift while you’re sewing.
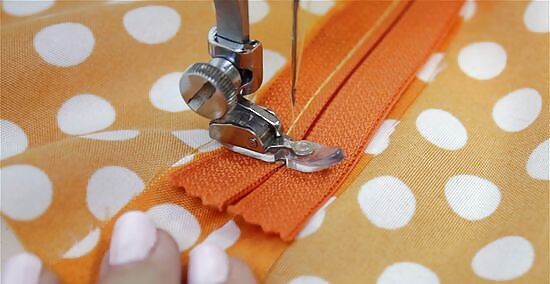
Sew along the length of the zipper’s fabric to attach the pieces. Start from the bottom of the zipper and use a basic straight stitch to start sewing. After going about ⁄2 inch (1.3 cm), backstitch to where you started so the threads stay in place. Then, sew up to the top of the zipper and snip the thread with some scissors when you’re finished. Place your stitches the same distance from the edge as you did on the other side of the zipper so they look uniform. When you finish, small portions of the zipper’s sides and the entire zipper will be visible between the pieces of fabric.
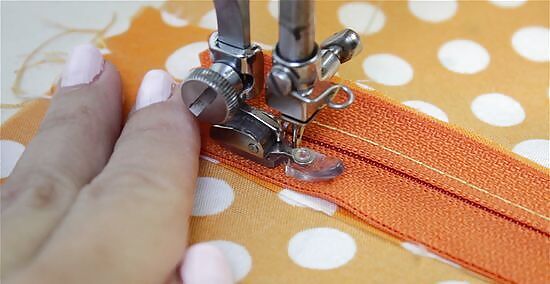
Topstitch the zipper to finish sewing the zipper. The stitches holding the zipper in place aren’t visible from the front, and topstitching gives your piece a more finished look. Turn the zipper and fabric over so they’re face-up. Topstitch a line of thread about ⁄4–⁄2 inch (0.64–1.27 cm) away from each side of the zipper to add the finishing touches. Use thread that’s a complementary or accent color for the fabric for extra embellishment.
Sewing a Concealed Zipper
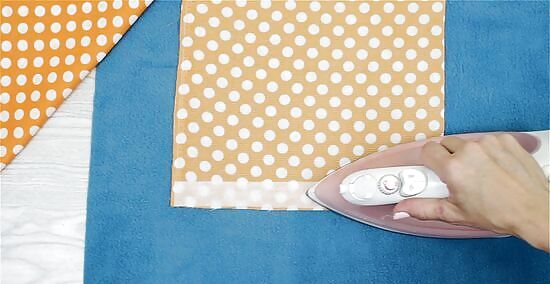
Baste-stitch the fabric pieces together where you want the zipper seam. Lay one piece of fabric so the good side with the brightest colors is face-up. Set the second piece of fabric on top of the first one with its good side face-down. Change your sewing machine to the baste stitch setting. Measure about ⁄8 inch (1.6 cm) in from the edge where you want to attach the zipper and put in a straight baste stitch along the fabric’s length. Basting stitches are temporary and are just meant to hold fabric pieces in place while you put in the permanent stitches. After you sew the seam, flatten out the flaps (or allowances) by pressing them with an iron on low heat. That way, it’ll be easier to make more accurate stitches.
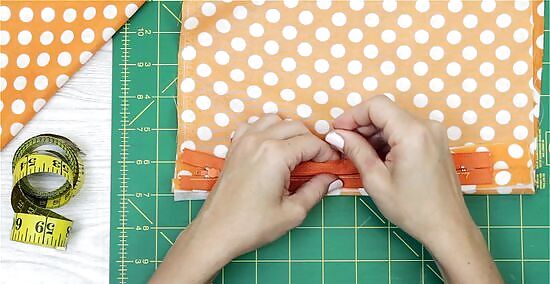
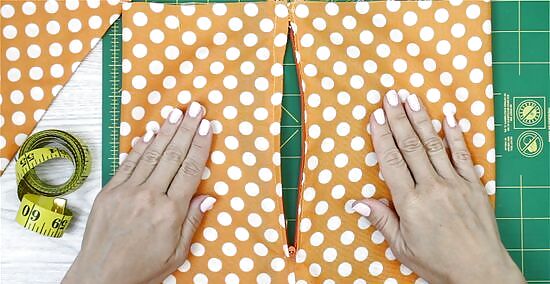
Pin or tape your zipper face-down along the seam. Make sure the zipper is completely closed so the pull tab is at the top. Lay the zipper face-down so the teeth are centered on the baste stitch and so the top and bottom edges align with the fabric. Stick pins or strips of fabric tape every few inches along the zipper’s length to hold it tightly in place. If any excess zipper hangs over the edges, just cut it shorter along the bottom of the seam and remove the stop. When you sew the zipper, just whip-stitch the bottom to prevent the pull tab from falling off.
Stitch along the length of the zipper fabric from top to bottom. Set your sewing machine to a basic straight stitch and put a zipper foot onto your machine as well so it’s easier to maneuver the needle. Start the straight stitch at the top of the zipper fabric on the left side so the needle is about ⁄8 inch (1.6 cm) away. Sew down the entire length of the fabric until you reach the stop at the end of the zipper. Use a thread that complements or accents the fabric because it will be visible when you’re finished.
Turn the fabric and sew a short seam at the bottom of the zipper stop. While the needle is still down, carefully rotate the fabric clockwise by 90 degrees so the stitch you just made runs from side to side. Continue making a short straight stitch just below the zipper’s stop until the needle is on the other side of the zipper.
Finish stitching up the opposite side of the zipper fabric. Turn the fabric clockwise by 90 degrees again so the top of the zipper is closest to you. Continue sewing the loose edge of the zipper until you reach the top again. Backstitch the last section before snipping the thread with a pair of scissors. Make sure all of your seams are the same distance from the zipper to ensure they look uniform.
Remove the basting stitch with a seam ripper. Flip the pieces of fabric over to reveal the seam left from the basting stitch. Slowly move the blade of the seam ripper through the middle of the seam to break the threads and expose the teeth of your zipper underneath. Then, just pull the excess thread out and you’re finished. Work slowly so you don’t accidentally snag any permanent threads on your zipper.
Prep and Troubleshooting Tips

Preshrink the zipper if you’re using stretch fabric. If you plan on adding a zipper to natural fabrics that are stretchy, like cotton, place it under hot tap water for a few minutes and let it air-dry before sewing it. That way, the zipper won’t shrink or break the seams the next time you wash the fabric. Many zippers are already pre-shrunk, so check the packaging to see if you need to.
Add interfacing along the seam to add support for thinner fabrics. Interfacing is a type of thin fabric that makes lightweight fabrics stronger and stiffer so they’re able to handle the zipper being opened and closed repeatedly. Cut the strips into the length of the zipper and the width of your seam allowances. Place the thin strips of interfacing on the duller side of the fabric right next to the seam. Iron over the fabric and interfacing with low heat to make them stick together.

Press the zipper fabric flat with an iron if it’s curled. If the fabric on the sides of your zipper is a little warped, it’s more difficult to sew them down correctly. Set your zipper face-down and lay a press cloth over it. Turn your iron onto low heat and gently move it back and forth over the zipper until the fabric lays flat. Be careful ironing zippers made from plastic because they’re more susceptible to melting. Keep the iron moving at all times so the zipper doesn’t get too warm.


Comments
0 comment